Hi, Habr! Today we have the final article in a series on developing a game with programming without writing code. By the way, all this is based on the platform Clickteam Fusion 2.5. Consider a real project to create a platformer and tell you about the publication in the Microsoft Store. Look under the cat!
 I give the word to the author.
We continue to develop
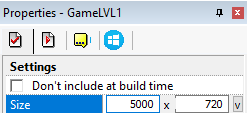
11. Now you can start doing the most "tasty" part of the development - the game itself. Go to the frame with the first level of the game and increase the width of our frame through Properties to 5000

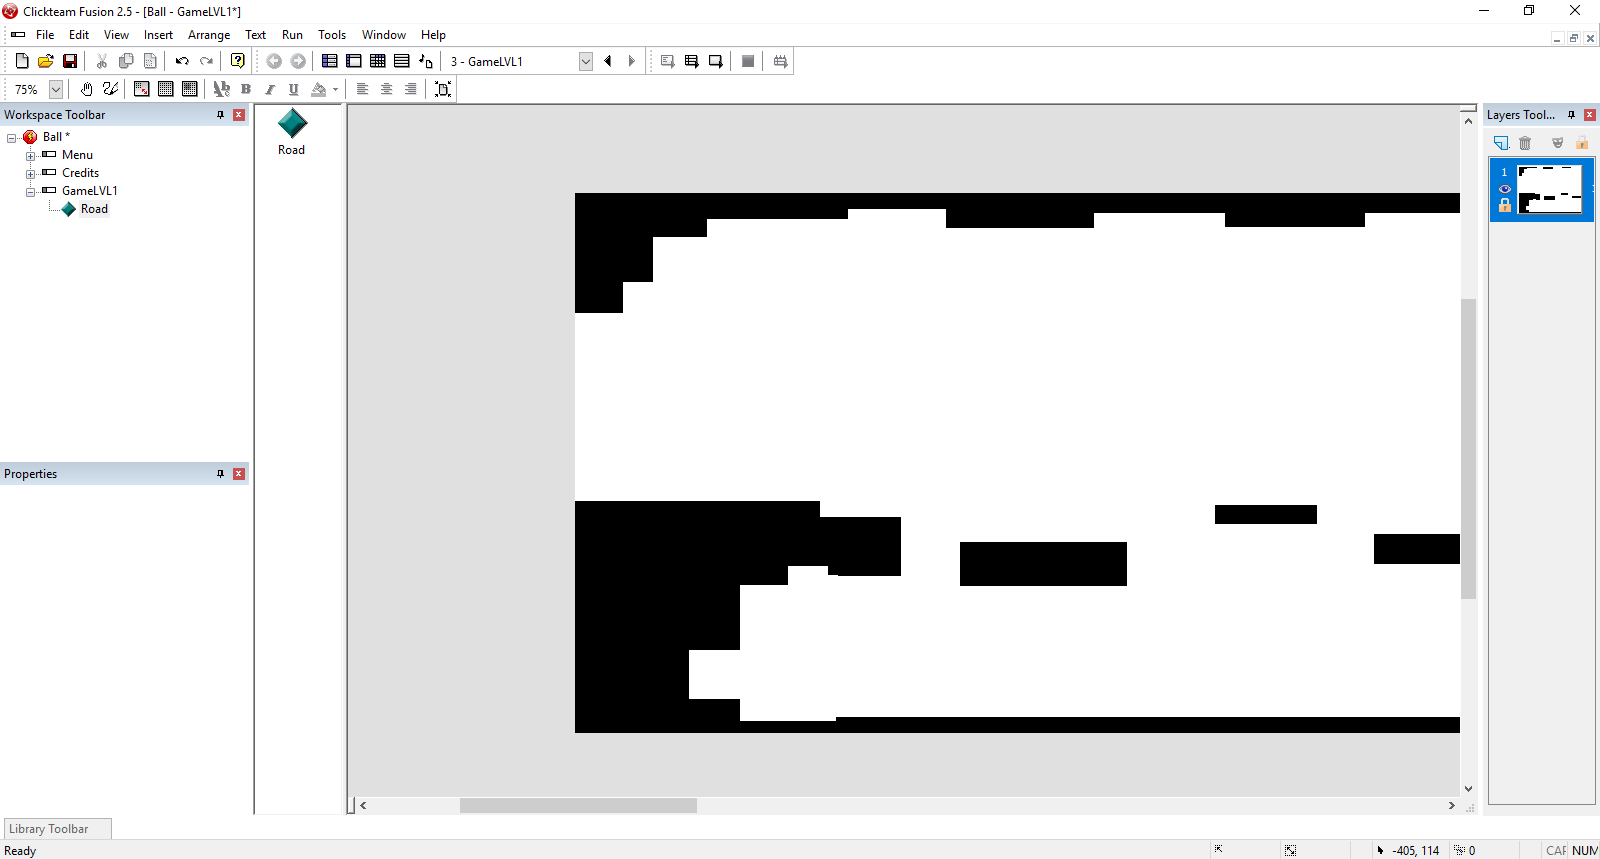
12. Add platforms to our stage, along which the character will move. For this we need the Active object again.

The principle does not change - we draw the sprite (s) and load it into the asset (s) (depending on how you use them. Remember, the main thing is to use objects rationally for optimization)
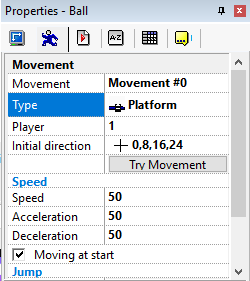
13. It's time to add a character! Add another active object to the same layer, then select it and go to the Properties window (Movement tab).
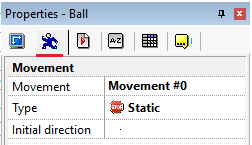
And in the Type item, select the Platform
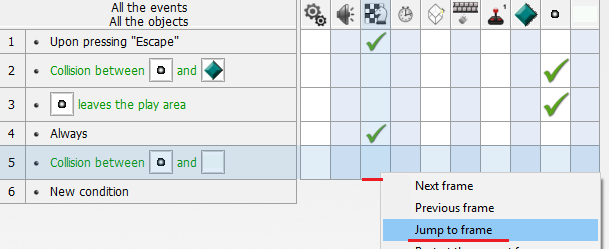
Then go to the Event Editor

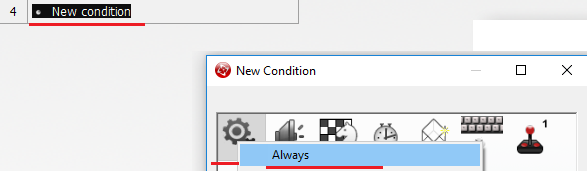
And we create an event that says: “If a character collides with a road, then it stops.”
To do this, click New condition - choose our character - PKM - Collisions - Another object

After that, select the object responsible for the road along which the character will move
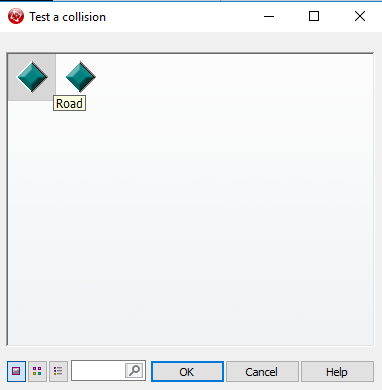
And in the column of our character (not to be confused with the road) we press the RMB - Movement - Stop

What did it give us? The character will not fall "underground" and will be able to safely move around the object.
For clarity
Option with just created event:

Option without this event:

Now you can do character animation. In the present case, the role of the character will be a creature resembling a ball (I’m an artist ... it’s a feature ...). To do this, go to the object editing window.
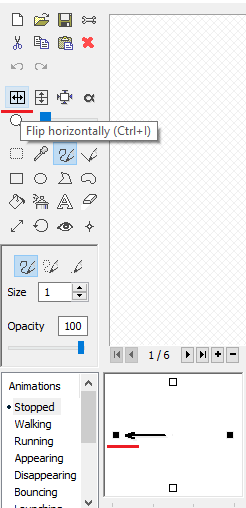
Please note - now we will work with the bottom of this window, since it is in it that the parameters for creating animation are located. As you can see in the illustration below, we have 4 main windows - Animations, a window with an arrow, Direction Options and Frames
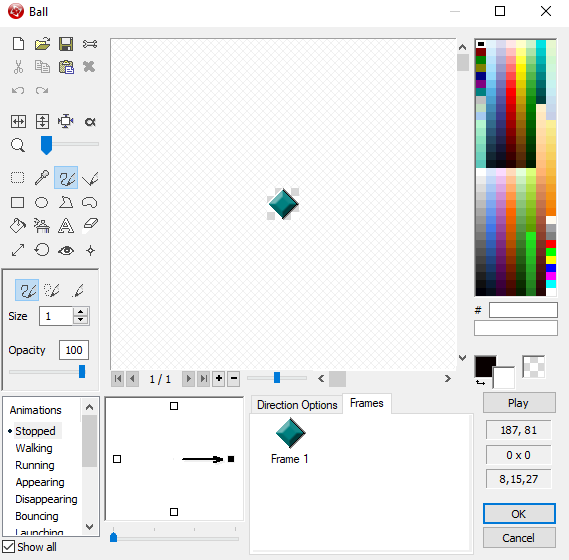
Let's look at them briefly.
Animations - is responsible for the animation when a certain condition is met (that is, how the animation will look when the object is standing, walking, running, jumping, etc.).
The window with the arrow is responsible for which animation will play when a certain direction is selected (that is, when the player presses the right arrow on the keyboard, the character turns and looks right. When the left is left, etc.).
Direction Options - is responsible for the playback speed and repeat animation.
Frames - frames of our animation.
So, going back to work - first we set up the animation when the character is standing (in the Animations window, the Stopped item). To do this, load our first frame on the first frame of the animation, then add the second frame of the animation and load the second

After loading the frames, go to Direction Options and set the playback speed and repeat animation. There is already individually. To check how the animation will look like - click Play.
Then we switch to the opposite side (click on the left square) and transfer all our frames, turning them through Flip horizontally
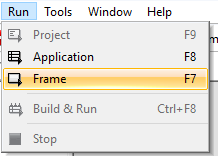
Fine. Now you can check

Noticed that the animation is playing when the character is moving (and this despite the fact that our frames were displayed in the Stopped paragraph)? To prevent this from happening, go to the Walking point and place frames of motion animation in it.
Result:

If you wish, you can still play with the animation. Adjust animation when jumping, falling, etc.
Continuing to customize the character, I suggest to make him a normal jump. To do this, select the character's object again and go to Properties (Movement tab), setting Gravity to 35

Result:

And now we will limit the movement of the character to the edges of the frame so that it does not fly out of the scene:


And now add scrolling so that the camera follows the character. Again in the event editor.

After that, the window “Center window position in frame” will open, and you will need to select our character. Click "OK".

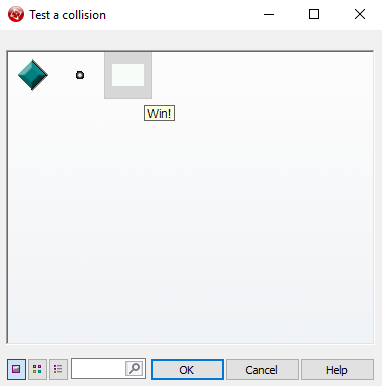
14. With the character finished. Now create a victory condition. For example: if a player reaches the finish line, he will be thrown onto a frame with the inscription “You win!”.
To do this, first create the frame “Win” and on the frame with the level one more active object (place it at the end of the scene) and style it. It will serve as a trigger, which will be thrown onto the winning frame. You can stylize at your discretion. Since I have a white background, then I just repainted the object in white and stretched

And create an event in which the frame will be changed.

On the actual frame (“Win”) we will place a large “You win!” Sign and add a transition event to the menu by pressing Esc.
15. We continue to refine our first level. Add diversity. Moving platforms Again, we need an active object, as well as a sprite for the platform itself.
After adding them, go to Properties (Movement tab) and in the Type item select Path.
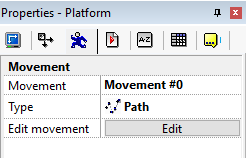
Click Edit and set up the platform path.

Result:
You can also add obstacles in the same way. Here is an example of the simplest obstacle in the collision with which the frame restarts:
16. At the end of the game creation we will make the game full screen. To do this, go to the event editor of the first frame and create an event that will perform this


Fine. Now we can say our little game is complete. I repeat - this is just an example that should introduce mechanics. Let's go to the time of publication.
Building and Publishing for Microsoft Store
1. First of all at this stage it is necessary to set the project properties. To do this, go to the Properties window of the application itself (not a separate frame) and, if necessary, fill it with icons, etc. Especially to paint the properties window makes no sense - everything is very clear.
Upon completion, you can proceed to build the project. File - Build - Application.

A window appears in which you must specify (if you did not specify this before) the name and path of the project
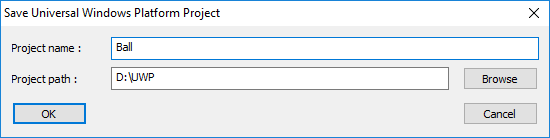
Click "OK" and go to our folder

Inside there will be something like this:

We are interested in the file with the .sln extension (also known as Microsoft Visual Studio Solution). Open it in Visual Studio.
In the solution browser, first of all, find the manifest file and fill it in (paint the file name)

Then we reproduce the following procedure: PCM on (in my case) Ball (Universal Windows) -> Store -> Create application packages:

Then the following window should appear:

It is necessary to leave everything as it is (i.e. click on “Yes”) and move on by clicking “Next”.
After that, you will be prompted to select or reserve the name of the application. If it is already reserved for you, then select it and click "Next", if not, just enter the name in the appropriate window and click "Reserve":

After that, the list will automatically be updated, and you will see the name of your application there, by selecting which, you can proceed further.
Next is the choice of settings. Assembly may take some time, so do not worry and wait. By default, the architecture will be Neutral. Change it to x86, x64 and ARM.

Please note - the configuration is worth Release, not Master. I mark this point separately, so that there is no confusion when comparing with my previous article, where the method of publishing to the Microsoft Store games made on Unity was considered, since in the case of Unity, the Master is put.
Next you need to make a choice. Either run a set of certification and find out whether the game will pass in the Microsoft Store. Or try to send it immediately to the Microsoft Store. But the choice here is relative, because if the game cannot be certified, then it will not be allowed to be published. The difference is only in time. You can either spend a few minutes for certification, or up to three days (this is how long the product publishing process takes with all the checks).
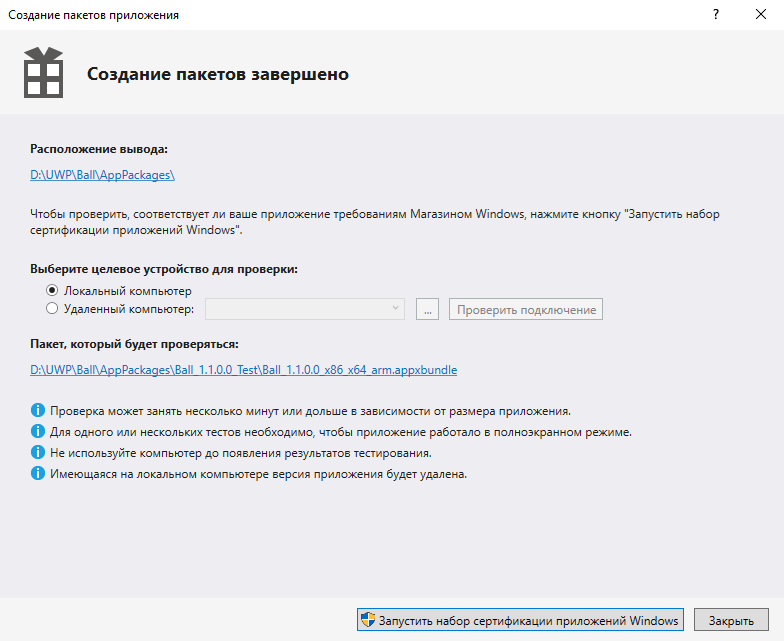
After running the certification set, after a couple of seconds the following window will appear:
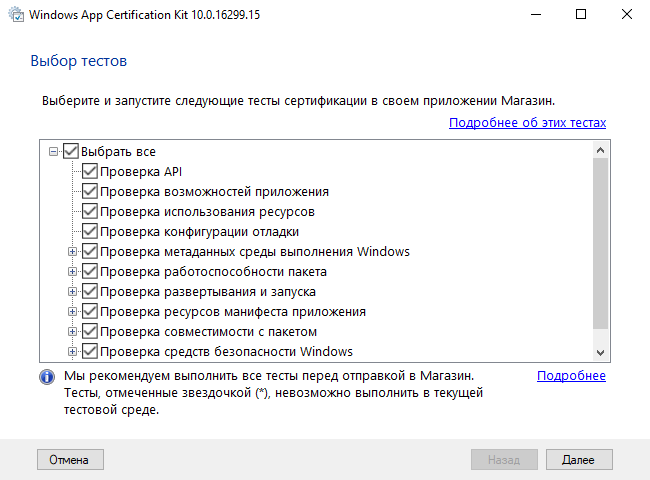
Click "Next", after which the certification process will begin. As soon as the check is completed, the result will be summarized. If everything goes well, then there will be a beautiful green inscription "Passed":
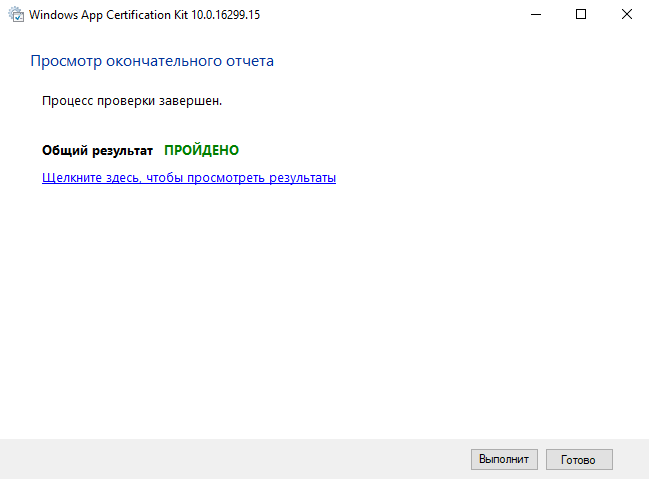
If you see “Not passed”, then do not worry - it happens. Just click “Click here to view the results”, and find the points with which you have difficulty, then either solve the problems yourself, or use the help in the thematic communities.

2. When the certification set completes the verification, go to the APPXUPLOAD file.

Further steps have already been described in
this article. For full information on publishing in the Microsoft Store, please contact her.
about the author
 Lev Bulanov
 is a student at Tchaikovsky Industrial College and Udmurt State University, Microsoft Student Partner, C # developer, CF2.5 developer, Unity developer, computer operator (5th grade). The main area of interest is the development of mini-games, utilities and MR-projects.