Part 2. We continue to create smart home
In this part, we install the Z-Wave controller into the “Smart Home” system, define it and get acquainted with * Nix operating systems and work in the terminal (the PuTTY program), I will explain my actions a little.
Let me remind my requirements for "smart home" (UD):
- The place is an apartment, where alteration (a significant alteration of something is not planned).
- The ability to integrate all solutions into a single open source data management system.
- The possibility of a gradual expansion (scaling) of the functional.
- If possible, the minimum cost.
- If possible, purchase elements of the system in the Republic of Belarus or in the Russian Federation, without any orders from foreign sites. Came, looked, bought.
- If possible, the Russian-language interface, documentation, support.
In the first part, we have already created a bootable memory card, configured and learned the IP address of the Raspberry board, learned a little about working with the PuTTY program and connecting via an SSH connection.
Now we are doing the following steps: let's expand the space on the memory card, install the RaZberry controller in the system, take a quick look at the Z-Wave and MajorDoMo / control panel interface
→
First part ": Just about the complex. Start creating a wireless" smart home ". Based on Linux technology, Z-Wave and MajorDoMo software"We install our Razzbery controller with power off. Turn on our small computer and connect to it using PuTTY. The power supply is recommended to use on 2A., But I used 1.5 A.
Small tips
If you work in the Windows operating system, and you don’t often work with * nix, then the following tips may help you:
You can completely not type commands, copy the command to the clipboard and right-click in the PuTTY window, paste it into the line with the cursor.
The last commands can be searched using the ↑, ↓ keys.
Supplementing with the [Tab] key - if you enter the first few letters of the file name, command or path and then press the [Tab] key, bash will show the rest of the file name or path.
When working with PuTTY, if you accidentally forgot to set the correct settings, encoding, you have a problem with the display of characters, you can not close the window, just right-click on the top panel of the program and call the context menu of the program. Next, select the item: Change Settings ...

Also, when the connection is lost (restarting the remote PC), the Restart Session item appears in the context menu.
Expansion of free space on the memory card
First of all, I expanded my memory card. When you install it, the disk image is copied, and the memory, regardless of the capacity of your card, is 16 GB. If you have a memory card of 16 GB installed, you can skip this step.
In general, with such an operation, I recommend keeping the backup image, but since we only have a bare system there and we haven’t done anything yet, I don’t see the point.
Enter the command:
df –h

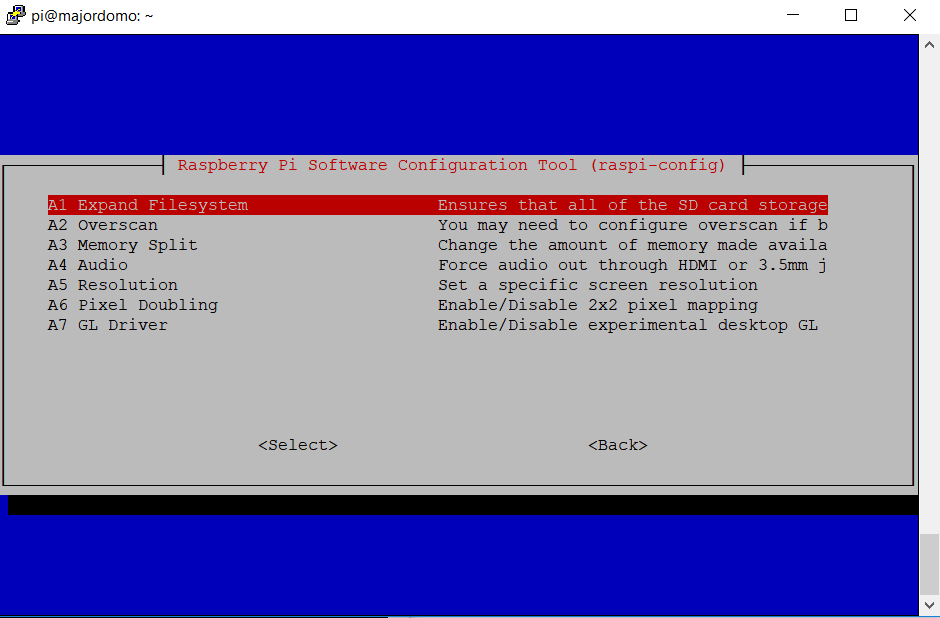
Run Raspberry Configuration Utility
sudo raspi-config
Select item 7 “Advanced Options”, then point A1 “Expand Filesystem”:
After executing the command, restart Raspberry, having connected to it in a new way, repeat the command:
df-h
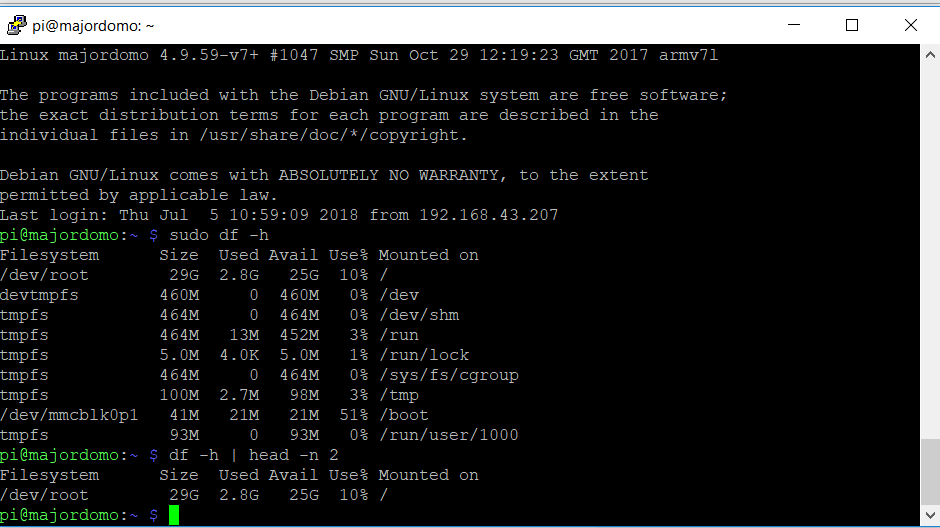
As you can see, the space on the memory card has increased.
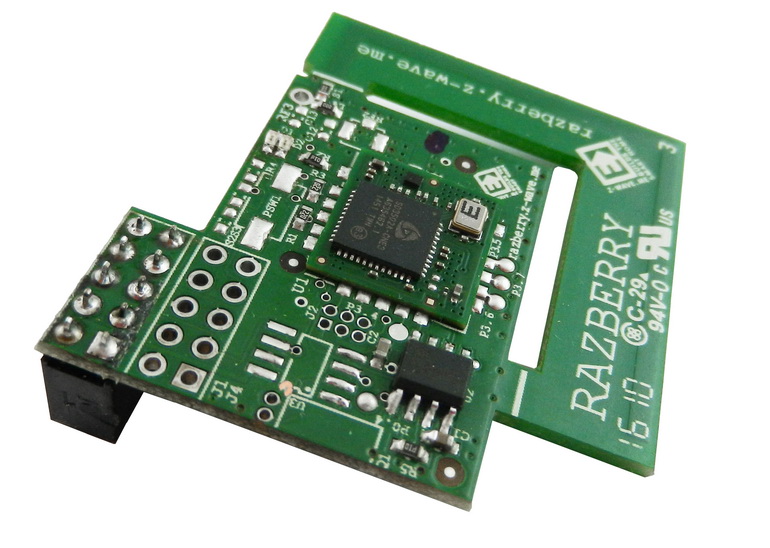
Installing a RaZberry controller:
With the RaZberry controller a small instruction was supplied in English and German.
The Russian version can be read here:
→
Russian version of the manual for RaZberry→
Complete English manual.The Russian version of the manual is short (and in terms of installation, it corresponds to the full manual), so I will give it in full:
- Download the Raspbian wheezy image from the official site of the Raspberry Pi project (use the regular Raspbian wheezy, not the Soft-Float version).
- Write the image to the SD card (this procedure is described in detail on the Raspbian download site).
- Connect your RaZberry expansion card to your Raspberry Pi computer as shown in the image below. Attention! Never connect the RaZberry to a running Raspberry Pi - always turn off the power before installing the expansion card!
- Insert SD card into Raspberry Pi
- Boot and connect to Raspberry Pi via SSH or via screen and keyboard
- Open a terminal and run the following command:
wget -q -O - http://razberry.z-wave.me/install | sudo bash - After successful installation, open the browser page
http://IP_OF_YOUR_RASPBERRY:8083 - Z-Way for Razberry successfully installed!
We have already completed point 1-5 in the first part, but then I have problems:
I will give my procedure:
Run the command
wget -q -O - http://razberry.z-wave.me/install | sudo bash
We agree with the license agreement, we are installing and downloading files.
We see the launch of the mongoose service and there is a proposal to receive news from the Z-wave project.
We agree, enter your e-mail in the end:

It seems to be all set up and run.
Perform the penultimate item by typing in the browser page
http:
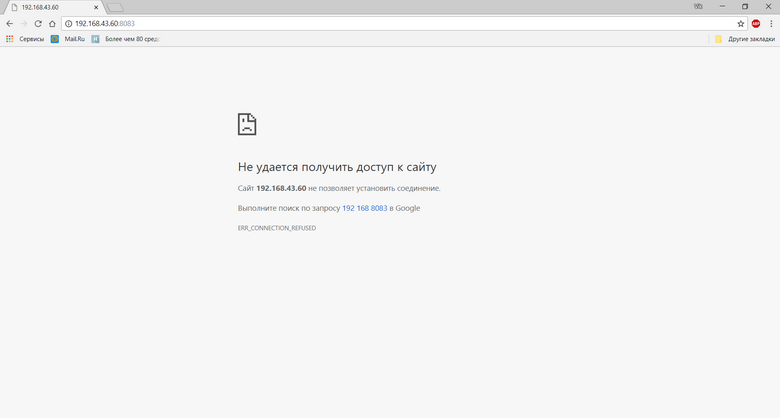
It was here that I didn’t manage to open the page at all, as I didn’t try, without additional actions, z-wave does not start.
We can see the running processes by running the command:
pstree
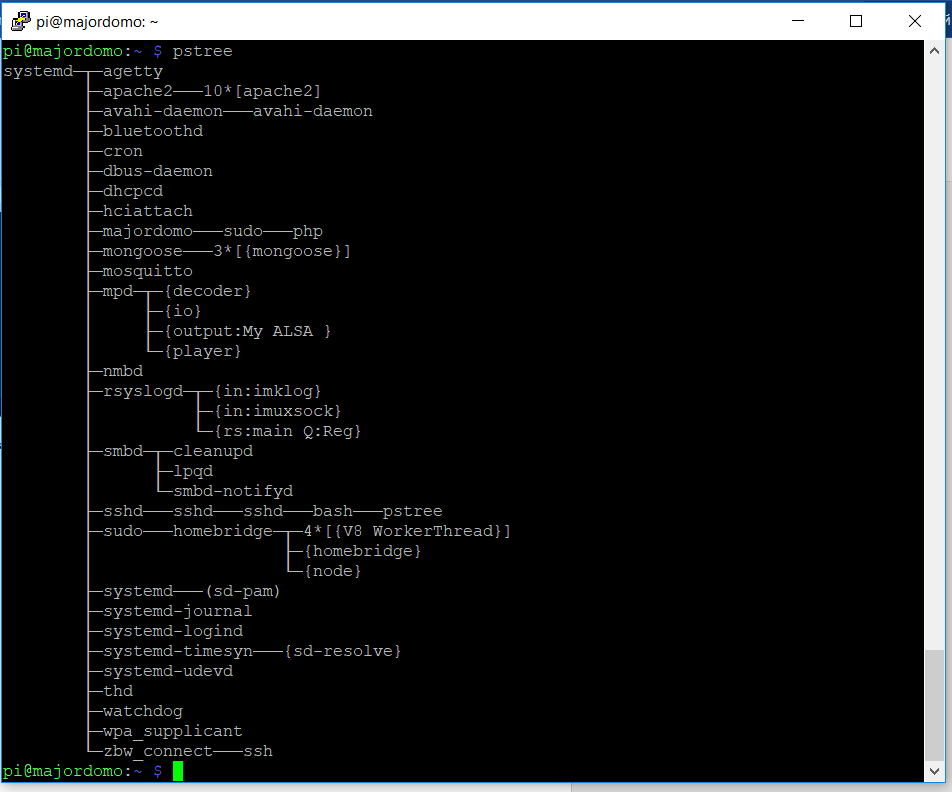
Thanks to the MajorDoMo forum (I also saw a solution on some other, not Russian-speaking) I found a solution to the problem:
It is necessary to delete everything from the folder: / opt "z-way-server". Then execute the commands:
wget -q -O - support.zwave.eu/libs | sudo bash wget -q -O - http://razberry.z-wave.me/install | sudo bash wget -q -O - support.zwave.eu/libs | sudo bash
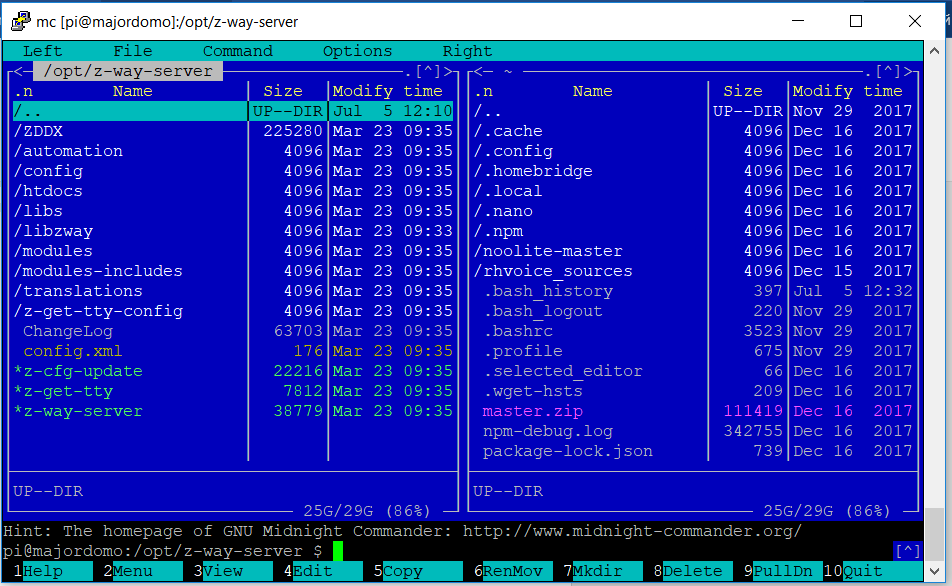
In order not to type the commands for deleting files by hand, I'm used to using the file manager Midnight Commander or the abbreviation MC.
→
Midnight Commander Wiki DescriptionI have already been installed in the image (but if something suddenly changes, then for installation we execute the command):
sudo apt-get install mc
Run it from the administrator and find ourselves in the home folder of our mini PC
sudo mc
Go to the directory: / opt / z-way-server / Delete the contents by selecting insert and pressing F8.
I did not delete the folder itself. To exit, press F10 "exit from commander". Functional key assignment tips - at the bottom of the program window, highlighted in green.
Then we execute these three commands in turn:
wget -q -O - support.zwave.eu/libs | sudo bash wget -q -O - http://razberry.z-wave.me/install | sudo bash wget -q -O - support.zwave.eu/libs | sudo bash
Reboot Raspberry:
Sudo reboot
Restart the PuTTY session (as you remember, right click of the mouse, when the connection is broken, restart sesshion appears).
Having executed the pstree command again, we can see the Z-Way service started.
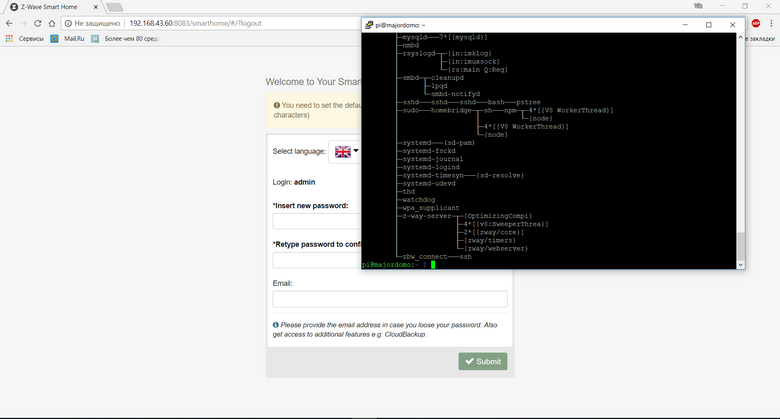
Typing in the browser
http://IP_OF_YOUR_RASPBERRY:8083 get to the initial settings page. You must set your password, your username will be admin, Administrator access rights. We can also change the language, from English to Russian by default, this can be done on our settings page.
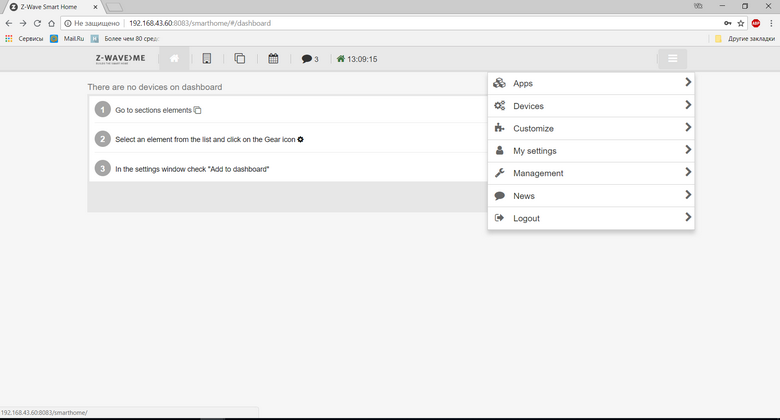
After typing
IP_OF_YOUR_RASPBERRY : 8083 / expert, we switch to expert mode. Going to the tab Device - Interview we can see the status of our controller.
http://IP_OF_YOUR_RASPBERRY:8083/expert/#/configuration/interview/1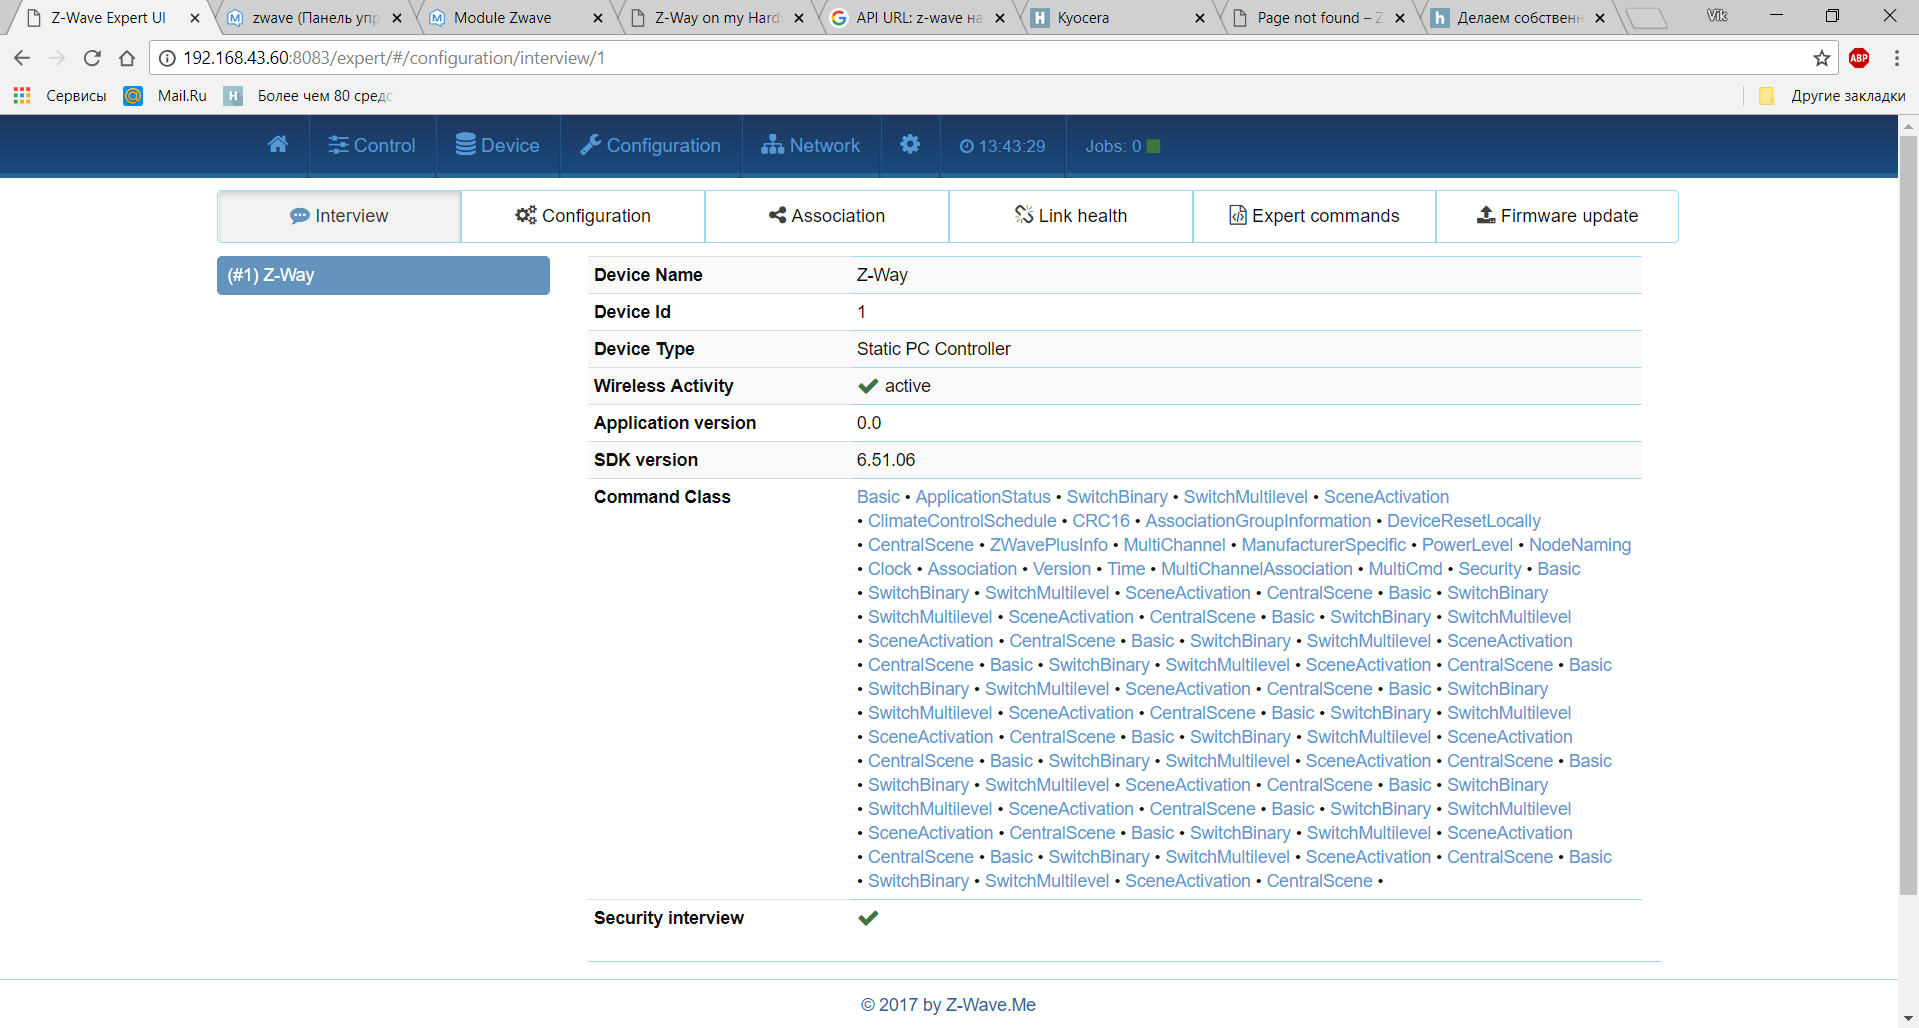
If you build “Smart Home” (apartment automation) only on Z-Wave technology, then perhaps this is enough, if you use several technologies and plan the expansion of the system, then in my opinion, this is not enough.
Therefore, we will install another Z-Wave module in MajorDoMo:
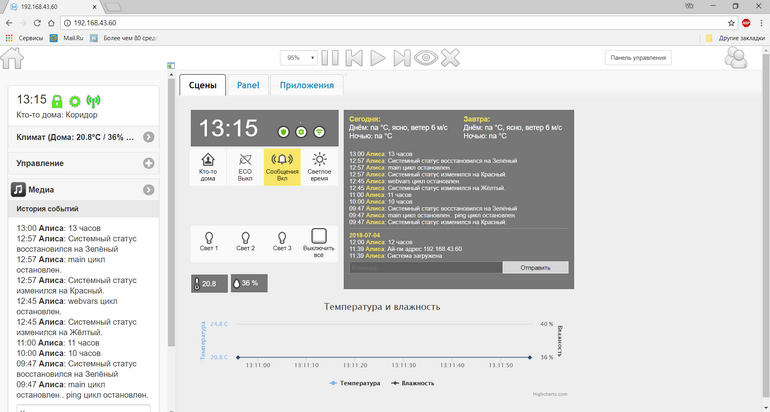
Go to the main page of MajorDomo: opening IP_OF_YOUR_RASPBERRY in the browser (already without specifying the port), we see the familiar interface:
Go to the
Control Panel , then:
System Market Updates - equipment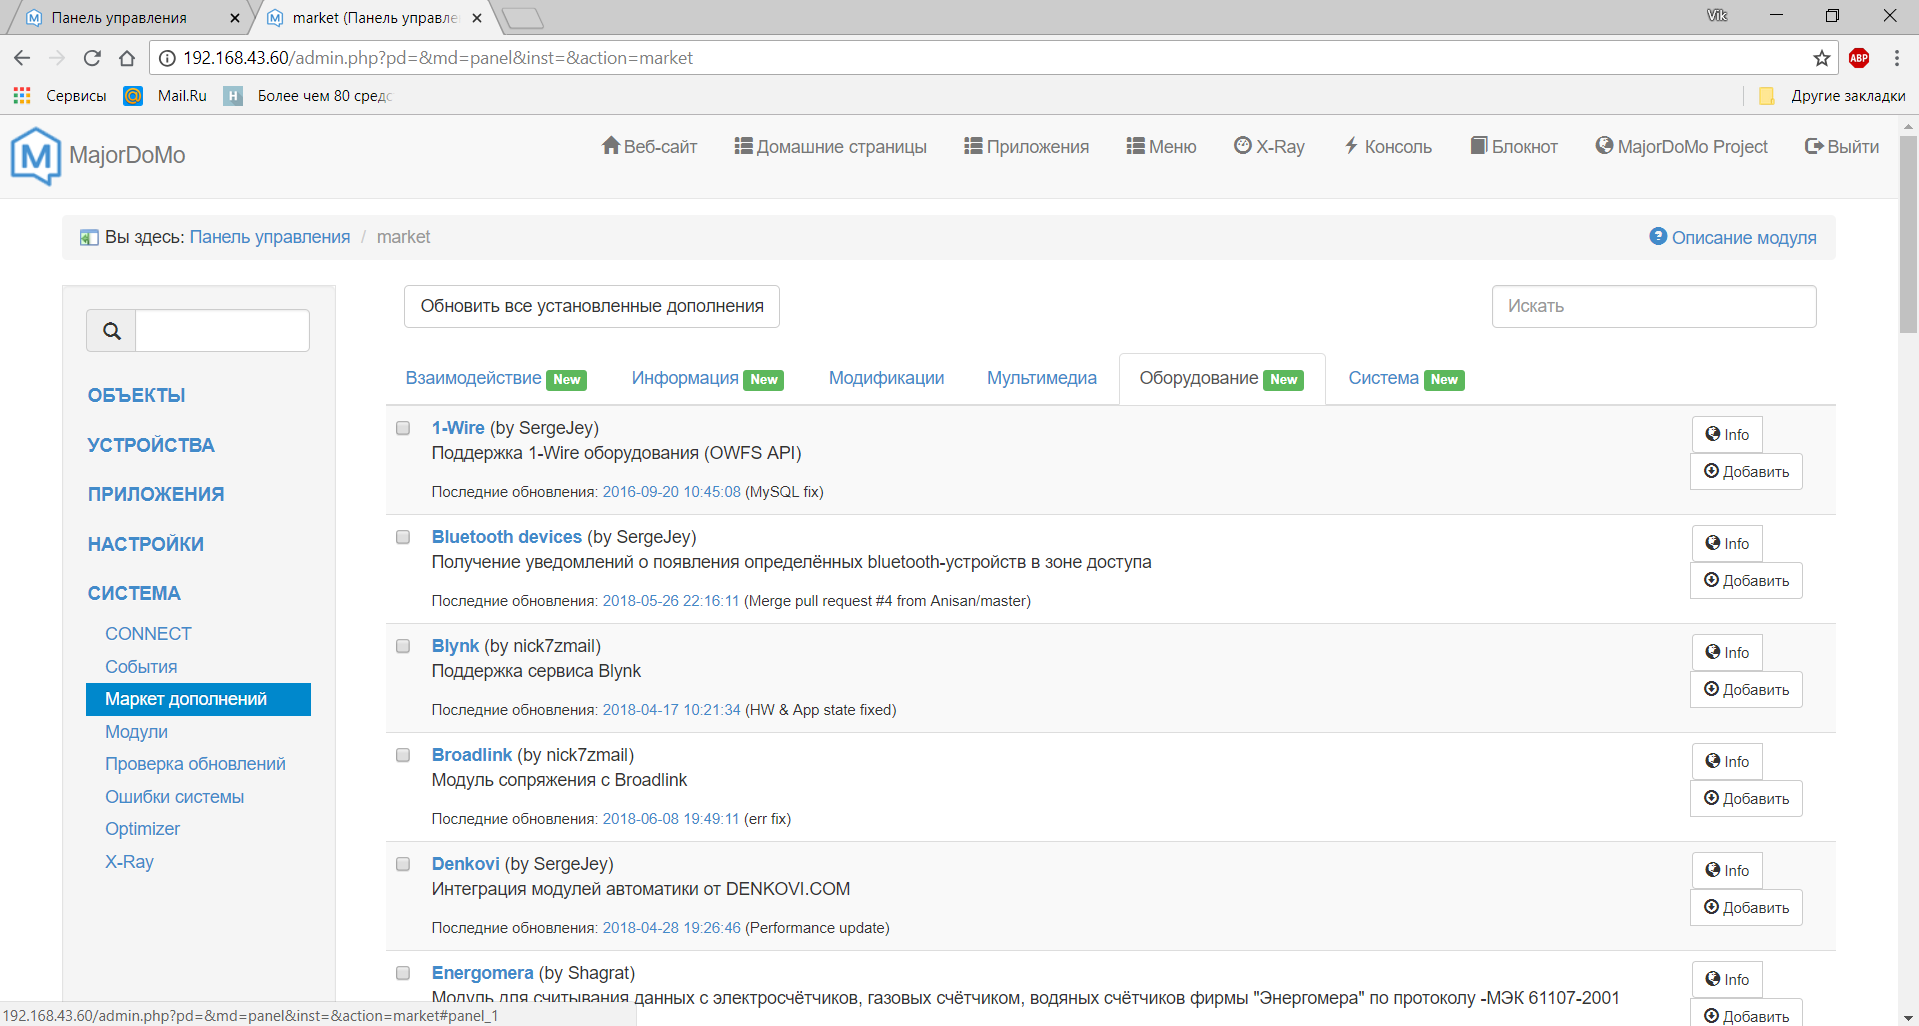
At the very end of the list add-on for Z-Wave, add it.
Perhaps this will stop.
The only thing I wanted to add:
Small info: our Raspberry works under the Raspbian GNU / Linux operating system based on Debian9. You can find out the OS version using the commands:
cat /etc
In the installation instructions, described for the version of Raspbian wheezy (Debian 7), which has already ceased support and relevance since February 2016.
→
Read more about Debian from the WikiSources:
So as not to search the text, I repeat a small list of sources:
→
Z-wave.ru→
Z-wave.by→
Developer site MajorDoMo→
Forum MajorDoMo→
Russian version of the manual for RaZberry→
Complete English manual.→
First part ": Just about the complex. Start creating a wireless" smart home ". Based on Linux technology, Z-Wave and MajorDoMo software"