Prologue
In one of my projects, it was necessary to make an interface like that in the Dnipro. When a card comes out with information over the image from the camera, smoothly replacing it with a solid color, and just the same in the opposite direction. I personally was especially fascinated by the transition from the camera window to the side card, and with great pleasure I set out to paint back ways to solve this problem.
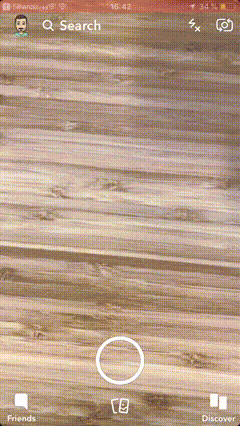
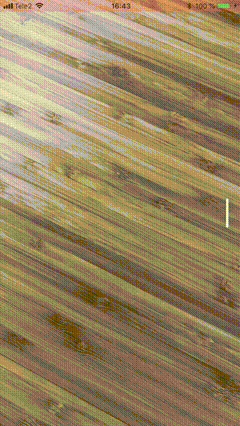
On the left is the example of the Snepchat, on the right is the example of the application that we are going to create.
Probably, the first solution that comes to mind is to adapt the UIScrollView , arrange the views somehow on it, use the padjination, but, frankly, the scroll was designed to solve completely different tasks, add additional animations to it, and it doesn’t have the necessary flexibility settings. Therefore, using it to solve this problem is absolutely not reasonable.
The scroll between the camera window and the side tab is deceptive - it is not a scroll at all, it is an interactive transition between the views belonging to different controllers. The buttons at the bottom of it are ordinary tabs, clicking on which throws us between the controllers.
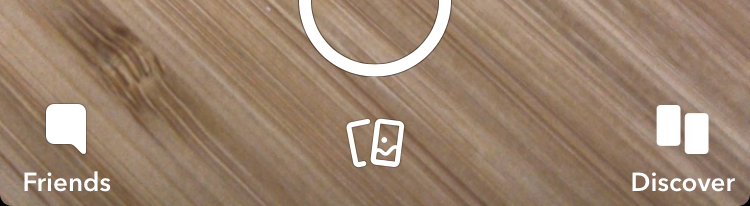
Thus, Snepchat uses its own version of the UITabBarController type navigation controller with custom interactive transitions.
UIKit includes two navigation controllers that allow customization of transitions - these are UINavigationController and UITabBarController . Both have in their delegates navigationController(_:interactionControllerFor:) methods navigationController(_:interactionControllerFor:) and tabBarController(_:interactionControllerFor:) respectively, which allow us to use our own interactive animation to navigate.
tabBarController (_: interactionControllerFor :)
navigationController (_: interactionControllerFor :)
But I would not want to be limited to the implementation of UITabBarController or UINavigationController , especially since we cannot control their internal logic. Therefore, I decided to write my similar controller, and now I want to tell and show what came out of it.
Formulation of the problem
Make your own container controller in which you can switch between child controllers using interactive animations for transitions using the standard mechanism as in UITabBarController and UINavigationController . We need this standard mechanism to use already written ready transition animations like UIViewControllerAnimatedTransitioning .
Project preparation
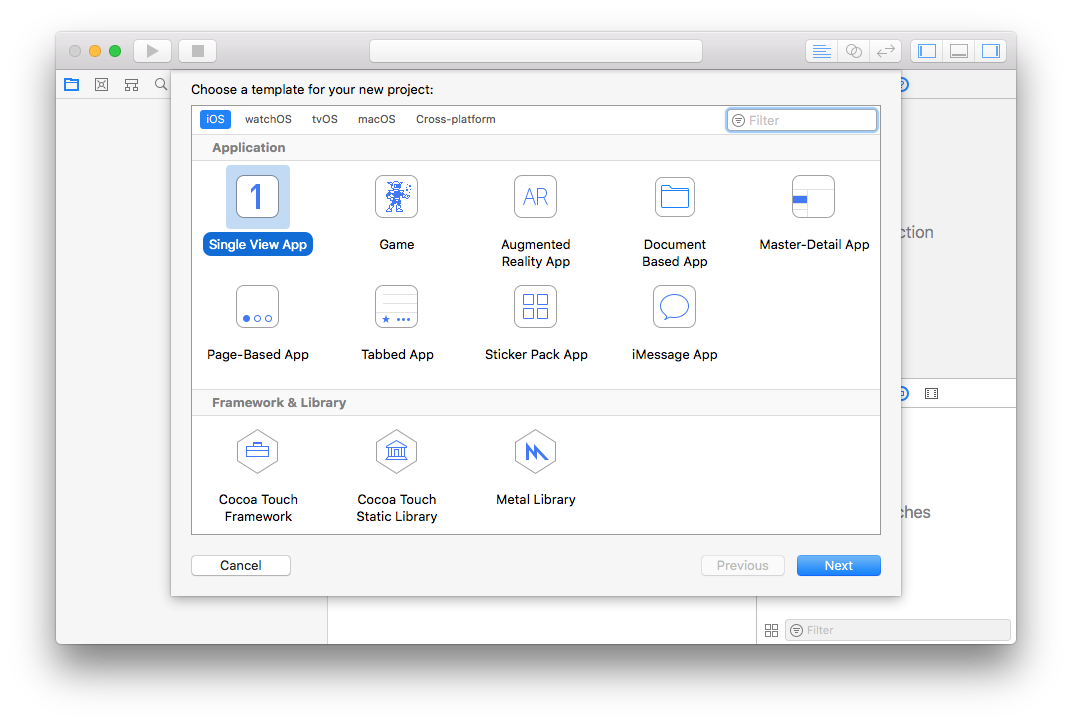
Usually, I try to bring modules into separate frameworks, for this I create a new application project, and add an additional target to the Cocoa Touch Framework , and then scatter the source code in the project for the appropriate targets. In this way, I have a separate framework with a test debugging application.
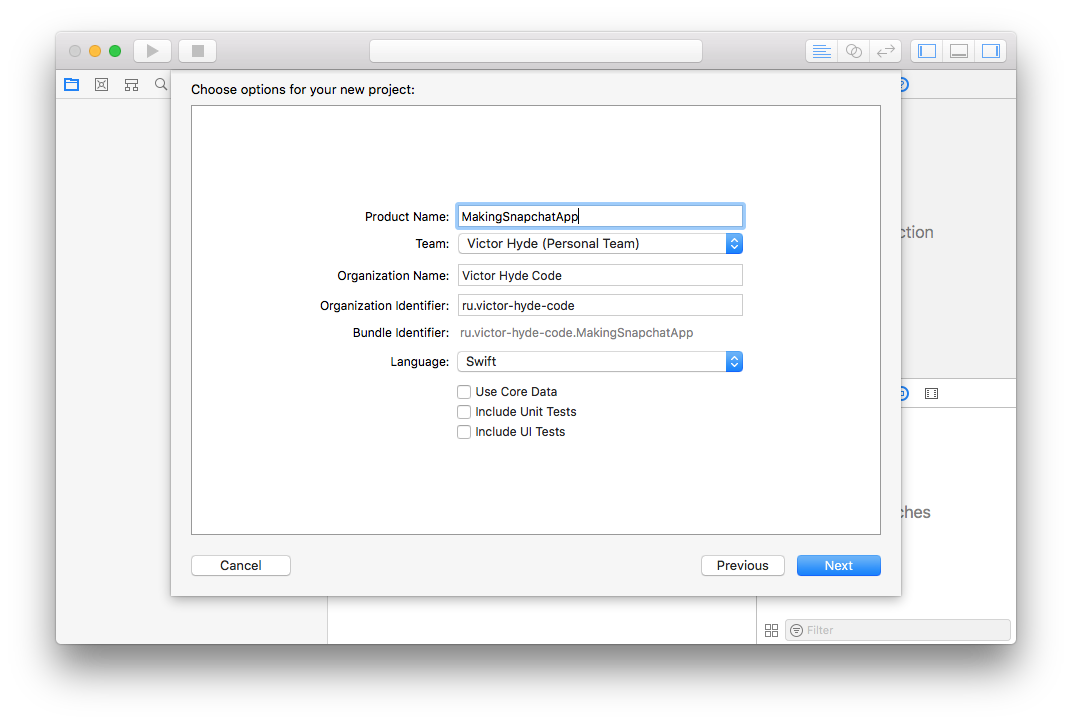
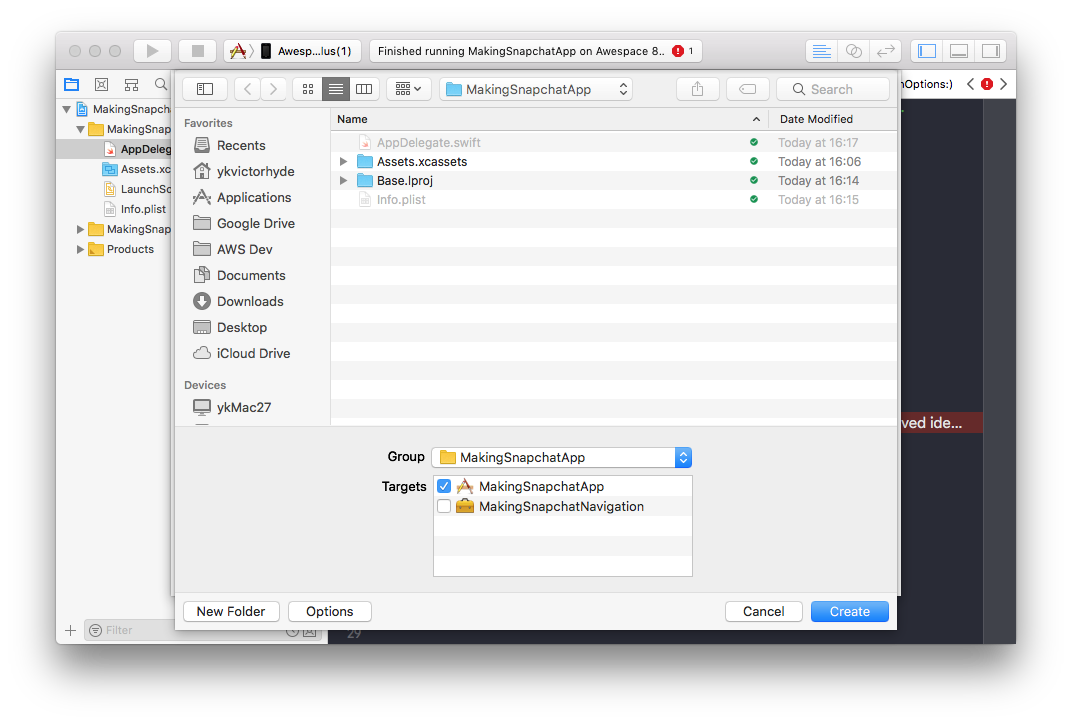
Create a Single View App .
Product Name and will be our target.
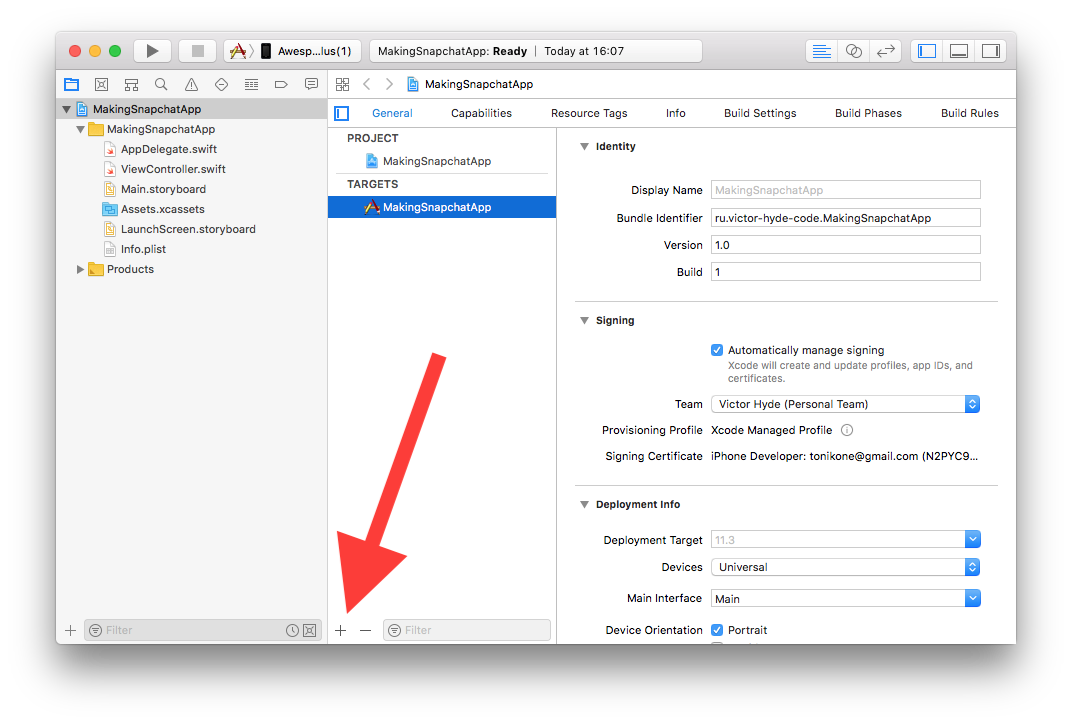
Click on + to add a target.
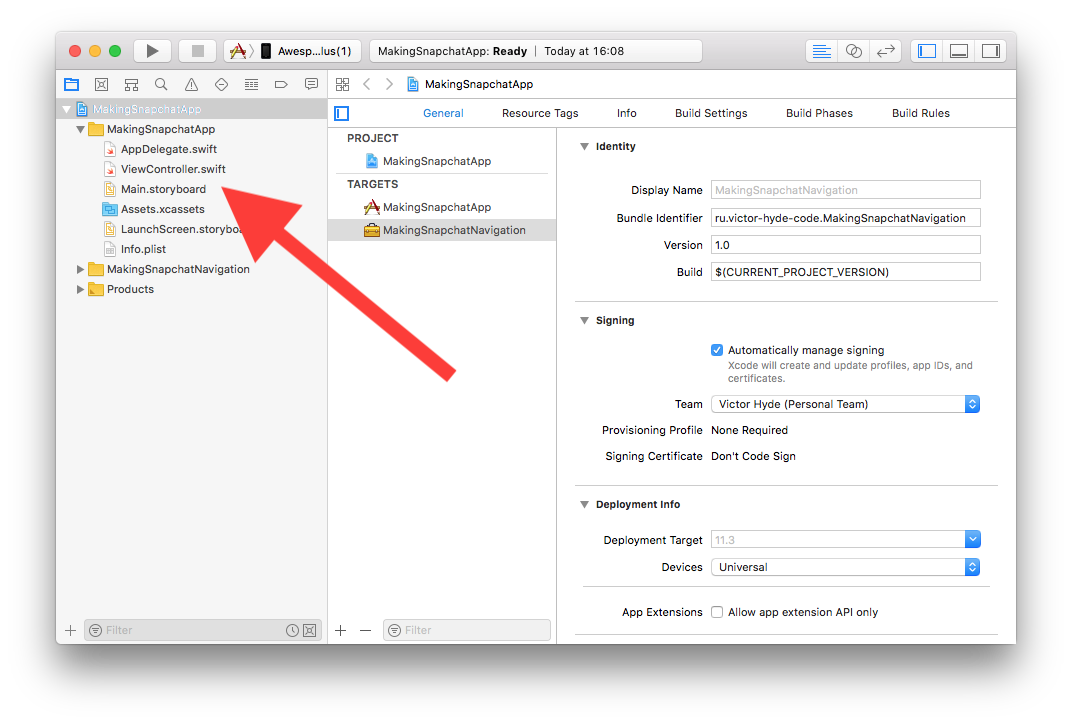
Choosing the Cocoa Touch Framework .

We call our framework an appropriate name, Xcode automatically chooses a project for our target and offers to tie the binary right into the application. We agree.

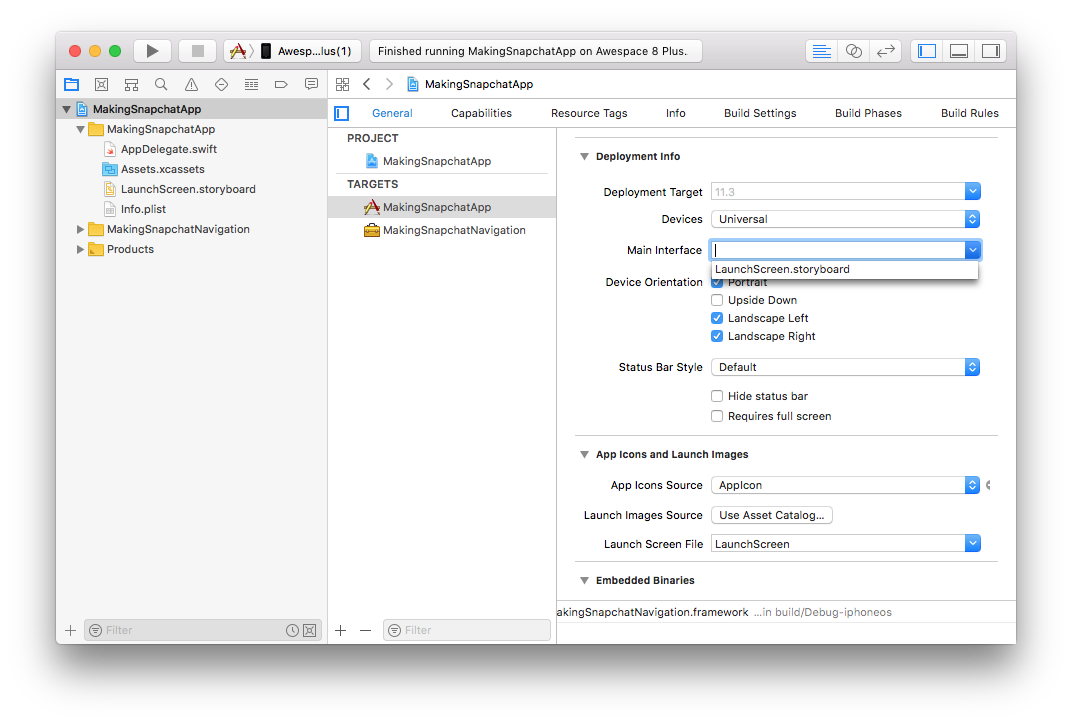
We will not need default Main.storyboard and ViewController.swift , delete them.
Also, do not forget to remove the value from the Main Interface in the application target on the General tab.
Now we go to AppDelegate.swift and leave only the application method with the following content:
func application(_ application: UIApplication, didFinishLaunchingWithOptions launchOptions: [UIApplicationLaunchOptionsKey: Any]?) -> Bool {
Here we set our controller to the main place so that it appears after the launch screen.
Now create this same MasterViewController . It will relate to the application, so it is important to choose the right target when creating the file.
We will inherit MasterViewController from SnapchatNavigationController , which we will implement later in the framework. Do not forget to specify the import our framework. I don’t cite the full controller code here, the gaps are shown with ellipsis ... , I posted the application on GitHub , there you can see all the details. In this controller, we are only interested in the viewDidLoad() method, which initializes the background controller with the camera + one transparent controller (main window) + the controller containing the departing card.
import MakingSnapchatNavigation class MasterViewController: SnapchatNavigationController { override func viewDidLoad() { super.viewDidLoad()
What's going on here? We create a controller with a camera and set it to the background using the setBackground method from SnapchatNavigationController . This controller contains a camera image that is stretched to the entire view. Then we create an empty transparent controller and add it to the array, it simply passes the image from the camera through it, it will be possible to place controls on it, create another transparent controller, add a scroll to it, add a view inside the scroll with content, add the second controller to array and setit this array with the special setViewControllers method from the parent SnapchatNavigationController .
Do not forget to add a request to use the camera in Info.plist
<key>NSCameraUsageDescription</key> <string>Need camera for background</string>
On this test application we consider ready, and go to the most interesting - to the implementation of the framework.
Parent controller structure
First, create an empty SnapchatNavigationController , it is important to choose the right target for it. If everything was done correctly, then the application should be assembled. This project status can be downloaded via the link .
open class SnapchatNavigationController: UIViewController { override open func viewDidLoad() { super.viewDidLoad() // Do any additional setup after loading the view. } // MARK: - Public interface /// Sets view controllers. public func setViewControllers(vcs: [UIViewController]) { } /// Sets background view. public func setBackground(vc: UIViewController) { } }
Now we add the internal components of which the controller will be composed. I don’t cite all the code here, focusing only on the important points.
We set variables for storage of an array of child controllers. Now we rigidly ask them the required number - 2 pieces. In the future, it will be possible to expand the logic of the controller for use with any number of controllers. We also set a variable to hold the current display controller.
private let requiredChildrenAmount = 2 // MARK: - View controllers /// top child view controller private var topViewController: UIViewController? /// all children view controllers private var children: [UIViewController] = []
Create views. We need one view for the background, one view for the effect that we want to impose on the background when changing the controller. We also have a container view for the current child controller and a view indicator that will tell the user how to navigate.
// MARK: - Views private let backgroundViewContainer = UIView() private let backgroundBlurEffectView: UIVisualEffectView = { let backgroundBlurEffect = UIBlurEffect(style: UIBlurEffectStyle.light) let backgroundBlurEffectView = UIVisualEffectView(effect: backgroundBlurEffect) backgroundBlurEffectView.alpha = 0 return backgroundBlurEffectView }() /// content view for children private let contentViewContainer = UIView() private let swipeIndicatorView = UIView()
In the next block, we set two variables, swipeAnimator is responsible for the animation, swipeInteractor is responsible for the interactive (the ability to control the animation progress), we always initialize it during the controller loading, so we do force unwrap.
// MARK: - Animation and transition private let swipeAnimator = AnimatedTransitioning() private var swipeInteractor: CustomSwipeInteractor!
We also set the transformation for the indicator. We shift the indicator by the width of the container + double shift from the edge + width of the indicator itself, so that the indicator is at the opposite end of the container. The width of the container will be known during the operation of the application, so the variable is calculated on the fly.
// MARK: - Animation transforms private var swipeIndicatorViewTransform: CGAffineTransform { get { return CGAffineTransform(translationX: -contentViewContainer.bounds.size.width + (swipeIndicatorViewXShift * 2) + swipeIndicatorViewWidth, y: 0) } }
At the time of loading the controller, we assign self for the animation (below we will implement the appropriate protocol), initialize the interaction based on our animation, the course of which it will control. We also appoint ourselves as a delegate. The delegate will respond to the beginning of the user's gesture and either start the animation or cancel it, depending on the state of the controller. Then we add all the views to the main setupViews() and call setupViews() , which sets the constraints.
override open func viewDidLoad() { super.viewDidLoad() swipeAnimator.animation = self swipeInteractor = CustomSwipeInteractor(with: swipeAnimator) swipeInteractor.delegate = self view.addSubview(backgroundViewContainer) view.addSubview(backgroundBlurEffectView) view.addSubview(contentViewContainer) view.addSubview(swipeIndicatorView) setupViews() }
Then we proceed to the logic of installing and removing child controllers in the container. Everything is as simple as the Apple documentation. We use the methods prescribed for such operations.
addChildViewController(vc) - add a child controller to the current one.
contentViewContainer.addSubview(vc.view) - add the controller view to the view hierarchy.
vc.view.frame = contentViewContainer.bounds - stretch the view onto the entire container. Once we use frames here instead of auto layout, we need to resize them each time the controller is resized, we will omit this logic and we will assume that the container will not change dimensions while the application is running.
vc.didMove(toParentViewController: self) - put a dot in the operation of adding a child controller.
swipeInteractor.wireTo - we tie the current controller to the user's gestures. Later we will analyze this method.
// MARK: - Private methods private func addChild(vc: UIViewController) { addChildViewController(vc) contentViewContainer.addSubview(vc.view) vc.view.frame = contentViewContainer.bounds vc.didMove(toParentViewController: self) topViewController = vc let goingRight = children.index(of: topViewController!) == 0 swipeInteractor.wireTo(viewController: topViewController!, edge: goingRight ? .right : .left) } private func removeChild(vc: UIViewController) { vc.willMove(toParentViewController: nil) vc.view.removeFromSuperview() vc.removeFromParentViewController() topViewController = nil }
There are two more methods whose code I won't give here: setViewControllers and setBackground . In the setViewControllers method setViewControllers we simply set an array of child controllers in the corresponding variable of our controller and call addChild to display one of them on the view. In the setBackground method setBackground we do the same as in addChild , only for the background controller.
Controller Container Animation Logic
Total, the basis of our parent controller is:
- UIView, dividing into two types
- List of child UIViewController
- An object that controls the animation
swipeAnimator type AnimatedTransitioning - The object that controls the interactive animation
swipeInteractor type - The delegate of the interactive animation course
- Implementing an animation protocol
Now we will analyze the last two points, then move on to the implementation of AnimatedTransitioning and CustomSwipeInteractor .
The delegate of the interactive animation course
The delegate consists of only one panGestureDidStart(rightToLeftSwipe: Bool) -> Bool method panGestureDidStart(rightToLeftSwipe: Bool) -> Bool , which informs the controller about the beginning of the gesture and its direction. In response, he is waiting for information about whether the animation can be considered to have begun.
In the delegate, we check the current order of the controllers to see if we can start the animation in a given direction, and if everything is OK, we run the transition method, with parameters: controller from which we move, controller to which we move, direction of movement, flag of interactivity (if false , a timed transition animation is started).
func panGestureDidStart(rightToLeftSwipe: Bool) -> Bool { guard let topViewController = topViewController, let fromIndex = children.index(of: topViewController) else { return false } let newIndex = rightToLeftSwipe ? 1 : 0
Consider immediately the body of the transition method. First, we create the execution context of the CustomControllerContext animation. We will also analyze this class a bit later, it implements the UIViewControllerContextTransitioning protocol. In the case of UINavigationController and UITabBarController , the system creates an instance of the implementation of this protocol automatically and its logic is hidden from us, we need to create our own.
let ctx = CustomControllerContext(fromViewController: from, toViewController: to, containerView: contentViewContainer, goingRight: goingRight) ctx.isAnimated = true ctx.isInteractive = interactive ctx.completionBlock = { (didComplete: Bool) in if didComplete { self.removeChild(vc: from) self.addChild(vc: to) } };
Then we just call either fixed or interactive animation. Fixed can be hung in the future on the buttons-tabs navigation between the controllers, in this example, we will not do this.
if interactive { // Animate with interaction swipeInteractor.startInteractiveTransition(ctx) } else { // Animate without interaction swipeAnimator.animateTransition(using: ctx) }
Animation protocol
The TransitionAnimation animation protocol consists of 4 methods:
addTo is a method designed to create the correct structure of child views in the container, so that the overlapping of the previous view of the new takes place according to the animation idea.
prepare is a method called before an animation to prepare views.
/// Setup the views position prior to the animation start. func prepare(fromView from: UIView?, toView to: UIView?, fromLeft: Bool)
animation - the animation itself.
finalize - the necessary actions after the completion of the animation.
We will not consider the implementation we are using, everything is quite transparent there, let's go straight to the three main classes that make the animation happen.
class CustomControllerContext: NSObject, UIViewControllerContextTransitioning
The execution context of the animation. To describe its function, refer to the UIViewControllerContextTransitioning protocol UIViewControllerContextTransitioning :
A context object encapsulates information on the transition. It also contains the details of the transition.
The most interesting is a ban on the adaptation of this protocol:
Do not create objects that you adopt this protocol.
But we really need it to launch the standard animation engine, so we are still adapting it. There is almost no logic in it, it only stores state. Therefore, I will not even bring him here. It can be viewed on GitHub .
It works great on timed animations. But when it is used for interactive animations, one problem arises - UIPercentDrivenInteractiveTransition calls the undocumented method of the context. The only correct solution in this situation is to adapt another protocol - UIViewControllerInteractiveTransitioning to use its own context.
class PercentDrivenInteractiveTransition: NSObject, UIViewControllerInteractiveTransitioning
Here it is - the heart of the project, allowing the existence of interactive animations in custom controller-containers. Let us analyze it in order.
The class is initialized with a single parameter of the UIViewControllerAnimatedTransitioning type; this is the standard protocol for animation of transition between controllers. This way we will be able to use any of the already written animations along with our class.
init(with animator: UIViewControllerAnimatedTransitioning) { self.animator = animator }
The public interface is fairly simple, four methods, the functionality of which should be obvious.
We only need to note the moment of the beginning of the animation, we take the parent view of the container and set the layer speed to 0, so we can control the progress of the animation manually.
// MARK: - Public func startInteractiveTransition(_ transitionContext: UIViewControllerContextTransitioning) { self.transitionContext = transitionContext transitionContext.containerView.superview?.layer.speed = 0 animator.animateTransition(using: transitionContext) } func updateInteractiveTransition(percentComplete: CGFloat) { setPercentComplete(percentComplete: (CGFloat(fmaxf(fminf(Float(percentComplete), 1), 0)))) } func cancelInteractiveTransition() { transitionContext?.cancelInteractiveTransition() completeTransition() } func finishInteractiveTransition() { transitionContext?.finishInteractiveTransition() completeTransition() }
We now turn to the private block of logic of our class.
setPercentComplete sets the temporal displacement of the animation progress for the superview layer, calculating the value from the percentage of completion and the duration of the animation.
private func setPercentComplete(percentComplete: CGFloat) { setTimeOffset(timeOffset: TimeInterval(percentComplete) * duration) transitionContext?.updateInteractiveTransition(percentComplete) } private func setTimeOffset(timeOffset: TimeInterval) { transitionContext?.containerView.superview?.layer.timeOffset = timeOffset }
completeTransition is called when the user has stopped his gesture. Here we create an instance of the CADisplayLink class, which will allow us to automatically complete the animation beautifully from the point when the user no longer controls its progress. We add our displayLink to the run loop so that the system will call our selector whenever it needs to display a new frame on the screen of the device.
private func completeTransition() { displayLink = CADisplayLink(target: self, selector: #selector(tickAnimation)) displayLink!.add(to: .main, forMode: .commonModes) }
In our selector, we calculate and set the temporal displacement of the animation progress as we did before during the user's gesture, or we finish the animation when we reach its initial or final point.
@objc private func tickAnimation() { var timeOffset = self.timeOffset() let tick = (displayLink?.duration ?? 0) * TimeInterval(completionSpeed) timeOffset += (transitionContext?.transitionWasCancelled ?? false) ? -tick : tick; if (timeOffset < 0 || timeOffset > duration) { transitionFinished() } else { setTimeOffset(timeOffset: timeOffset) } } private func timeOffset() -> TimeInterval { return transitionContext?.containerView.superview?.layer.timeOffset ?? 0 }
Finishing the animation, we displayLink off our displayLink , return the layer speed, and if the animation has not been canceled, that is, it has reached its final frame, we calculate the time from which the animation of the layer should start. You can learn more about this in the Core Animation Programming Guide, or here in this response to stackoverflow.
private func transitionFinished() { displayLink?.invalidate() guard let layer = transitionContext?.containerView.superview?.layer else { return } layer.speed = 1; let wasNotCanceled = !(transitionContext?.transitionWasCancelled ?? false) if (wasNotCanceled) { let pausedTime = layer.timeOffset layer.timeOffset = 0.0; let timeSincePause = layer.convertTime(CACurrentMediaTime(), from: nil) - pausedTime layer.beginTime = timeSincePause } animator.animationEnded?(wasNotCanceled) }
class AnimatedTransitioning: NSObject, UIViewControllerAnimatedTransitioning
The last class that we have not yet understood is the implementation of the UIViewControllerAnimatedTransitioning protocol, in which we control the order of execution of the protocol methods of our animation addTo , prepare , animation , finalize . Everything is quite prosaic here, it is worth noting only the use of UIViewPropertyAnimator to perform animations instead of the more typical UIView.animate(withDuration:animations:) This is done in order to be able to further control the course of the animation, and in case of its cancellation, return it to its initial position by calling finishAnimation(at: .start) , which allows you to avoid unnecessary blinking of the final animation frame on the screen.
Epilogue
We have created a working demo of the interface similar to the Snapchat interface. In my version, I configured the constraints so that there were fields left and right of the card, and besides, I left the camera to work on the background view to create the effect behind the card. This is done solely to demonstrate the capabilities of this approach, as it will affect the performance of the device and the charge of its battery, I did not check.
This article is my first attempt at writing in the genre of technical literature, I could have missed some important points, so I’m ready to gladly answer questions in the comments. , - .
GitHub .
, , , !
:
Custom Container View Controller Transitions, Joachim Bondo.
Objective C. Swift.
Link
Interactive Custom Container View Controller Transitions, Alek Åström
, Objective C, Swift.
Link
SwipeableTabBarController
, UITabBarController . .
Link