
To launch the “
Fullstack Mobile Developer ” course, conducted jointly with
Agima , we have prepared a series of materials on how to create mobile applications. Let's talk about cases, figures, rules and failures, but let's start, together with Nikita Arkhipov from Anvics studio, with the theme of the release on the App Store. Let us analyze how to reach an agreement with the review team and avoid problems, tell you step by step about the technical side - from creating a certificate to interacting with Itunes Connect - and about what everyone is silent about - how can you go through the review from the first time. Cook paws, and go!
Py si: and in this series of materials there are hidden discounts for the course: in every post on mobile development there is a rebus in which the word or the name of the solution from the mobile area is encrypted. You get a 10% discount for the guess rebus! By the way, discounts are summed up, so if you collect them all, you can grab a course at a very tasty price! Look for the first rebus in this text!The game is developed, the application is created, everything is ready to launch. It's time to release - and here you may face surprises. When you need to quickly release, and the application is not yet ready for an “honest” review, it’s difficult to circumvent the restrictions set by Apple. We tell how to negotiate with the team that makes decisions about publishing applications on the App Store. We understand the possible causes of failure or blocking. And for those who are rolling out their product to the app store for the first time, we sort out the technical details of the review from creating a certificate to interacting with Itunes Connect.
Read the documentation
It seems that in order to prepare for a review, it’s enough to read the
App Store Review Guidelines a couple of times, and everything will be fine. But difficulties can begin already at this stage. First, today it is already a thirty-page Talmud. Secondly, almost at the very beginning of this document there is the following clause: “We will reject the application, the contents of which violate the boundaries”.
At the same time, what is beyond the boundary beyond which rejected applications remain is that no one knows exactly. As the American Supreme Judge once said, "I will understand (this border) when I see it." However, you shouldn’t be afraid in advance: in spite of such a vague wording, the review process itself is very adequate, and Apple just doesn’t refuse to publish applications.
Don't forget to follow the App Store Review Guidelines for updates. Set up notifications about news related to this in a search engine or follow profile events where innovations are announced. For example, at the recent World Wide Developers Conference 2018, Apple
introduced a number of new rules regarding privacy policy, advertising targeting, and cryptocurrency-related applications. You can be seriously helped by the
App Store Review Guidelines History project, the creators of which label all new changes: what is added to the Guide is marked in green and the deleted from it in red. We recommend to subscribe to their newsletter.
Why an application may be rejected
It is enough to clearly remember about the main reasons for the possible refusal, as set out in the App Store Review Guidelines. They are pretty simple and briefly sound like this:
- No realistic violence, pornography, discrimination, deception. In addition to the obvious bloody games and frank nudes content, there are more complex cases. For example, the AfterSchool application, in which American students could communicate in their free time, because of the lack of control over its content, was very quickly filled with threats of “chatting” - shooting at schools, which Apple removed several times from the store. However, after some time, AfterSchool again returned to the App Store.
- The application must be completely complete and past bug testing on the creators side. The App Store will not accept applications with obvious errors that are too slow compared to peers and unexpectedly departing. The review team tests the software that comes to them for review manually and very carefully. Because of the error found, the application will be rejected, and a screenshot and a description of what happened will be sent to you. This can be considered as an opportunity for additional testing, but you should not abuse it - if you send too often unfinished applications to reviews, the review priority of your applications by the review team will drop significantly.
- Developers must provide a correct description of all the functionality, and the application must work in accordance with this description. In particular, this means that it should not contain any hidden functions that will open to the user only after installation. For example, if you use free-to-play monetization, when part of the application's capabilities will be available only on a paid basis, be sure to tell about it in the description. In order to fully comply with this clause, you should not forget that the application must request permission from the user to use his contacts, geolocation data, microphone and camera, as well as to access the internal phone storage and accounts in third-party services, in particular during authorization.
- You cannot use any private API, call the internal system functions of iOS, download a new code, and especially viruses. If the previous point is addressed to bona fide, but inattentive developers, then this is directly addressed to potential intruders.
- Applications hosted at the Apple Store should not have too little functionality. Paragraph 4.2 of the guidelines states: "If the application does not have a specific benefit and is not perceived as a full-fledged product, it is not suitable for the App Store." So the review team seeks to ensure that everything offered to the user will be useful to him. A typical example is the ban on the publication of wrappers for the browser, changing only its appearance, but not adding any new features.
- The application must not violate any laws in all countries for which it will be available. It is specifically referring to this point that Roskomnadzor demanded that Apple remove Telegram from the application catalog.
- Including the application should not violate copyright. The question arises: “how did this rule bypass VKontakte with their volume of illegal music and video?” Indeed, the VK application has long been able to stream unlicensedly such content. But about 4 years ago, Apple began to be more serious about copyright infringement in other countries (before that, they looked, at least at Russia, through their fingers). Just at that moment, VKontakte (and other applications with pirated music) were removed from the site and returned only after the update, in which copyright-infringing content was no longer available. Now VK has the functionality of playing music again, but now it’s quite legal - these are limited “demo auditions”, and the full versions of playlists are available in a separate, paid application that donates money to musicians.
It is important to note here that the Apple review team, when rejecting the application, will always describe the reason and explain what needs to be changed. But this again should not be abused: a couple of unsuccessful attempts - and the next time your content will undergo even more careful inspection.
Personal experience
At various times, we ourselves at Anvics have encountered problems with the passage of a review not only from this list.
Once we launched a small promo for an advertising campaign.
one big brand. It contained only the functions of viewing VR-video and feedback from the brand representatives. The review team considered that the application was not functional enough, and rejected it. But it turned out that in order to successfully complete the review, it was enough to add the Share on Social Networks buttons and the gallery. After such cosmetic changes (against the general background of development), the application was quietly tested.
It was useful to learn about the fact that for branded applications, if they are not published from the brand’s enterprise account, you need a confirming letter from the brand representatives that allows you to use the name, logo and other brand attributes for developing and implementing the application. You can prepare it in a free form: “I, such and such, the general director, authorize the use of my brand“ Brand ”for the application“ Application ”in my account“ Account ””. Scan this document and attach it to the review application.
There are also technical features that can simply be overlooked. For example, we once faced with the fact that all third-party services to which the API addresses the application must support the IPv6 protocol. And, of course, they should not contain any URLs in the form 1.1.1.1. Be attentive to such details, it will save your time.
The technical side of the review
How to pass a review:
- pay your account (standard for $ 99 or Enterprise for $ 299 per year);
- make sure the application is fully prepared and tested;
- create a certificate;
- get an ID;
- using them, create an application profile;
- archive the application build in Xcode;
- send it to iTunes Connect - a service through which all developer interaction with the App Store occurs.

On the “Fullstack Mobile Developer” course, we explain in detail how to get from the idea of the application to the release on the App Store, and, of course, cover all the stages of the review in more detail. But step by step guide on how to send an application for review, we are sharing now. (And do not forget about the rebus with discounts - it's close!)
Sign the application
The mechanics of creating a signature can cause difficulties for those who have not previously encountered this, so we will tell about it in detail. Applications have certificates, identifiers, and profiles.
- The certificate is associated with the computer and authorizes it to sign applications.
- App ID - unique identifier of the application. In addition, it stores a list of technologies used by the application (for example, In app purchase, push notifications, etc.).
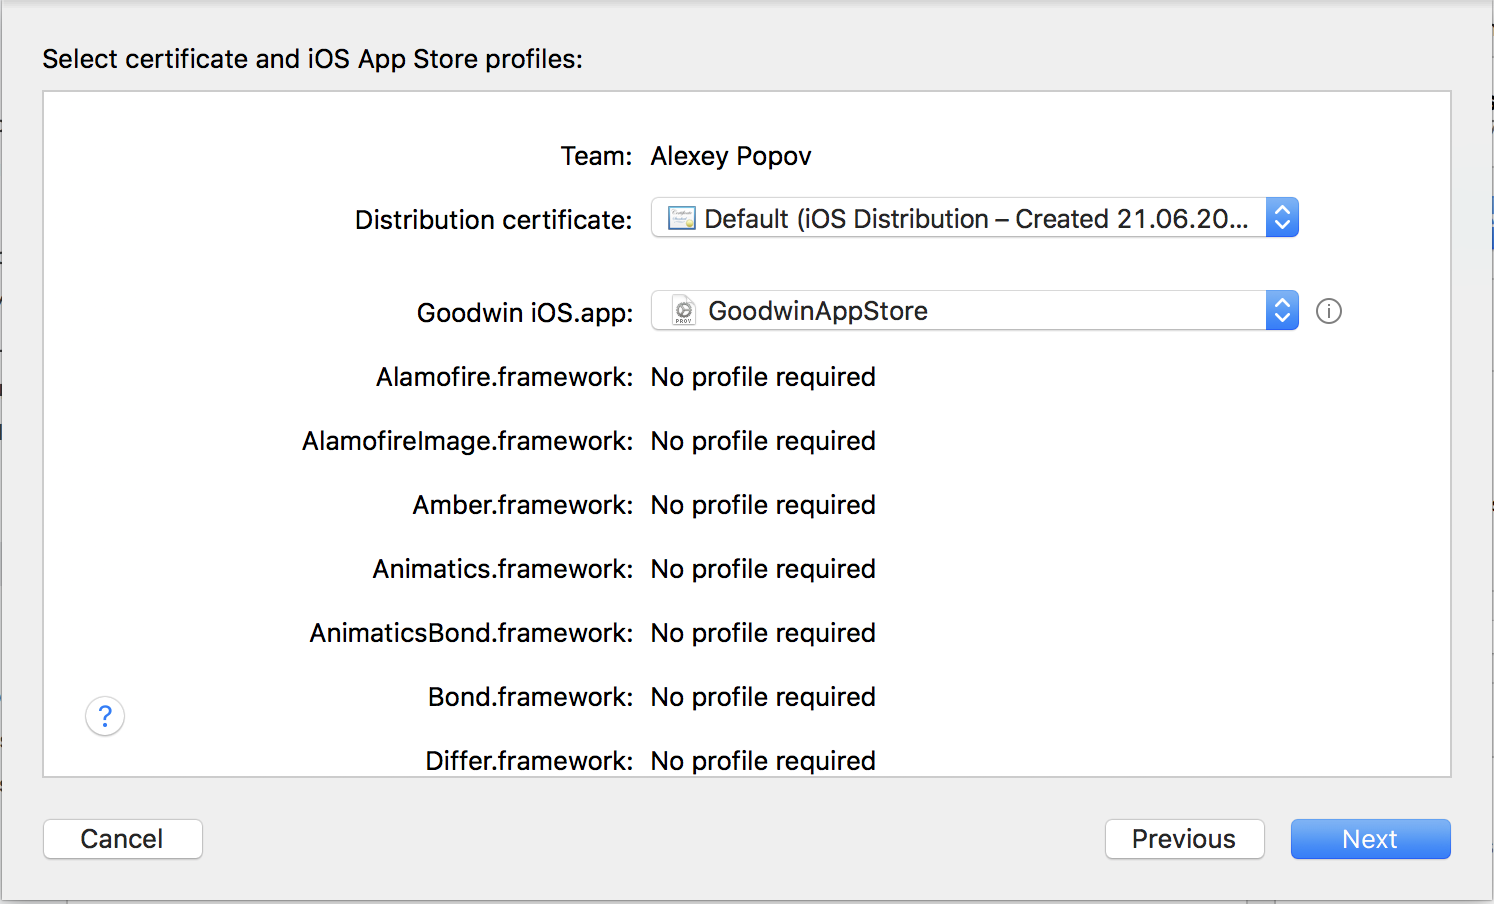
- Profile - “union” of the certificate and identifier, used to sign the application from a specific computer. It also indicates how the application will be distributed: development (launching the application from a computer to your device), App Store (sending the application to the official Apple store) or Ad Hoc (remotely installing the application on devices, without using the App Store).
To sign the application, you must first register your computer and get a certificate, then generate the application ID, and finally create a profile to send to the App Store. Step by step through all the steps.
Step One: Creating a Certificate
When we have already registered and paid for the account, we enter the
portal of the Apple developer .
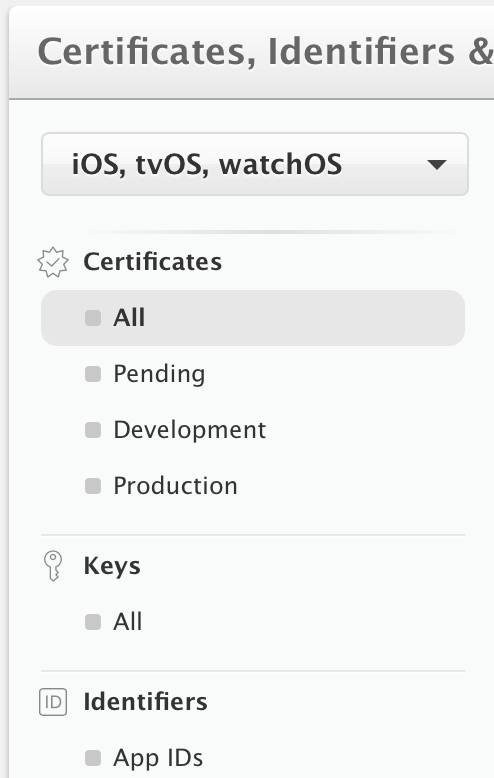
Select Certificates, Identifiers & Profiles:
We see the certificate menu:
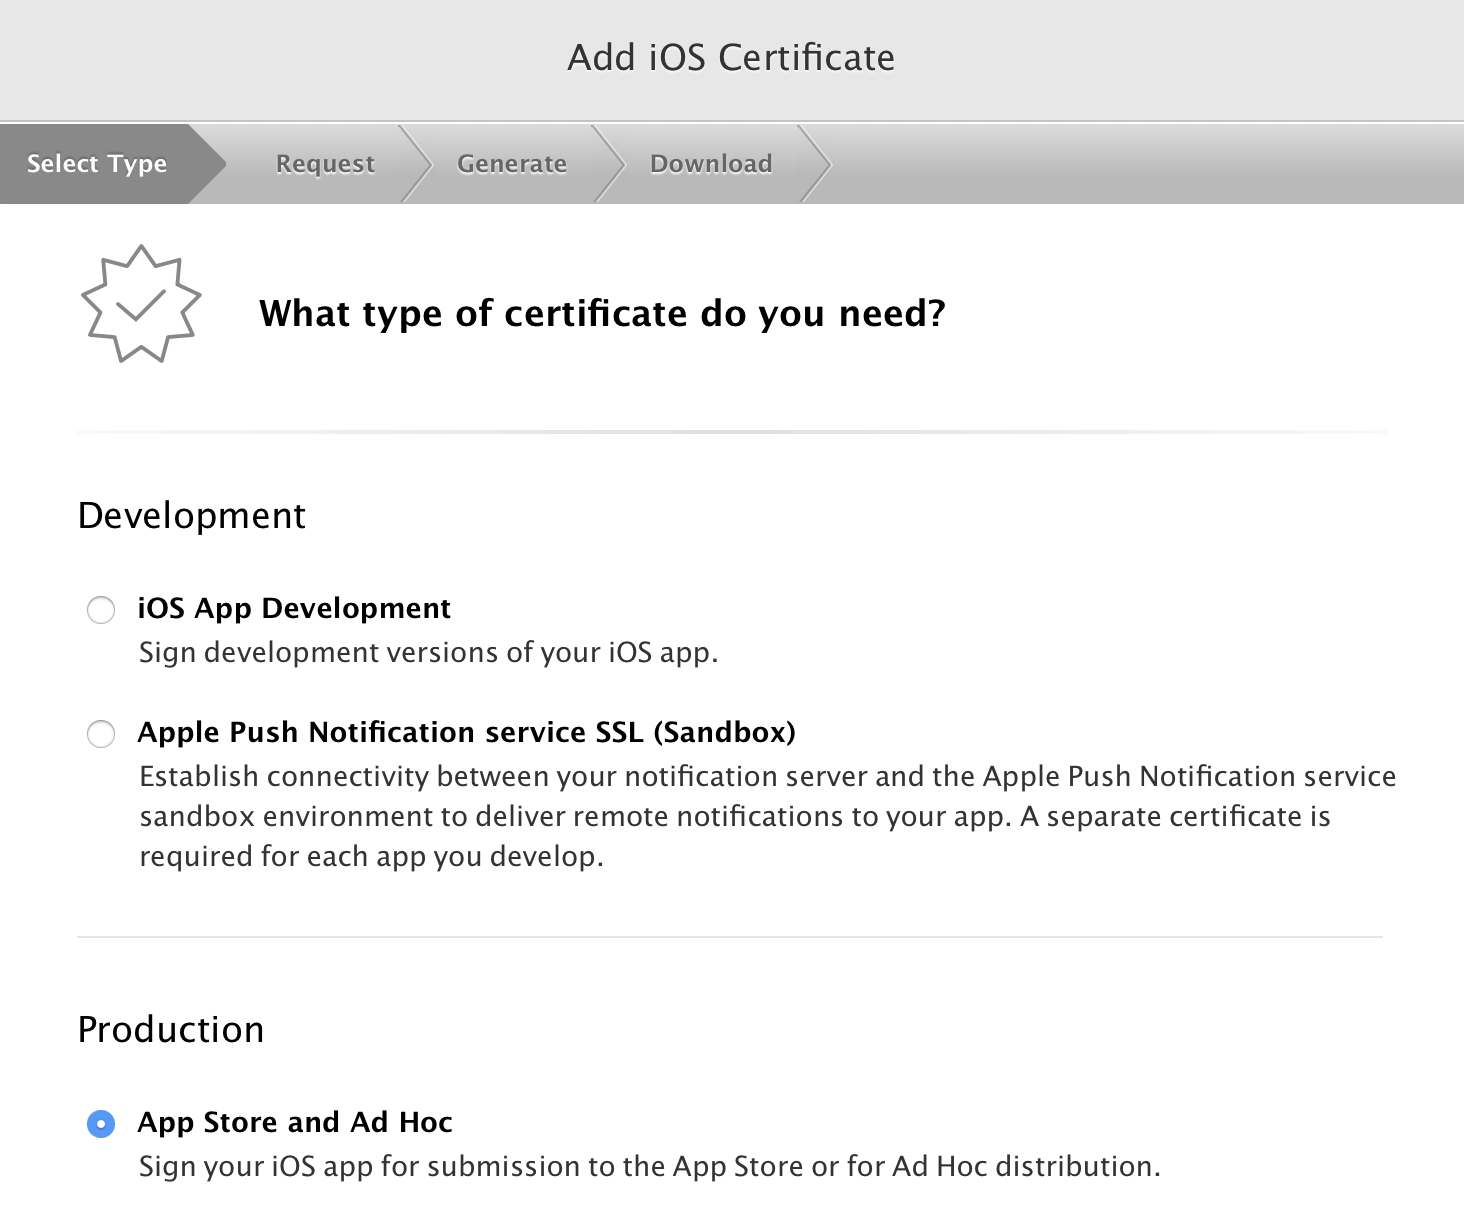
Click on the “+” icon to the right of the iOS Certificates label:

Choose
App Store and Ad Hoc , click Continue:
After reviewing the description of how the certificate creation request will be created, click Continue again:
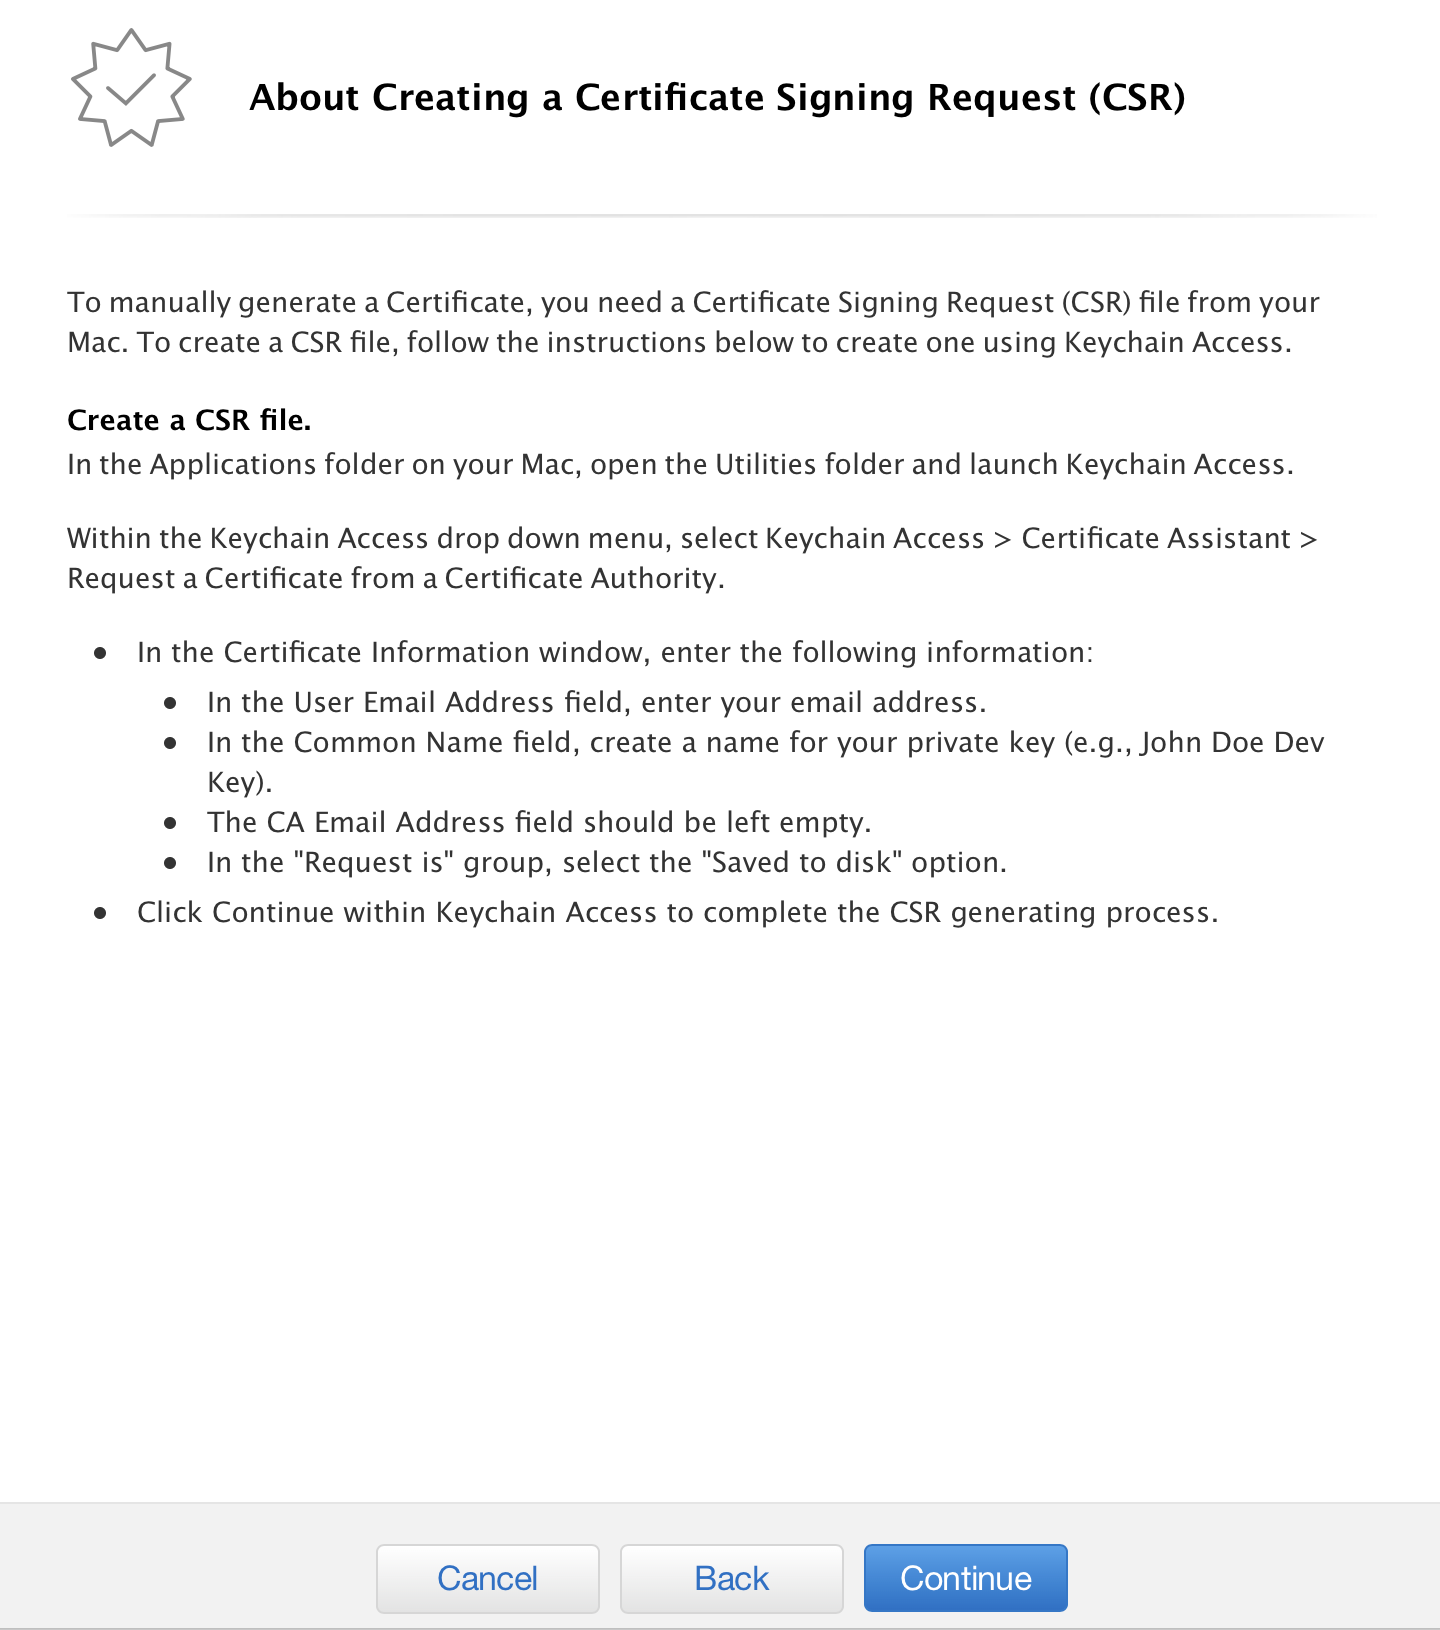
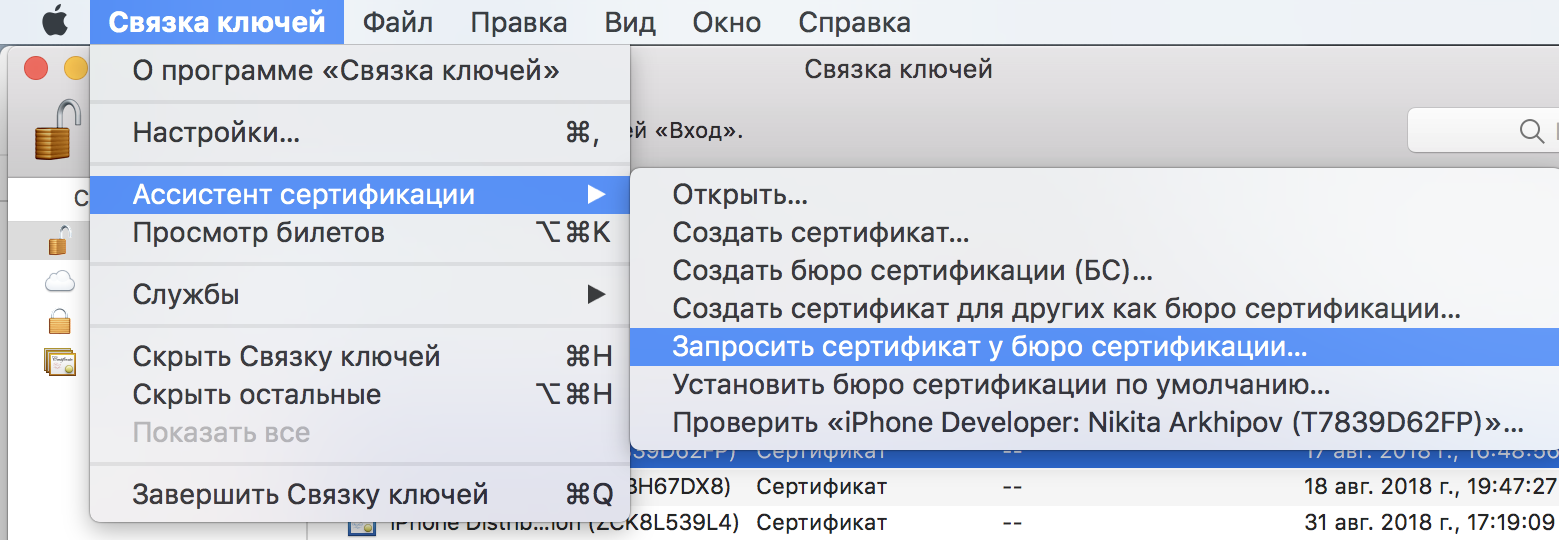
Now we need to create a key on the computer. To do this, run the keychain program:
In the top menu, click "Keychain" -> "Certification Assistant" -> "Request a certificate from a certification authority ...":
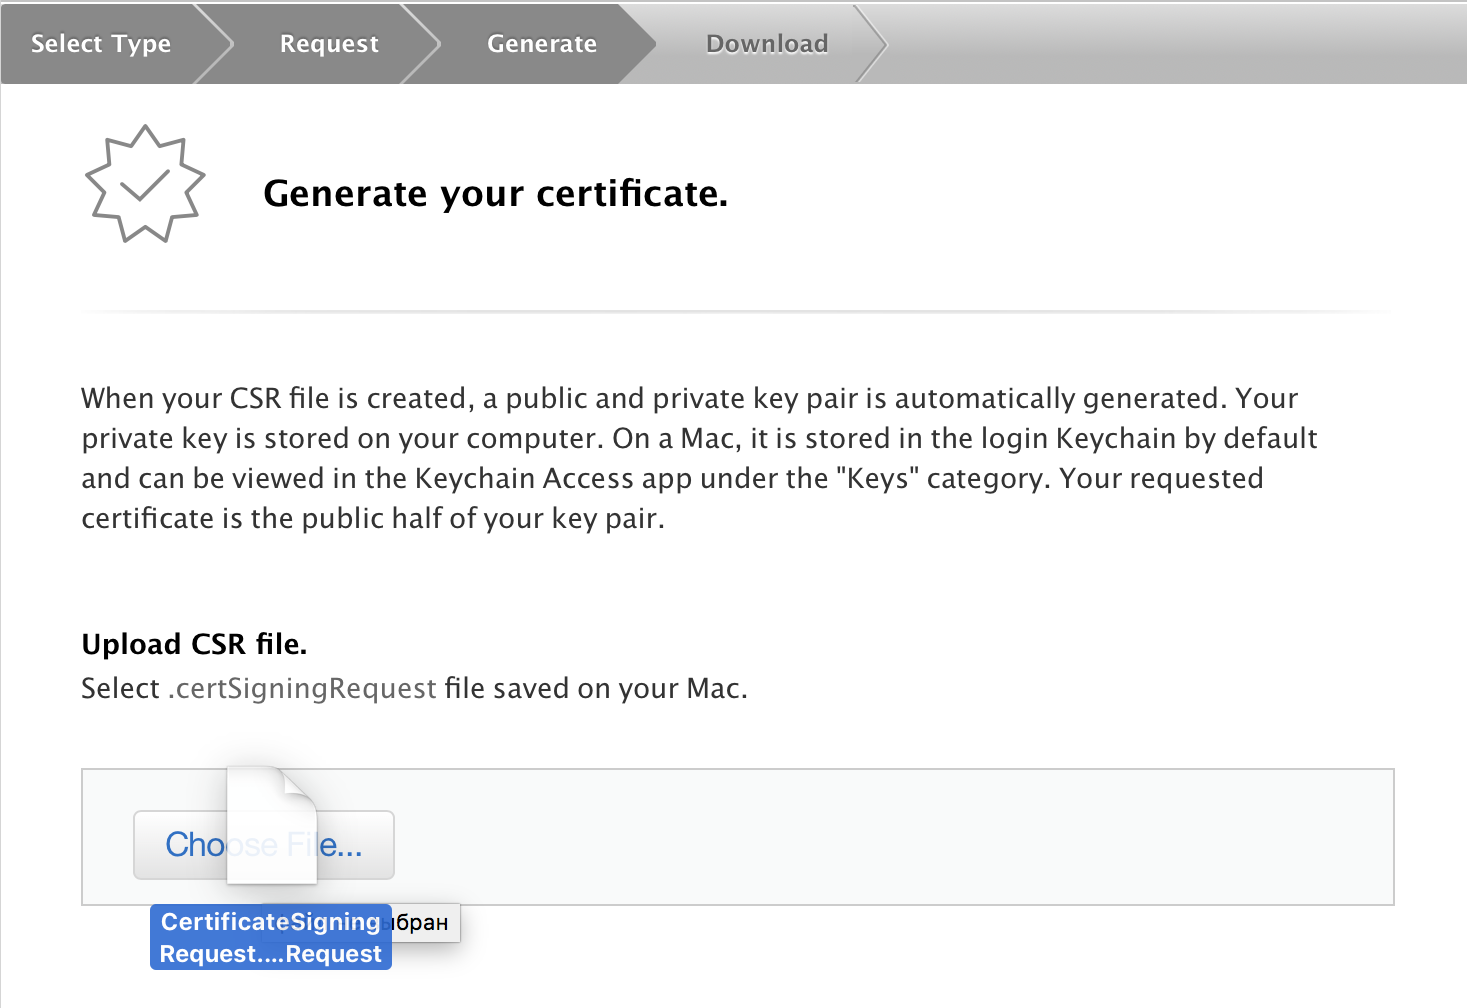
We specify the email of our account, in the common name we write any name, the BS email address is left blank, in the request we select "Saved on disk":

Click "Continue" and save the file with the .certSigningRequest extension in a convenient place (for example, on the desktop). After saving, transfer it to the Choose File button in the Apple portal:
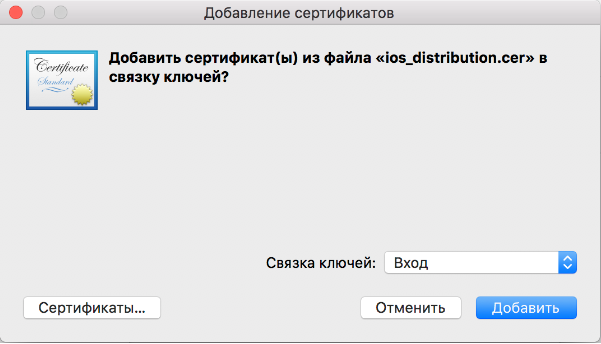
Click Continue, on the next screen - Download and double click on the downloaded file - after that the “Keychains” window should become active and “Add certificates” will appear. Make sure that the “Keychain - Entry” data is set in it and click “Add”:
Certificate for the computer is ready.
Step Two: Add ID
In the menu on the Apple portal, select the item App IDs:

As with certificates, click the icon with a plus:

On the page that opens, be sure to fill in the Name fields (the name of the application - under it it will appear only on the Apple portal) and App ID. App ID is copied from the Xcode settings of your project:
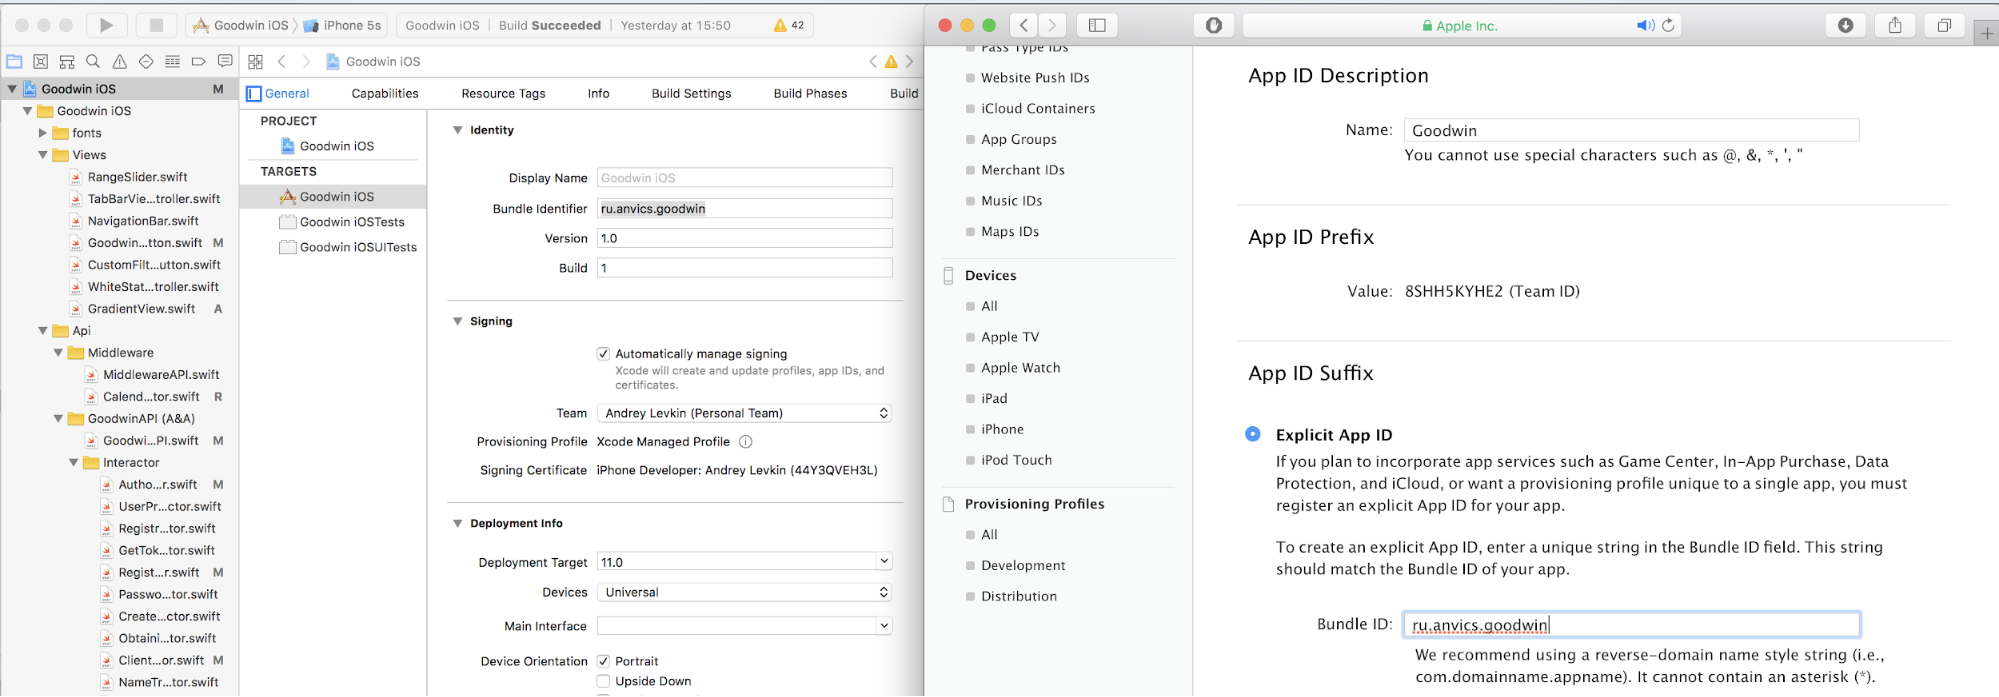
Below you will see a list of services that the application will use. Necessary tick in the appropriate checkboxes (later this list can be changed).
After that, click Continue at the bottom of the page, on the next screen - Register and on the last - Done. The application ID is ready.
Step three: create a profile
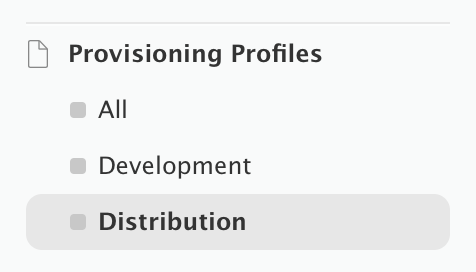
In the menu, go to Provisioning Profiles -> Distribution:
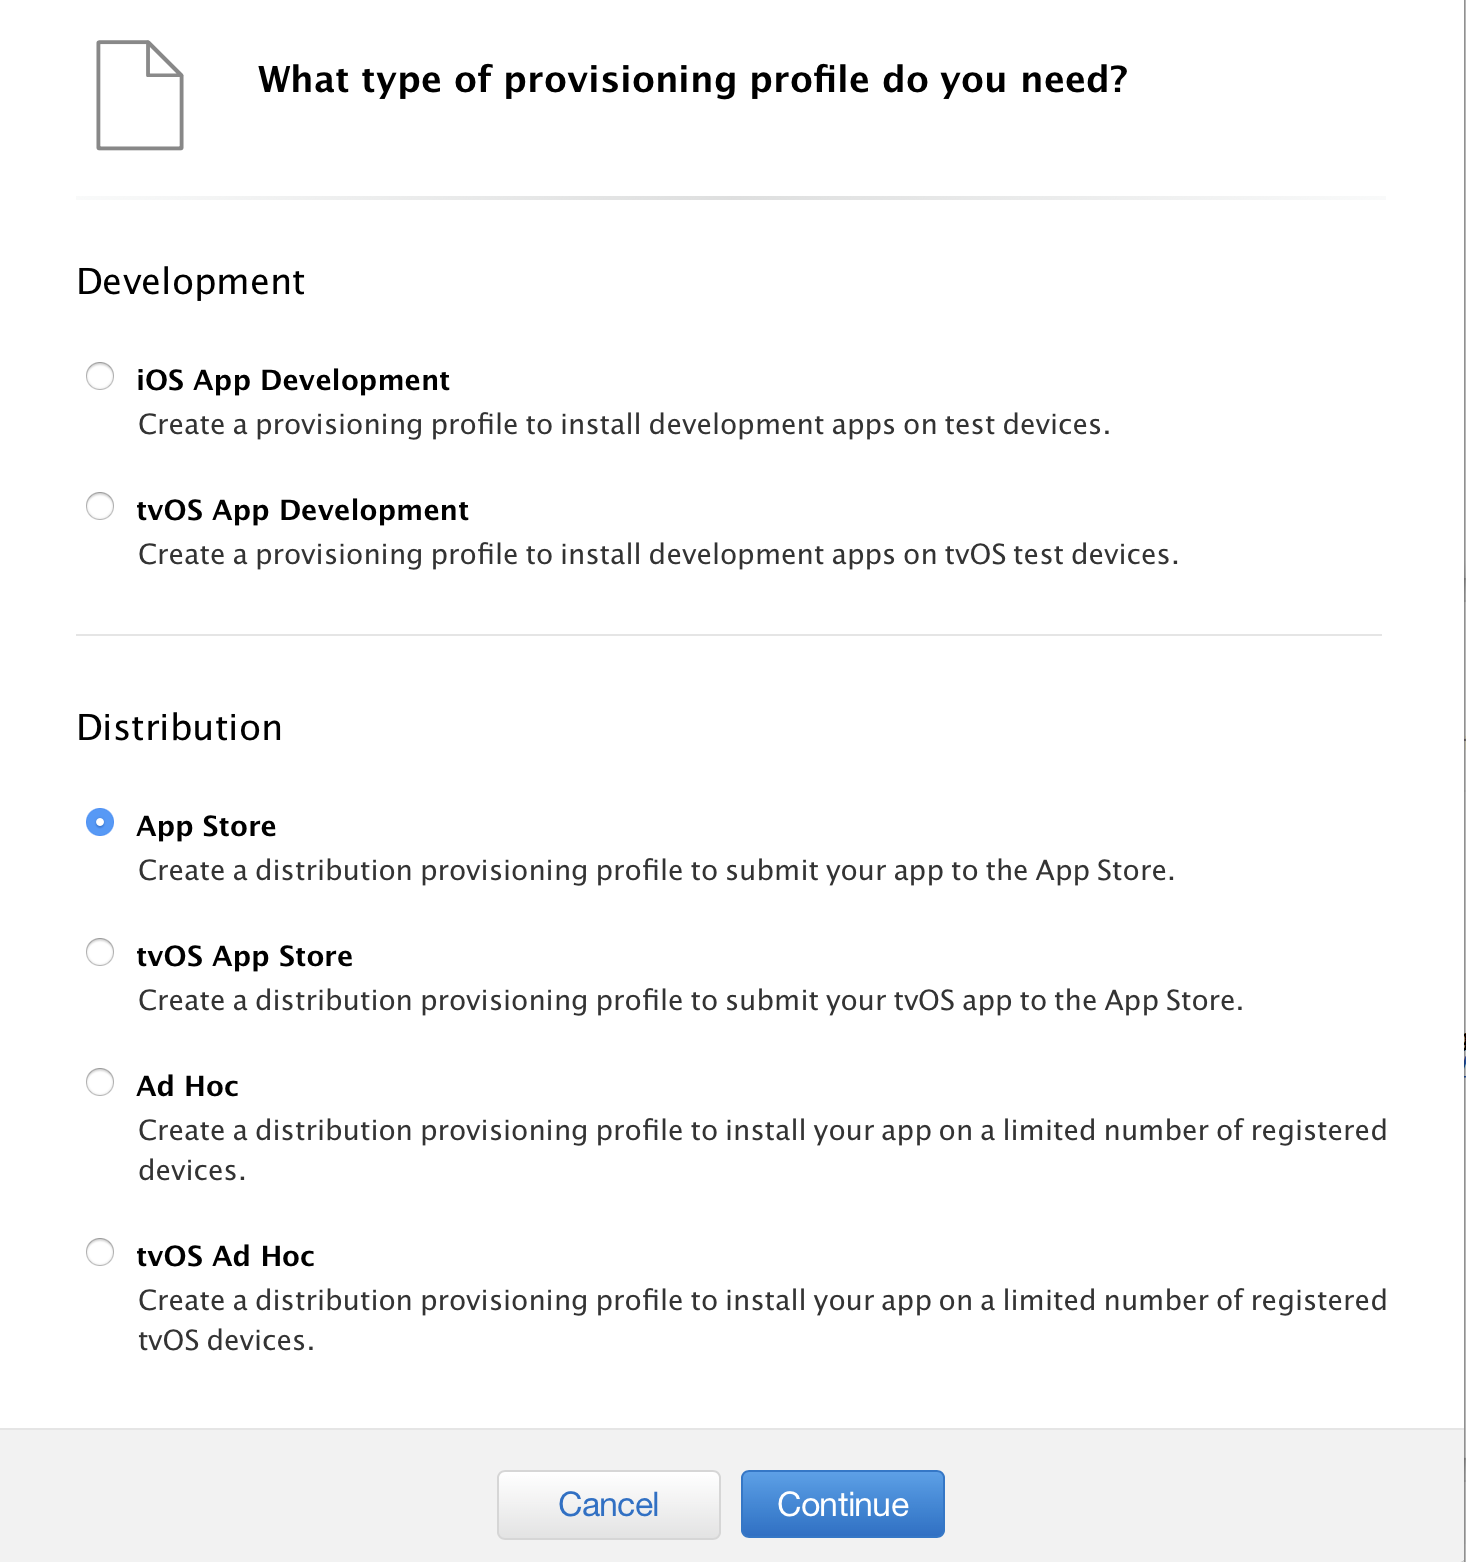
We click on the familiar “+” icon and in the opened tab select the
App Store :
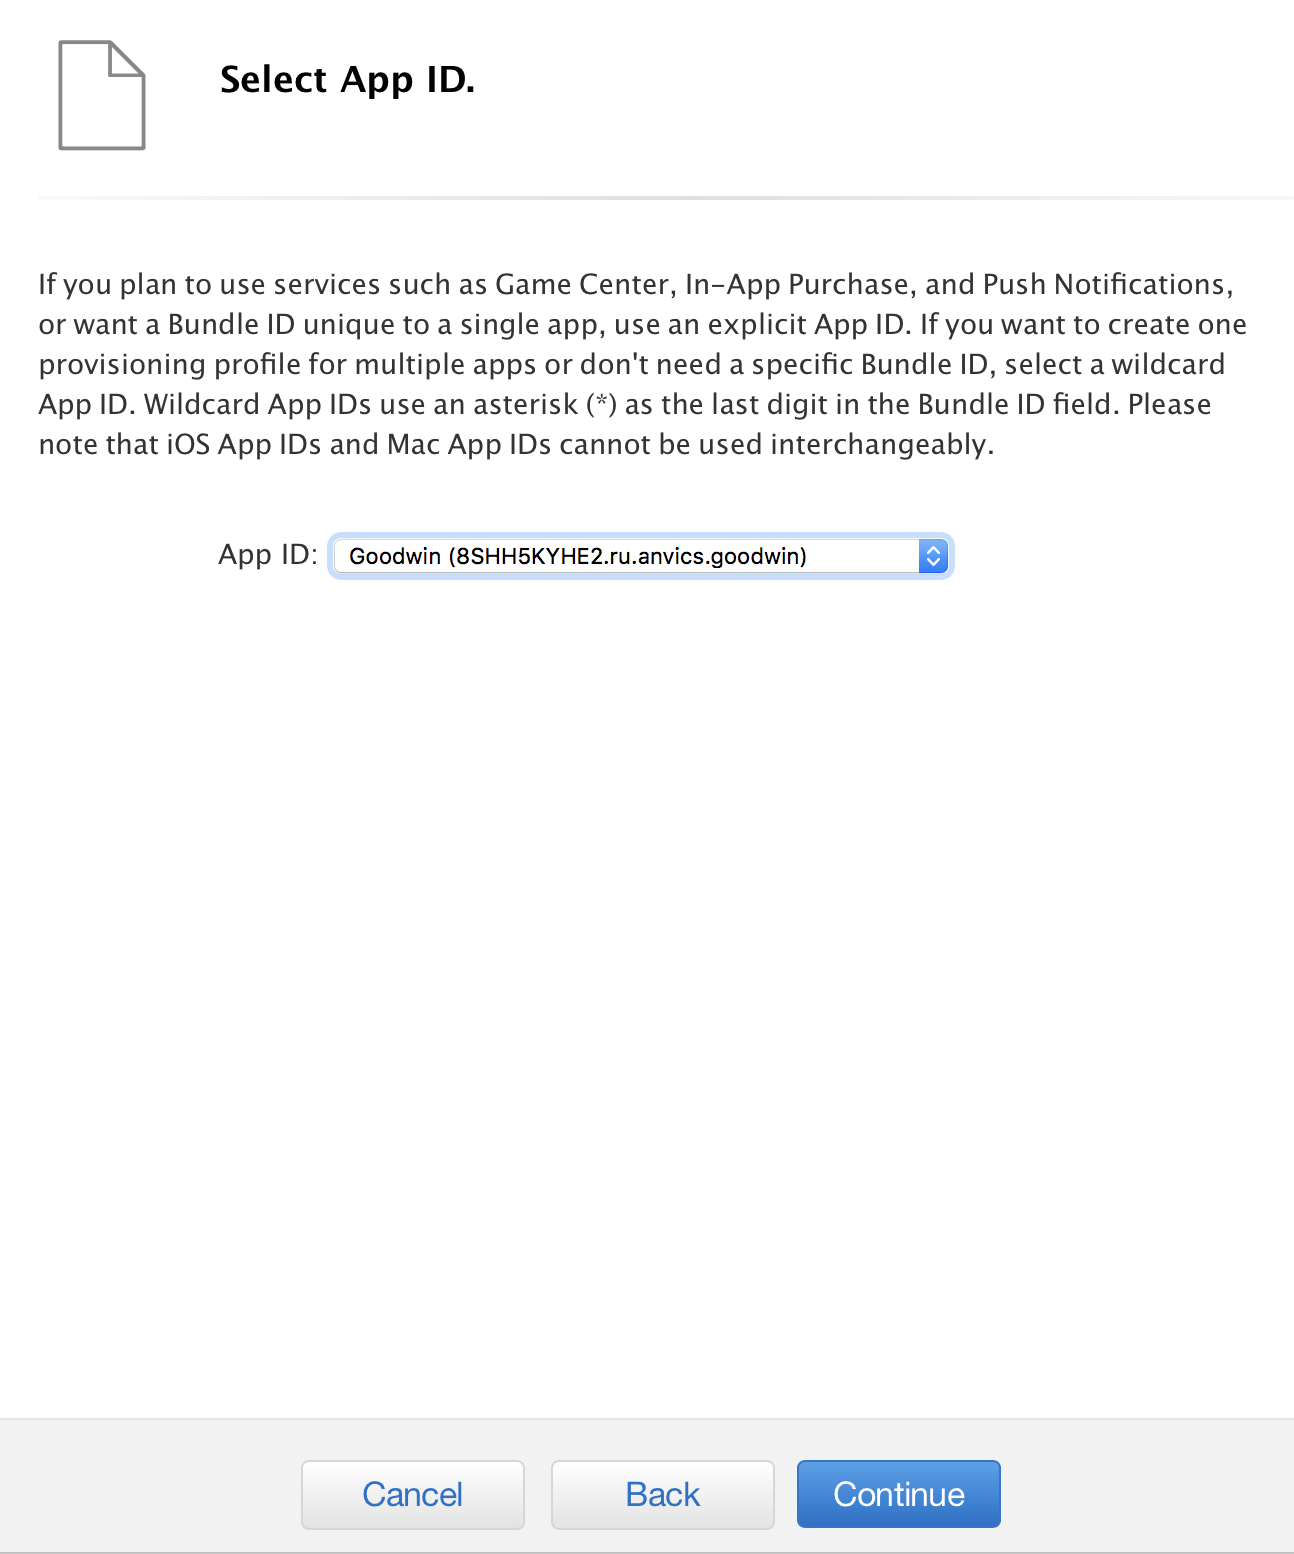
On the next screen, select the application ID that we registered:
Now select the certificate, and then enter the name for the profile (under this name it will be shown in xode - that is, this is a working name, visible only to you and Apple representatives):
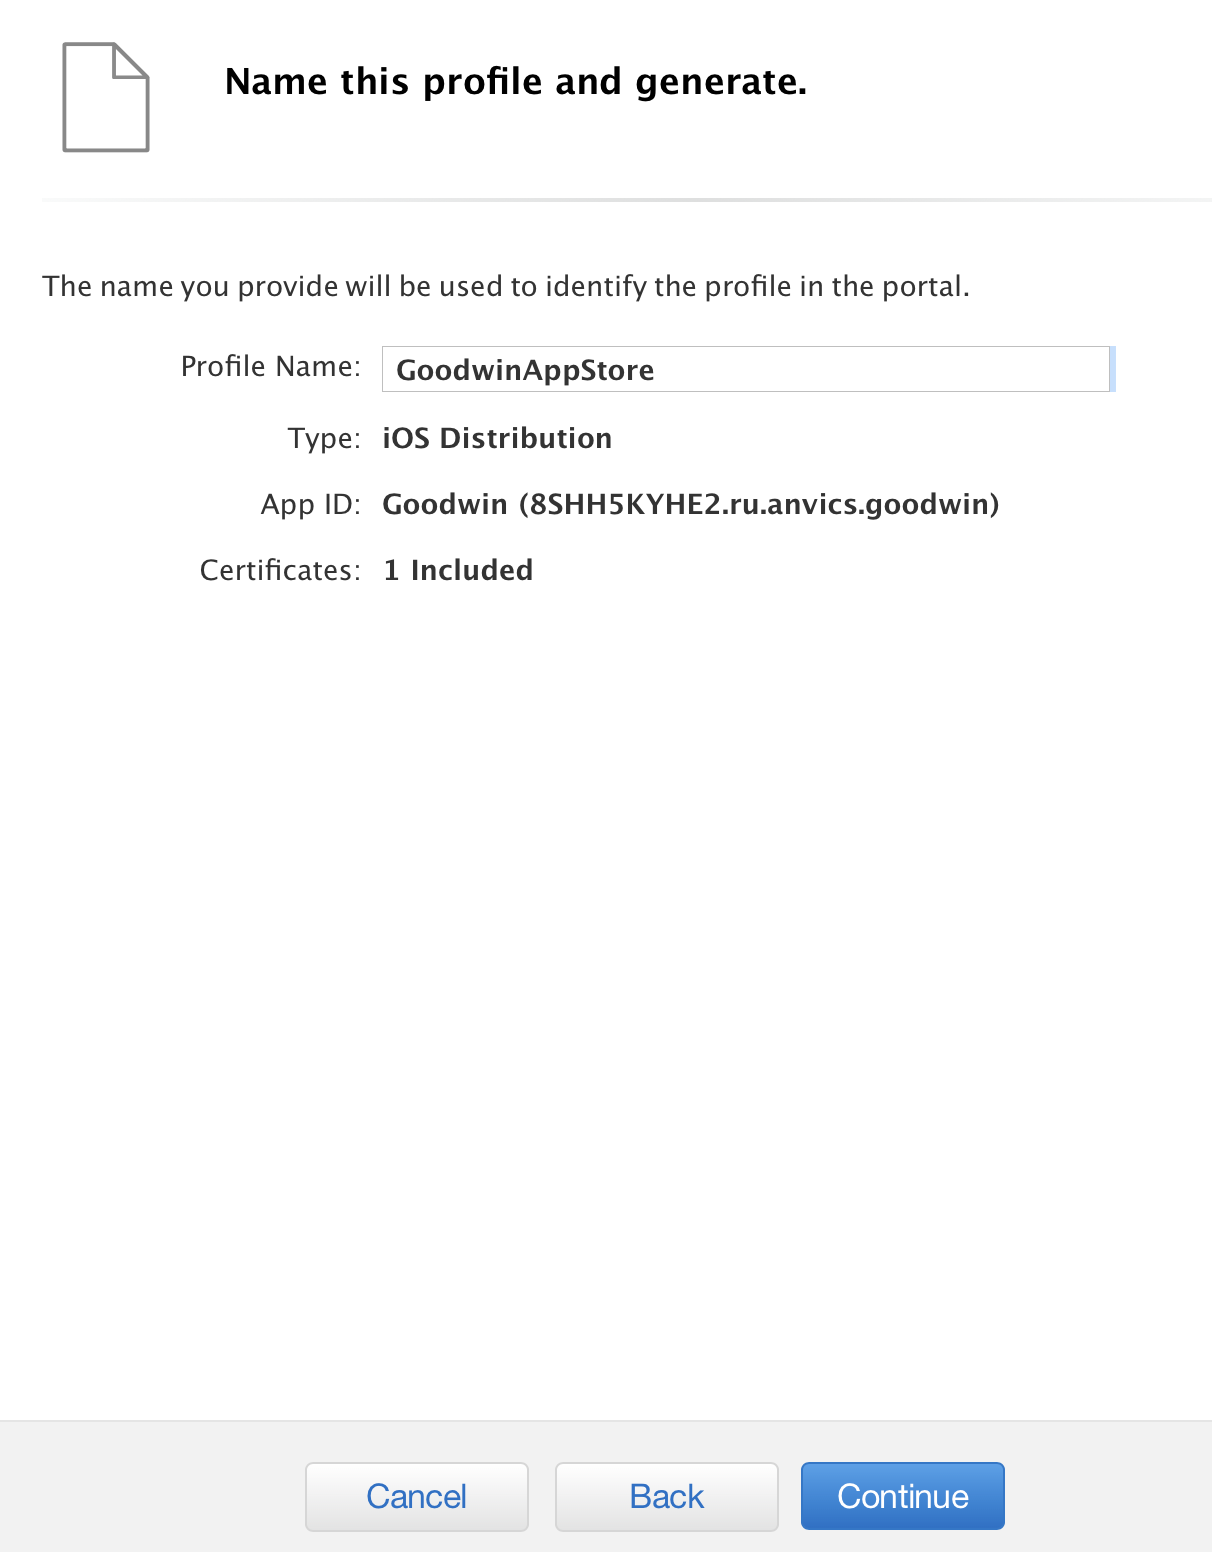
Click Continue, on the next screen - Download and double click on the downloaded file. After these simple actions, Xcode should become an active window. Everything is ready: we have created all the necessary files to sign our application.
Join iTunes Connect
Before sending the app to the App Store, you need to register it in iTunes Connect. To do this, open the site
appstoreconnect.apple.com and after
logging in with the same username / password as on developer.apple we get to the main screen:

Selecting “My apps”, click on the “plus” icon and select “New app”:

Fill all the fields in the window that opens. In the SKU field, enter the application identifier and assign the characters ".SKU":
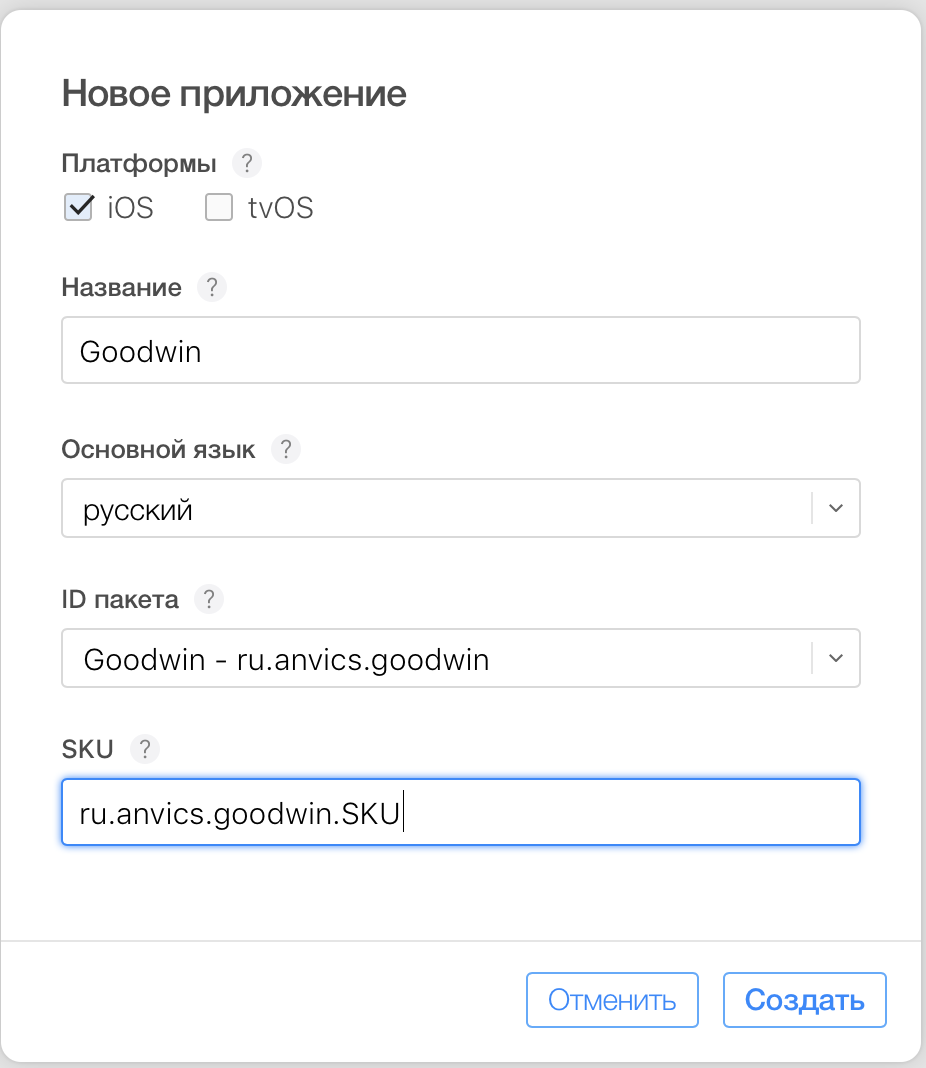
Click "Create" - now the application is registered.
Archiving application build
Go back to Xcode with the project:
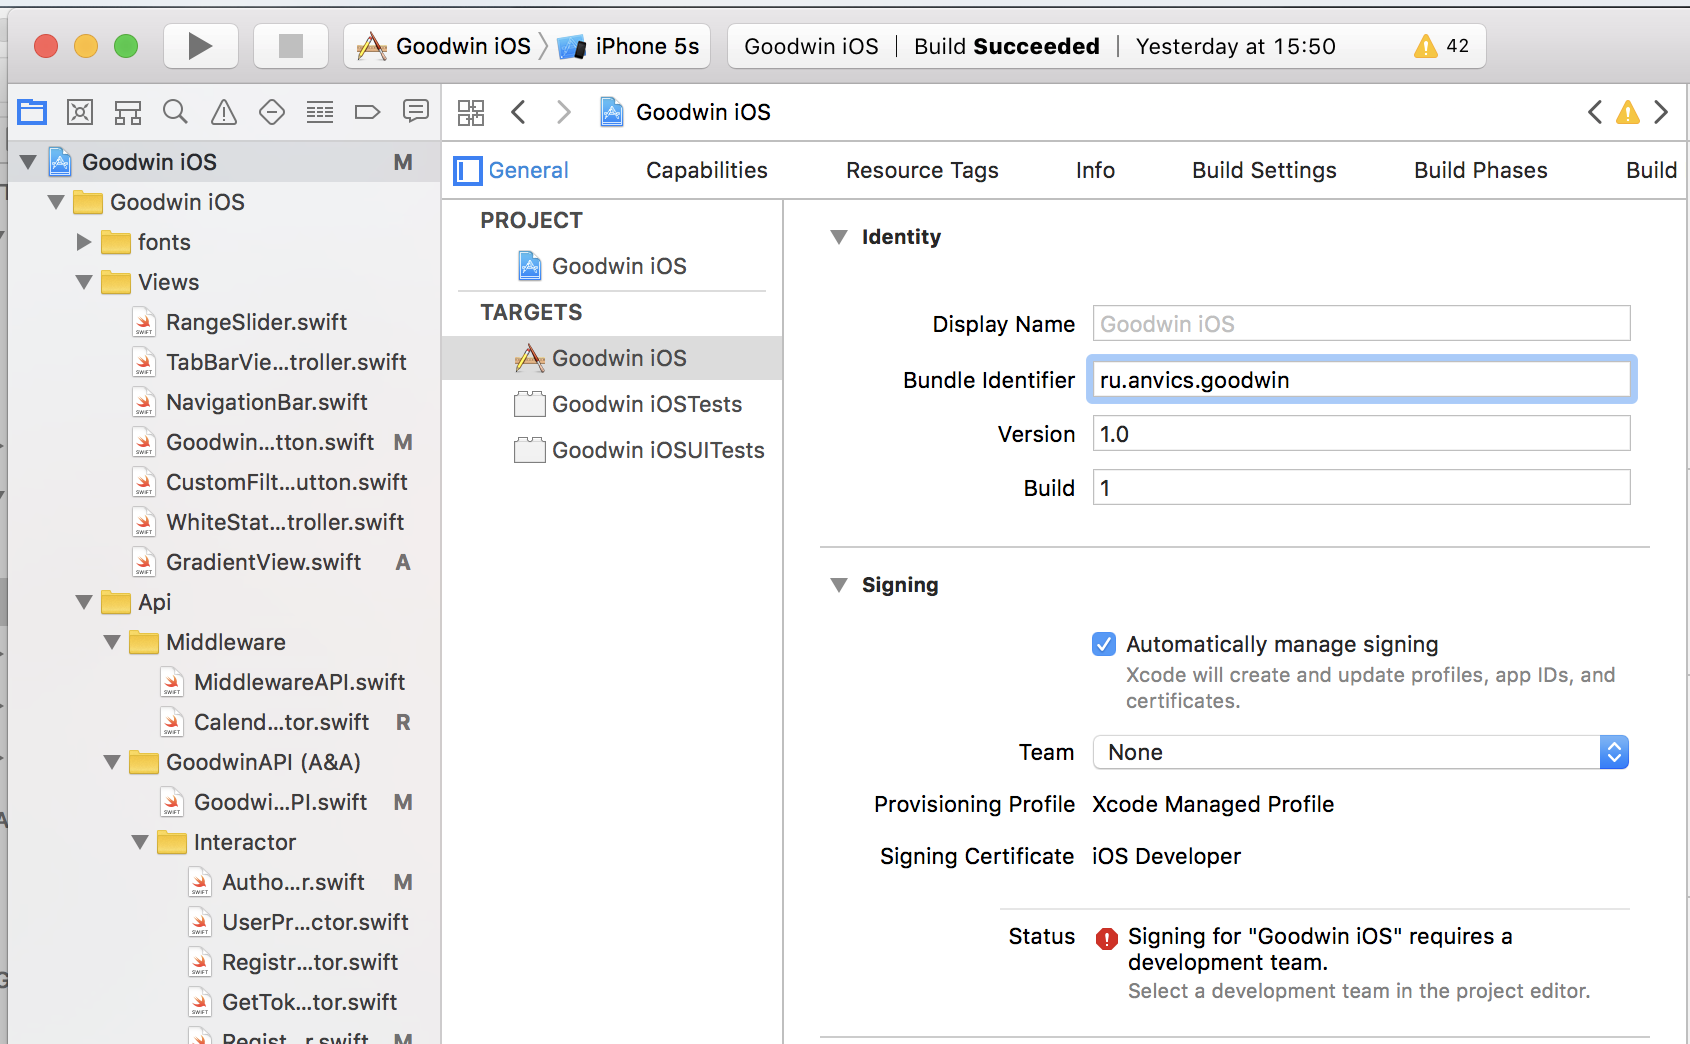
Turn off Automatically manage signing, click on None opposite Team and select Add account in the drop-down list. After that, you will see a window for entering your login and password:

After that, in the project settings, select the added command.
Now it remains to install the profile and certificate in Xcode. To do this, open the Build Settings tab (make sure that All is selected below):
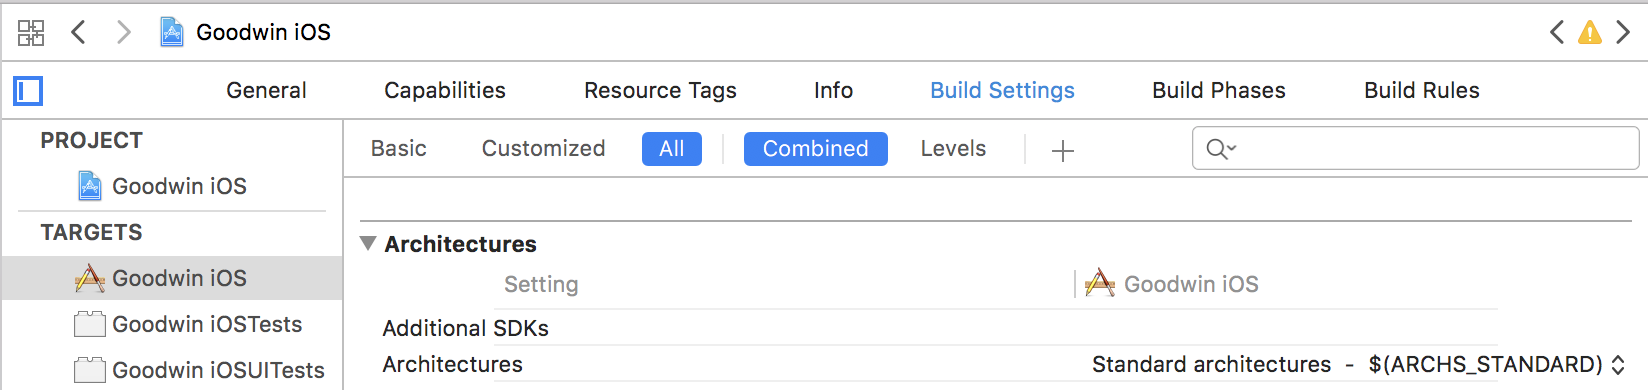
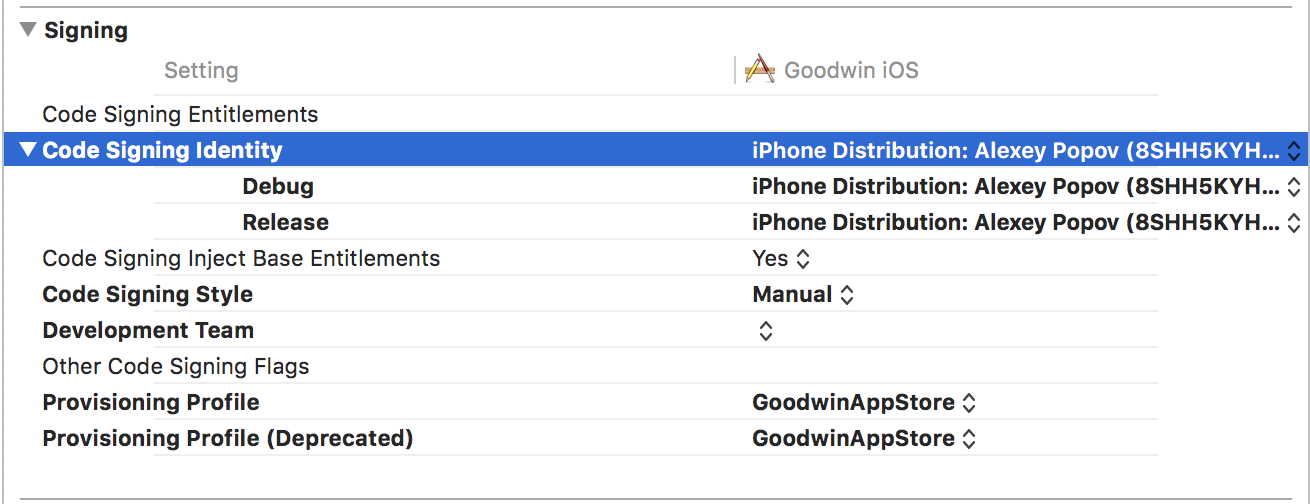
Scroll to the Signing section and select our certificate and profile there:
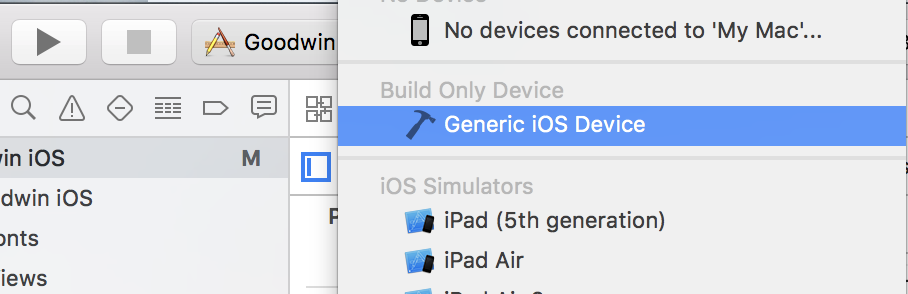
Next Target -> Generic iOS Device:
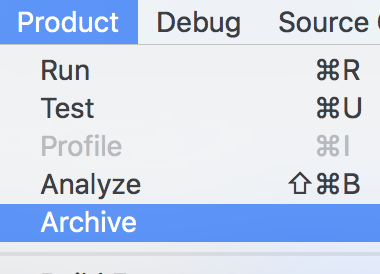
Click Product -> Archive:
We are waiting for the window to open after archiving (it can last up to half an hour):

Click Upload to App Store ...
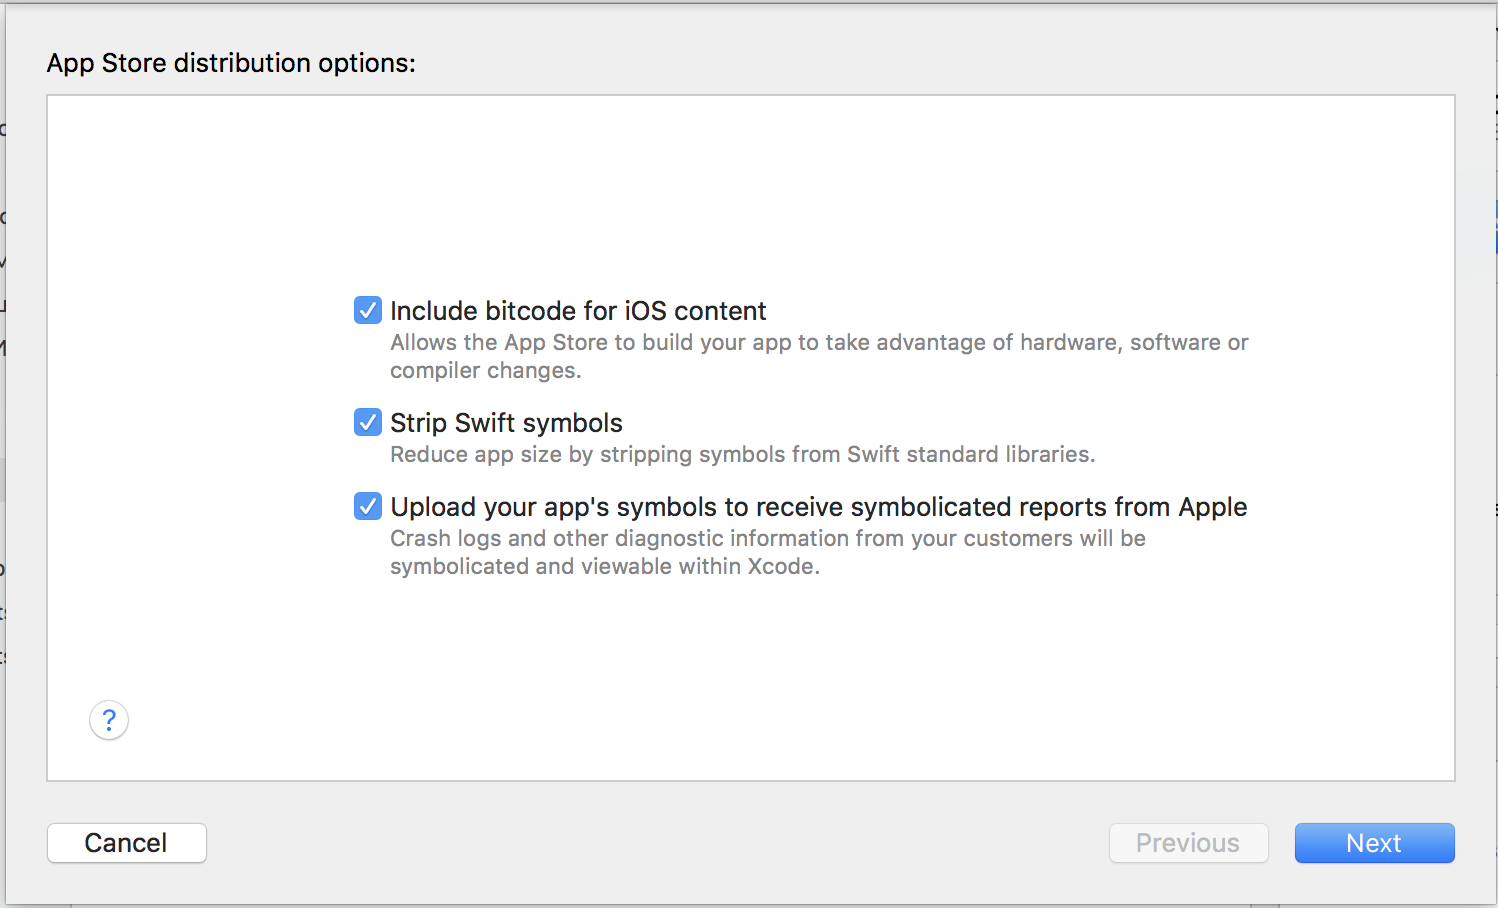
We click Next, after which Xcode will spend some time on loading and give you the following window:
Here we select our certificate and profile, click Next, then Upload and wait! After successfully downloading Xcode, after about 30–60 minutes, the build will appear in appstoreconnect.
When this happened, the assembly, along with the description of the application, the necessary documents (if any) and contact information can be sent for moderation to review team.
And here is the rebus! Remember that the word or concept hidden in it relates to mobile development, keep in mind that English can interfere with Russian, and most importantly - do not forget that we will carefully monitor the comments and delete hints and answers from them! Prudential, encrypted in the rebus, should be called when you will be contacted by our manager after you send the application for the course. Discounts for unraveled rebuses (there will be five in total, according to the number of materials) are added together, but not with discounts on the site. Too slow is not worth it - the promo works until August 30, 2018.
In a circular way
IOS, due to the specifics of the closed platform, has only one official app store - the App Store. If you make a jailbreak, you can, of course, use unofficial Cydia, but in recent years it has been losing popularity more and more, which means it has not too high user activity rates. This option may be relevant for those who do not want to be confronted with restrictions imposed by Apple, but an ordinary developer does not need it.
If you urgently need to unleash, circumvent the restrictions set by Apple, it is difficult, but it is possible. In our experience, if an application doesn’t violate the rules very much, then you can gently ask to skip it, promising to fix it in the next version, and motivate you to urgently need to get to the Store, for example, because an event is planned for tomorrow that requires the use of this application. . In general, the review team is quite friendly: its representatives are ready to meet the developers, and if you need to quickly solve the problem, you can even get in touch with them.
However, as we said above, if you systematically break the rules and send new unstable assemblies one after another, Apple may impose sanctions on you.
Each subsequent review of assemblies that violate the rules of the App Store, will increase its duration. Theoretically, you can deserve and block your account, but in practice this measure is usually not applied at the pre-release stage.
If the review command finds a deception of users or a violation of the rules in an already released application, it will be removed from the directory. Hard violations such as data theft can even lead to the deletion of an account.
Terms of Review
In most cases, a review takes 1-2 days, but it can take longer if all the necessary information is missing (for example, logins and passwords to access the closed part of the functionality) or when the application is sent again for moderation after several failures. In this case, the review takes longer with each subsequent refusal and its period may grow to a few weeks.
If you are developing applications for several platforms, remember that a review usually takes several hours on Google Play, so first of all, of course, you need to download the iOS version if the application should exit on iOS and Android at about the same time.
As you can see, there is nothing terrible about the passage of the review: Apple representatives are friendly, the rules are relatively flexible, and the timing of the review is small. And do not forget about politeness: careful reading of guidelines, independent high-quality testing and attentive attitude to the advice of review teams will ensure that you establish good relations with them and make it easy to review first time.