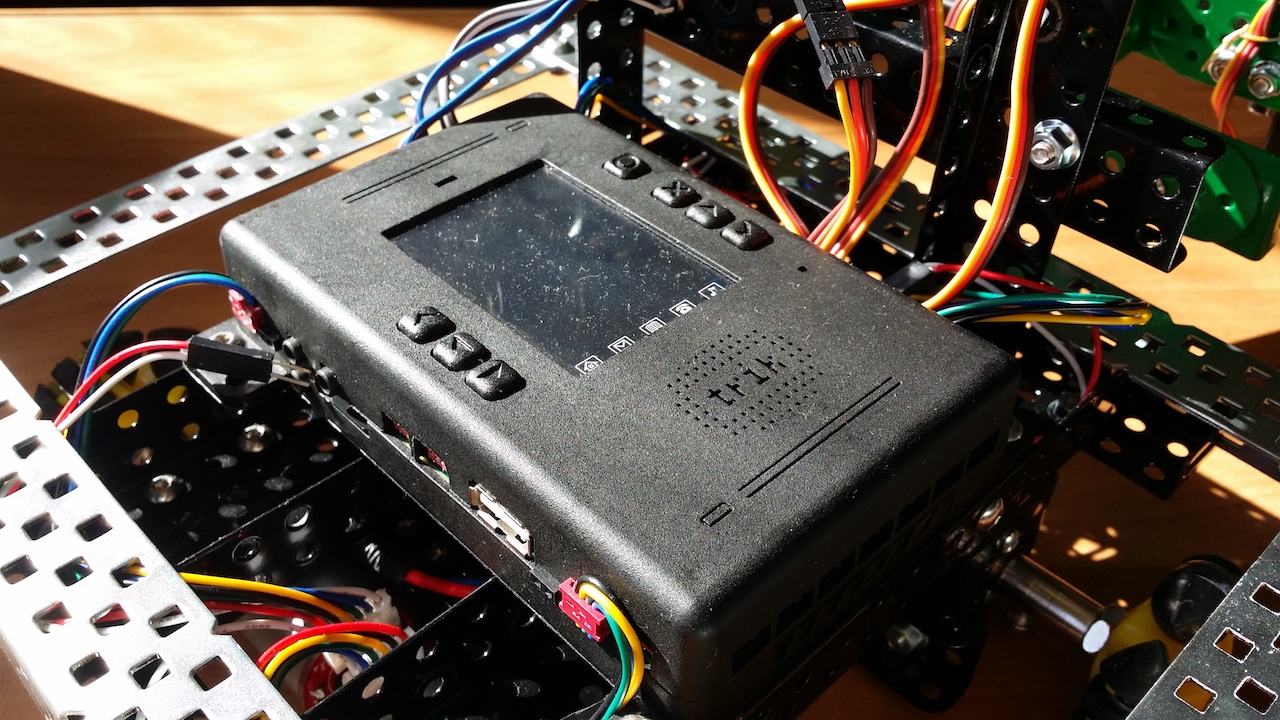
Preparing to work for the annual IT forum, the idea arose to create a simple manipulator controlled by a wireless gamepad to demonstrate the capabilities of microcontrollers and single board computers. At hand was the TRIK controller, several servomotors, an iron constructor, and a month before the start of the forum.
“Everything is going according to plan”, but not in this case.
Stage 1. Preparation
TRIK on board with Linux was a brute force for such a manipulator, but “the matter is in the banal usability and maintenance” (quote ClusterM about Linux in a smart intercom ).
After reading the specification , it was discovered that it has Bluetooth. If you worked with this controller, then you know that the transfer of programs is carried out via Wi-Fi and there are no other convenient ways to communicate with it. The menu does not mention the presence of Bluetooth. But how?
Armed with SSH, I began to look for Bluetooth with a screwdriver and curiosity. The system contains utilities hcitool, hciconfig and the demon bluetoothd. They all said that he was not.
root@trik-7dda93:~
root@trik-7dda93:~
root@trik-7dda93:~
Calling friends in search of an external USB module, I continued to search.
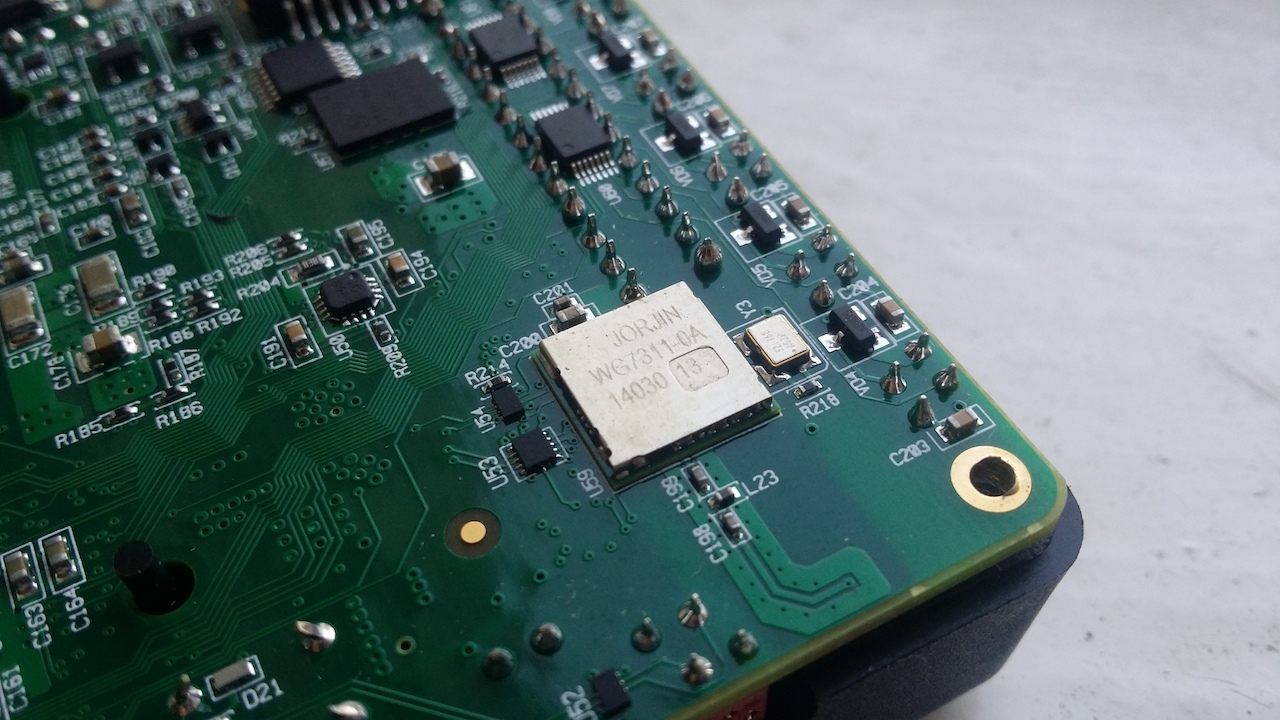
Having examined the controller, the Jorjin WG7311-0A module was found. The specification states that, indeed, there is Wi-Fi, Bluetooth and even FM radio. The interface for communicating with Bluetooth is the UART, and it is turned on via the BT_EN contact.
After reading how the Bluetooth module is connected via UART via hcitool, I was lucky and nothing. Two of the three free UART ports were silent.
But we have contact BT_EN! It is possible that the module is simply turned off and does not respond to requests. Having studied the Linux kernel device for ARM devices, a file was found where all the contacts used by the SoC are written. Having opened arch/arm/mach-davinci/board-da850-trik.c in the kernel source code, a GPIO contact for Bluetooth was indeed found. Victory! - I thought.
static const short da850_trik_bluetooth_pins[] __initconst = { DA850_GPIO6_11, DA850_GPIO6_10, -1 };
Stage 2. Offensive
To enable a contact through GPIO, you need to find its pass-through sequence number. We find the following line in the kernel code with the request to initialize the BT_EN_33 contact in arch/arm/mach-davinci/board-da850-trik.c :
ret = gpio_request_one(GPIO_TO_PIN(6, 11), GPIOF_OUT_INIT_LOW, "BT_EN_33")
It uses the macro GPIO_TO_PIN. See the macro description in arch/arm/mach-davinci/include/mach/gpio-davinci.h :
#define GPIO_TO_PIN(bank, gpio) (16 * (bank) + (gpio))
With the help of it and you can find out the through number of the contact. We get that 16 * 6 + 11 = 107. Now we turn to the inclusion of the contact.
echo 1 >> /sys/devices/virtual/gpio/gpio107/value
0 or 1 in the echo command is the contact state.
Run the command to connect and ...
root@trik-7dda93:~
incomprehensible for us (at the moment) error messages. We try to configure the device through hcitool:
root@trik-7dda93:~
No devices, although the initialization allegedly passed. We try to connect a second time, but with a different type of adapter:
root@trik-7dda93:~
Again, nothing. Let's go back to the first error and apply the knowledge of English:
Warning: cannot find BTS file: /lib/firmware/TIInit_7.6.15.bts
Open the folder / lib / firmware with firmware and do not find the desired file. After a long search on the Internet, we find the necessary file on the TI repository and download it. Other versions of the same file refused to work.
curl -k https://git.ti.com/wilink8-bt/ti-bt-firmware/blobs/raw/45897a170bc30afb841b1491642e774f0c89b584/TIInit_7.6.15.bts > TIInit_7.6.15.bts cp TIInit_7.6.15.bts /lib/firmware/TIInit_7.6.15.bts
Reboot the controller and reconnect:
root@trik-7dda93:~
Hooray! The firmware has loaded. Check hciconfig:
root@trik-7dda93:~
We start the bluetoothd service, scan devices and detect our module:
root@trik-7dda93:~
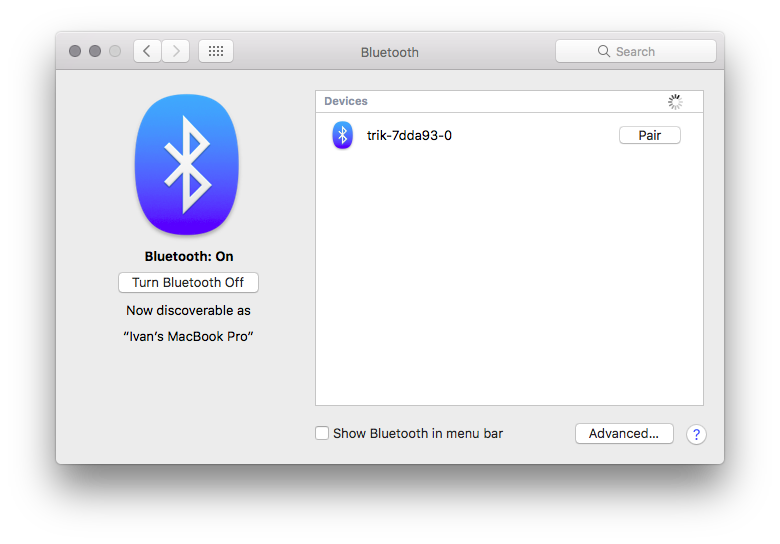
A search on the computer detects the device:
To enable Bluetooth, you can make a script:
And add it to autorun:
cp init-bluetooth /etc/init.d/init-bluetooth update-rc.d init-bluetooth enable 99
Restarting and disabling the module behave unpredictably, so the options stop and restart have no commands.
Stage 3. Checking the connection
The easiest way to verify communication in both directions is the COM port service. With the help of several commands we include it:
root@trik-7dda93:~
Connect from the phone and see an invitation to enter the system:
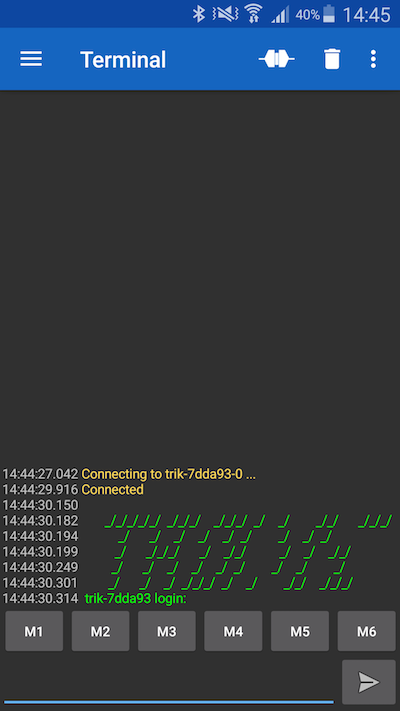
None of the verified terminals gave an empty user password, so I had to send the login information using the redirection of flows in the SSH session.
Following the instructions for connecting the gamepad in Linux, we encounter the following problems:
- BlueZ in the distribution is outdated and does not understand the commands from the demon sixad, which establishes communication with the gamepad
- The new version of BlueZ from source codes refuses to compile due to a multitude of dependencies
- BlueZ from fresh Debian requires udev and systemd, which are missing in the current distribution
The only dependency that we managed to satisfy is the uinput kernel module.
For this:
- get the current kernel configuration on the device
cp /proc/config.gz config.gz gunzip config.gz
- download the kernel code
- download and install toolchain
- we copy a configuration of a kernel in a folder with a kernel code
- add uinput module to configuration
echo "CONFIG_INPUT_UINPUT=m" >> config
- run the build by first turning on the toolchain
source /opt/trik-sdk/environment-setup-arm926ejste-oe-linux-gnueabi make
- we copy kernel modules on a memory card
make INSTALL_MOD_PATH=/mnt/trik-sd modules_install
- collect the uBoot image and copy to / boot
make uImage cp arch/arm/boot/uImage /mnt/trik-sd/boot/uImage-3.6.7
Now the program does not swear at the absence of a kernel module, but then we can not do anything. Instructions for the gamepad will be useful to us later.
Stage 5. Cook the porridge from the ax
We start the plan "tyap-lyap". If there is no convenient way to put the necessary programs on the original distribution, then we put something popular. The processor has the architecture of ARMv5TE, which means that distributions are there for it.
We try to unpack and run the universal Arch Linux for ARM and when loading into the console we see that systemd requires a newer version of the kernel, which we do not have. Attempts to transfer the 4.16 kernel were not crowned with great success, and too much time was spent on it.
Moving on to another option is Debian. A disk image with the installed system for ARM exists, but it is better to put a clean system with the necessary packages and settings for us.
Installation in QEMU
Download the installation image (link to .iso ) and install QEMU.
We also need a kernel and an initrd image to boot the installation, which can be downloaded from here .
Create an image of a memory card with the size of a real memory card (in this case 4 GB):
qemu-img create -f raw debian.img 4G
Run the installation:
qemu-system-arm -M versatilepb -kernel vmlinuz-3.2.0-4-versatile -initrd initrd.gz -hda debian.img -cdrom debian-7.11.0-armel-CD-1.iso
If you are going to partition the disk with a non-standard relative original distribution, leave the root partition first, otherwise you will have to change the kernel boot options in uBoot. There is registered the number of the partition on which the root file system is located.
Standard markup contains:
- Section EXT4 for the root file system of size ≈ 1.3 GB
- FAT32 section for storing user data in the size of ≈ 500 MB
The fdisk output for the original distribution image:
Disk: trik-distro.img geometry: 893/64/63 [3604478 sectors] Signature: 0xAA55 Starting Ending #: id cyl hd sec - cyl hd sec [ start - size]
After setting the parameters, we go to drink a few cups of tea, because The emulator is not much faster than a real ARM processor.
To start the installed system, you will need another initrd image, which can be taken from here .
Run the system:
qemu-system-arm -M versatilepb -kernel vmlinuz-3.2.0-4-versatile -initrd initrd.img-3.2.0-4-versatile -hda debian.img -append "root=/dev/sda1"
System Setup
After the launch, we enter the superuser, check the connection with the Internet, update the repositories and the system, set a minimum set of programs:
apt-get update apt-get upgrade apt-get install curl git mc htop joystick
Terminals
We edit /etc/inittab , remove unnecessary terminals, enable the UART we need and add autologin for the desired user (use root only for debugging). Autologin is useful if you plan to run a shell to control the controller.
1:2345:respawn:/sbin/getty 38400 tty1 --autologin root
Bluetooth and Wi-Fi
Install bluez-utils and wpasupplicant to access Wi-Fi and Bluetooth.
apt-get install bluez-utils wpasupplicant
Disable the eth0 interface and configure the wlan1 interface in /etc/network/interfaces :
# /etc/network/interfaces -- configuration file for ifup(8), ifdown(8) # The loopback interface auto lo iface lo inet loopback # Wireless interfaces auto wlan1 iface wlan1 inet dhcp wireless_mode managed wireless_essid any wpa-driver wext wpa-conf /etc/wpa_supplicant.conf
Add the network in advance in /etc/wpa_supplicant.conf , because doing it on the controller itself is not so convenient:
wpa_passphrase ssid password >> /etc/wpa_supplicant.conf
If you do not have access to Wi-Fi, you can use the UART for further configuration, but note that by default the kernel sends all errors to this terminal. Therefore, while running, you may be interrupted by a sudden message from the kernel or service.
Add a script to turn on Bluetooth. This time, we modify /etc/init.d/bluetooth :
139: case $1 in start) echo 1 >> /sys/devices/virtual/gpio/gpio107/value 168: hciattach /dev/ttyS0 texas log_end_msg 0 ;;
Thus, all services that require the Bluetooth service will run the necessary commands for initialization.
Swipe left, swing right
We remove unnecessary programs and services that can be viewed with the help of htop, because they occupy precious space in RAM:
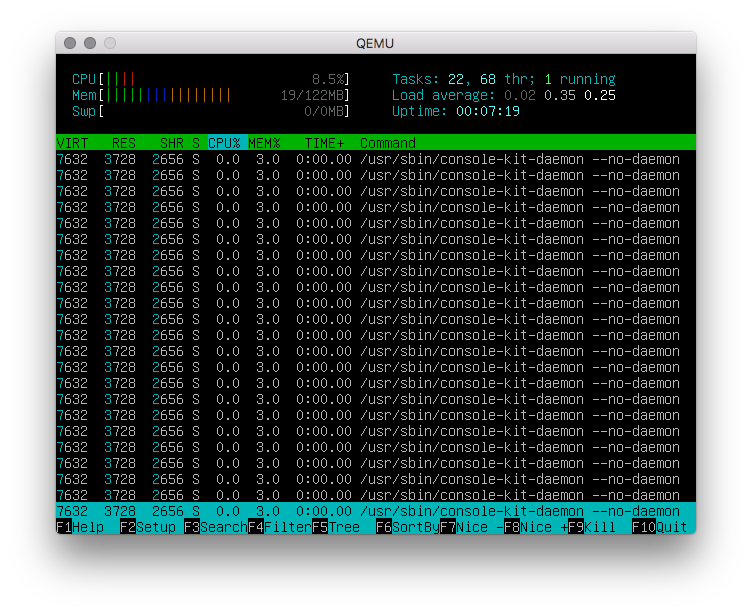
In this case, the ConsoleKit service has a lot of processes . Move the file of this service to the home folder of the superuser in case of recovery:
mv /usr/share/dbus-1/system-services/org.freedesktop.ConsoleKit.service /root/
Before shutting down the service, the consumption of RAM was 19 MB, and after - 16 MB.
System sections
Although uBoot passes the device on which the root partition is located to the kernel, you should write it in /etc/fstab for reliability. Change the first line responsible for the root section:
/dev/mmcblk0p1 / auto defaults 1 1 proc /proc proc defaults 0 0 devpts /dev/pts devpts mode=0620,gid=5 0 0 usbdevfs /proc/bus/usb usbdevfs noauto 0 0 tmpfs /run tmpfs mode=0755,nodev,nosuid,strictatime 0 0 tmpfs /var/volatile tmpfs defaults 0 0
If you did not make the root partition the first, do not forget to specify the desired partition number.
If you left the second FAT partition for user data, then you need to create a folder to mount the partition into it.
mkdir /usr/share/trik
and register the section in /etc/fstab :
/dev/mmcblk0p2 /usr/share/trik vfat defaults 0 0
Stage 6. We taste our porridge
Having configured the system image, you need to mount it to install the kernel modules and the kernel itself:
where, NNNN = sector size * beginning of the section. The default sector size is 512 bytes.
We also mount the original distribution:
fdisk -l trik-distro.img mount -o loop,offset=NNNN trik-distro.img /mnt/trik-clean
Remove the kernel for QEMU and its modules, since they are not intended for our platform. We copy the new kernel and modules, as well as on the original distribution.
rm -rf /mnt/debian/boot/ rm -rf /mnt/debian/lib/modules/3.2.0-4-versatile rm -rf /mnt/debian/lib/modules/3.2.0-5-versatile mkdir /mnt/debian/boot/ cp arch/arm/boot/uImage /mnt/debian/boot/ make INSTALL_MOD_PATH=/mnt/debian modules_install
We will need the firmware for the Wi-Fi module, which is in the original distribution in the folder / lib / firmware and the Bluetooth firmware that we found earlier.
cp /mnt/trik-clean/lib/firmware/* /mnt/debian/lib/firmware/ cp TIInit_7.6.15.bts /mnt/debian/lib/firmware/
Disconnect disk images:
umount /mnt/trik-clean umount /mnt/debian
And start copying the image to the memory card using dd:
# ( ) lsblk dd if=debian.img of=/dev/sdX bs=4M
Stage 7. Finish line
Compile the program to connect the gamepad on the new system and install the sixad daemon.
Connect the gamepad via USB to the controller and run the program to create a pair:
root@trik:~/bt
When the gamepad is connected, nothing happens and the sixad service is silent:
sixad-bin[2675]: started sixad-bin[2675]: sixad started, press the PS button now sixad-bin[2675]: unable to connect to sdp session
But in the community Raspberry Pi have already made a "crutch" to fix the connection .
Rebuild the program and enjoy.
sixad-bin[2833]: started sixad-bin[2833]: sixad started, press the PS button now sixad-bin[2833]: unable to connect to sdp session sixad-sixaxis[2836]: started sixad-sixaxis[2836]: Connected 'PLAYSTATION(R)3 Controller (00:**:**:**:**:09)' [Battery 02]
Now the gamepad is available to the system as an input device and the jstest program will show the status of all buttons and analog sensors:
root@trik:~# ls /dev/input/ by-path event0 event1 event2 event3 js0 js1 js2 mice root@trik:~# jstest --normal /dev/input/jsX Driver version is 2.1.0. Joystick (PLAYSTATION(R)3 Controller (00:**:**:**:**:09)) has 29 axes (X, Y, Z, Rx, Ry, Rz, Throttle, Rudder, Wheel, Gas, Brake, ?, ?, ?, ?, ?, ?, ?, ?, ?, ?, (null), (null), (null), (null), (null), (null), (null), (null)) and 17 buttons (Trigger, ThumbBtn, ThumbBtn2, TopBtn, TopBtn2, PinkieBtn, BaseBtn, BaseBtn2, BaseBtn3, BaseBtn4, BaseBtn5, BaseBtn6, BtnDead, BtnA, BtnB, BtnC, BtnX). Testing ... (interrupt to exit) Axes: 0: 0 1: 0 2: 0 3: 0 4: -7150 5: -7746 6:-32767 7: 0 8: 0 9: 0 10: 0 11: 0 12: 0 13: 0 14: 0 15: 0 16: 0 17: 0 18: 0 19: 0 20: 0 21: 0 22: 0 23: 0 24: 0 25: 0 26: 0 27: 0 28: 0 Buttons: 0:off 1:off 2:off 3:off 4:off 5:off 6:off 7:off 8:off 9:off 10:off 11:off 12:off 13:off 14:off 15:off 16:off
where X is the device number in the system, the default is 2. The numbers of the buttons and axes can be found here .
We use in practice
Video demonstration of the gamepad on YouTube .
Photos of the distribution useful links
Programs for connecting the gamepad Dualshock 3 - sixpair and sixad .
For gamepads and other input devices there is an easy library on C - libenjoy .
The source code for servomotor and motor control is the GitHub repository .
All configuration files from the article for homemade distribution - the GitHub repository .
The source code for the kernel is the GitHub repository .
Interesting facts about the controller
- The specification states that the amount of RAM is 256 MB. But if you run htop, you will see that only 128 MB is available. This is limited by the kernel parameters, which can be viewed in the uBoot console:
mem=128M console=ttyS1,115200n8 rw noinitrd rootwait root=/dev/mmcblk0p1 vt.global_cursor_default=0 consoleblank=0
The memory chip is marked 3PC22 D9MTD production Micron. Find information about its present volume failed.
- The uBoot is stored on an SPI flash memory in which the kernel is also wired, and it is not used. You can try to use this place for your tasks or copy the new kernel and reconfigure uBoot to use it.
Image addresses from dmesg:
[ 11.598170] 0x000000000000-0x000000040000 : "uboot" [ 11.642985] 0x000000040000-0x000000080000 : "uboot-env1" [ 11.706256] 0x000000080000-0x0000000c0000 : "uboot-env2" [ 11.761827] 0x0000000c0000-0x000000100000 : "config-periph" [ 11.805129] 0x000000100000-0x000000400000 : "kernel" [ 11.861864] 0x000000400000-0x000001000000 : "RootFS"
- The screen of the controller, though small, actually has a resistive sensor. Whether the sensor itself is connected is unknown.
- Dualshock 3 has LEDs at the USB connector, which show the number of the gamepad / joystick. There is one gamepad in the video, but its number is 3. This is not an error, because There are two more "joysticks" in the system: an accelerometer and a gyroscope.
Problems encountered when using
- The robot sometimes freezes tightly without disconnecting the servomotors, which allows them to change their position from the noise on the data line. This was noticed even on the standard distribution .
- Enabling PWM controllers is different from what is written in the documentation . At least, in pure C it did not work out.
- USB sometimes stops working on Debian.