
One of the advantages of the
Robot Operating System (ROS) is that it has many packages that can be reused in our applications. In our case, we want to implement an object recognition and detection system. The
find_object_2d package implements
SURF, SIFT, ORB, FAST and BRIEF function detectors and descriptors for object detection . Using the graphical interface provided by this package, we can mark the objects we want to detect and save them for future detection. The detector node will detect objects in camera images and publish object details through the subject. Using a 3D sensor, he can estimate the depth and orientation of the object.
At the end of the article, video testing on the example of the ORB and SIFT algorithms.
Installing find_object_2d
Installing this package is pretty simple. Here is the command to install it on Ubuntu 16.04 and Kinetic ROS:
$ sudo apt-get install ros-kinetic-find-object-2d
Installation from source code
Switch to the ROS workspace:
$ cd ~/catkin_ws/src
Copy the source code to the src folder:
$ git clone https://github.com/introlab/find-object.git src/find_object_2d
Create a workspace:
$ catkin_make
Starting find_object_2d nodes using webcams
Below is the procedure for launching detector nodes for a webcam. If we want to detect an object using a webcam, we first need to install the usb_cam package (see previous article).
1. Run roscore:
$ roscore
2.1 Connect the USB camera to the computer and run the usb_cam ROS driver:
$ roslaunch usb_cam usb_cam-test.launch
This will launch the ROS driver for USB webcams, and you can view the themes in this driver using the rostopic list command. The list of topics in the driver is shown here:
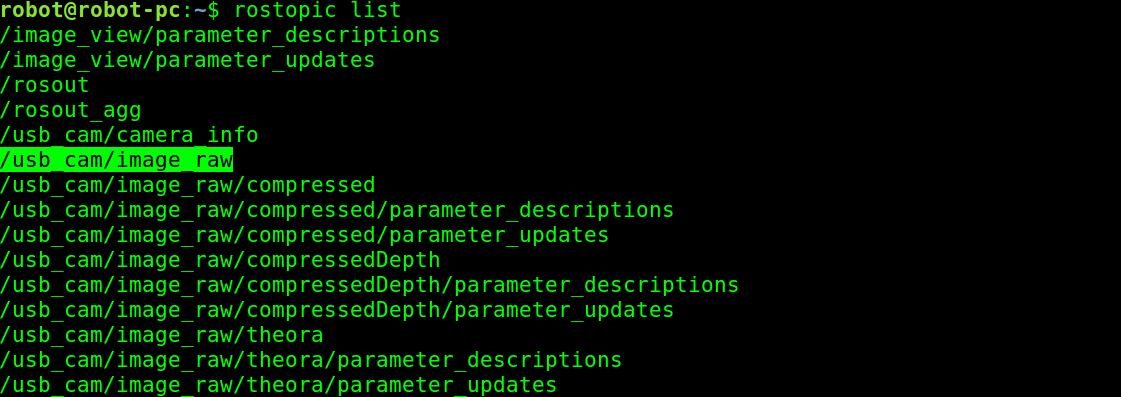 Topics Published From Camera Driver
2.2 Alternative version of the broadcast video from the camera via uvc_camera:
$ rosrun uvc_camera uvc_camera_node
3. From the list of topics we are going to use the theme of the raw image from the camera, which is published in the topic / usb_cam / image_raw. If you receive this topic, the next step is to launch the object detection node. The following command will start the object detection node:
$ rosrun find_object_2d find_object_2d image:=/usb_cam/image_raw
This command will open the object detection window, in which we see the camera channel and features of objects.
4. So, how can we use it to detect an object? Below are the procedures that allow you to perform basic discovery with this tool:
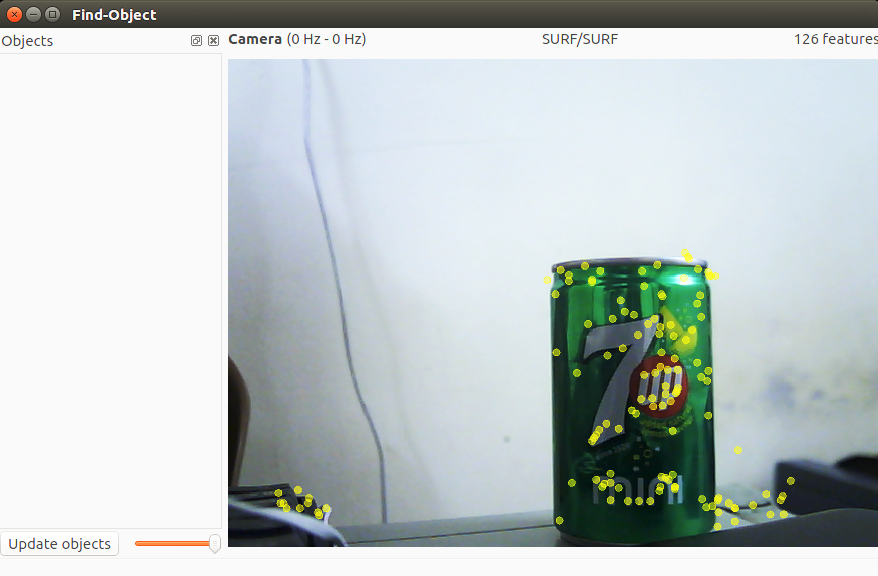 Find-Object Detection Window
5. You can right-click on the left side panel (Objects) of this window, and you will be able to add objects from the scene. If you select this option, you will be prompted to mark an object from the current scene, and after the marking is completed, the marked object will begin to be tracked from the scene. In the previous screenshot, the first step is shown in which a scene that has an object is shot.
6. After aligning the object towards the camera, click the “Take Picture” button to click the object:
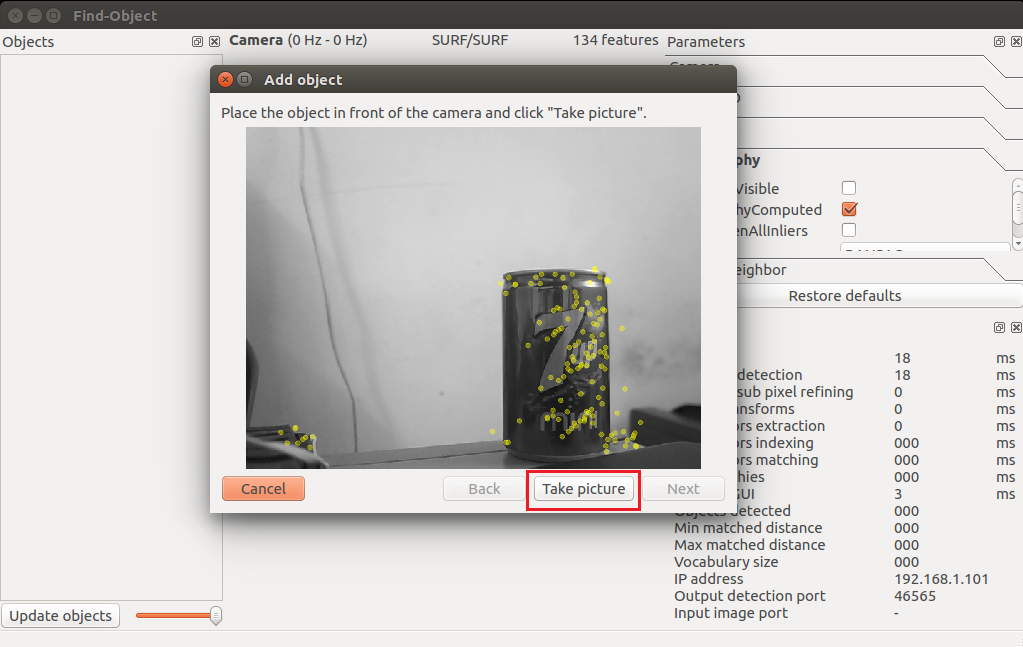 Add Object Wizard to capture an object
7. The next window is intended for marking the object from the current binding. The following figure shows this. We can use the mouse pointer to mark an object. Click the Next button to trim the object, and you can proceed to the next step:
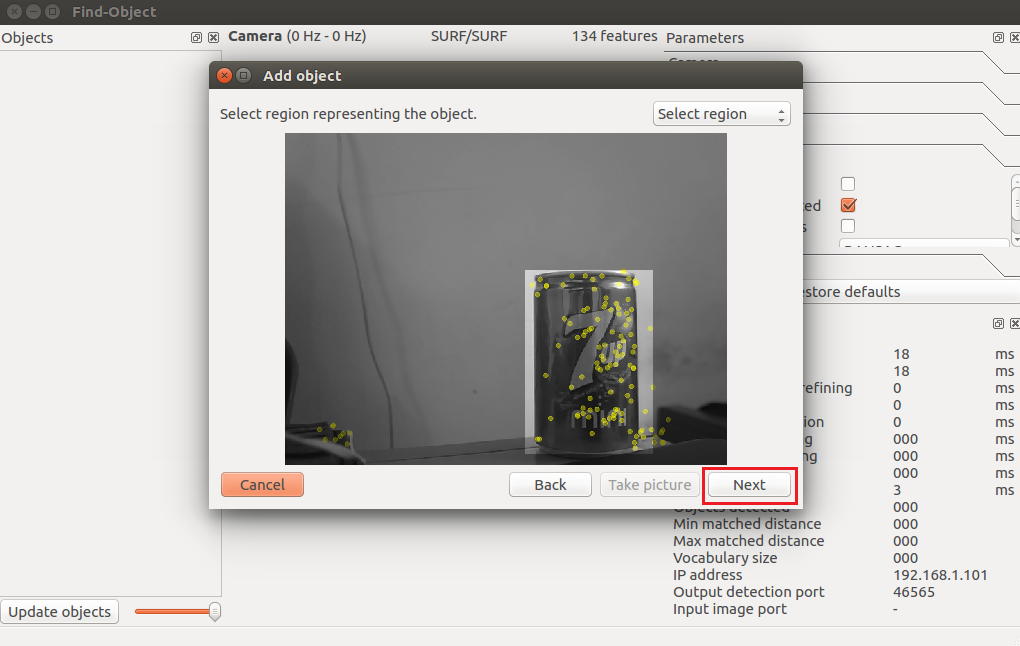 Add Objects Wizard for object marking
8. After trimming the object, it will show you the total number of function descriptors of the object, and you can click the End button to add an object template for detection. The following figure shows the final step in adding an object template to this detector application:
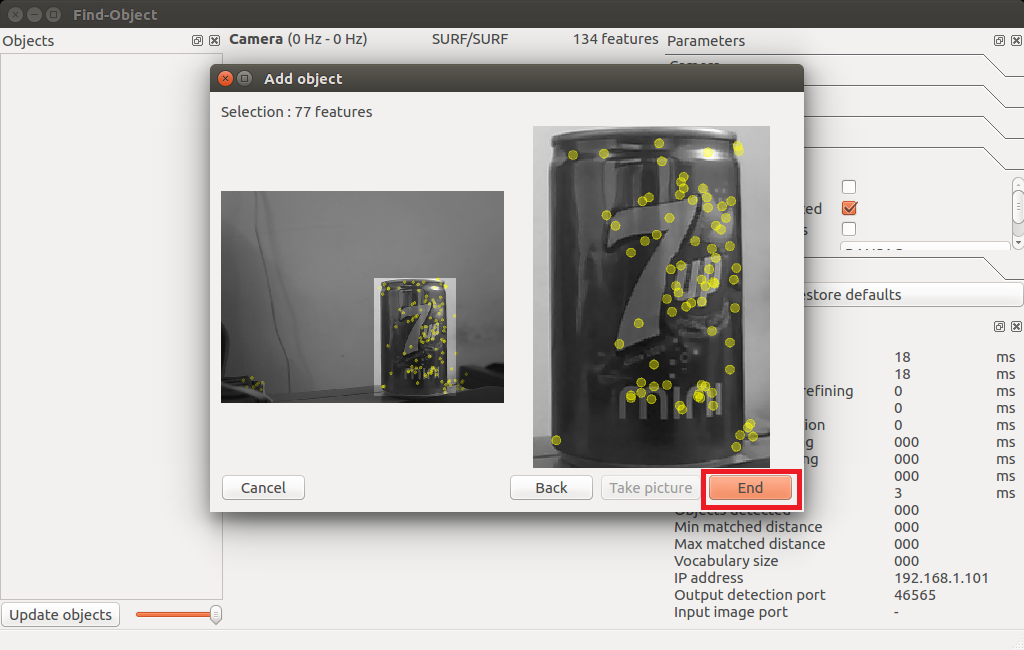 Last step of the add object wizard
9. Congratulations! You have added an object to be detected. Now you can see the detection shown in the following snapshot. You can see the bounding box around the detected object:
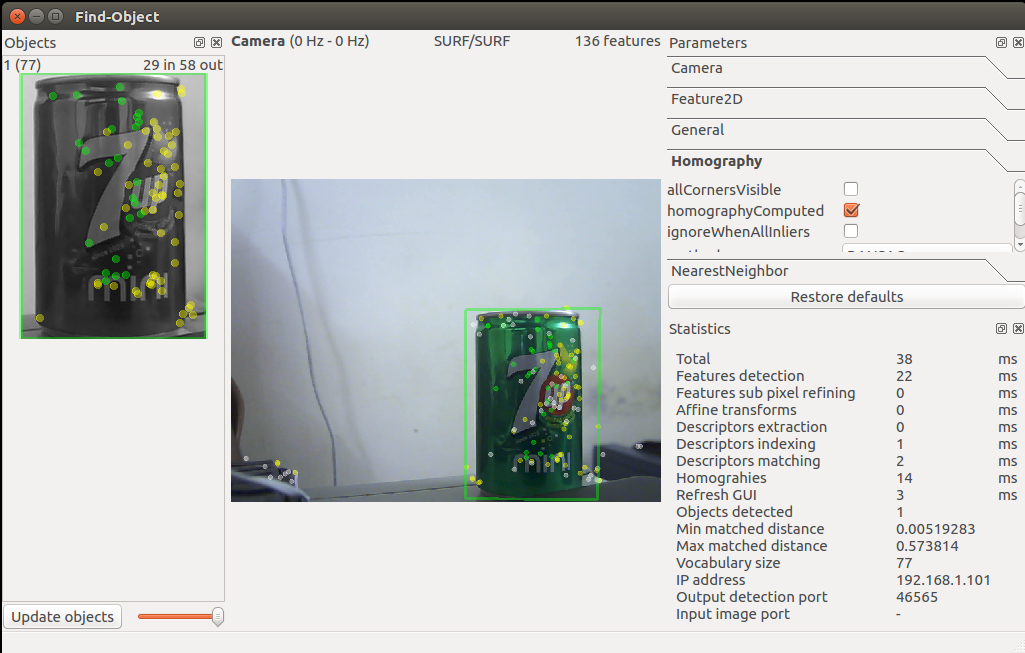 Find-Object wizard that starts detection
10. Is this enough? How about the position of the object? We can get
object positions using the following command:
$ rosrun find_object_2d print_objects_detected
 Object details
11. You can also get complete information about the detected object from
/ object topic. This topic publishes a multicast array, consisting of the width and height of the object and the homography matrix to calculate the position and orientation of the object and its scale and shift values. You can echo the / objects topic get this:
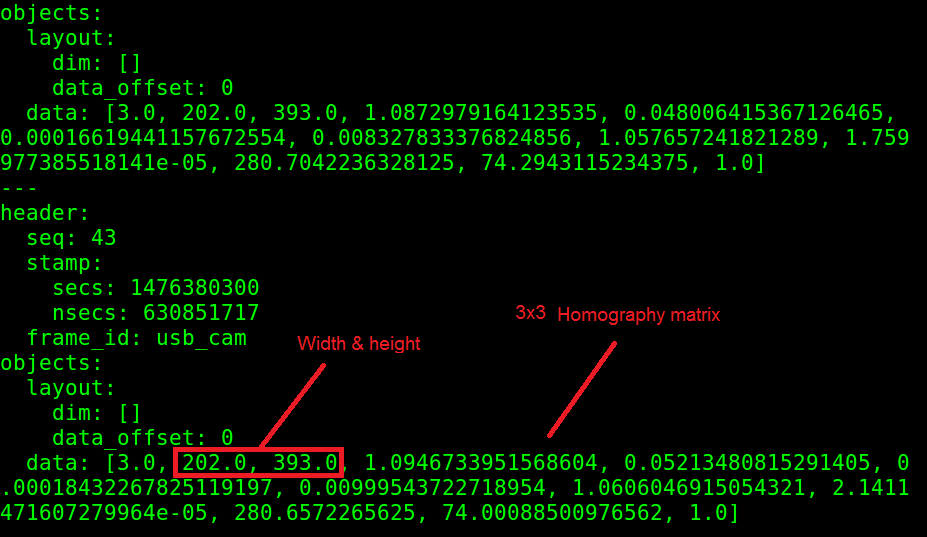 Theme values / object
12. We can calculate the new position and orientation from the following equations:
 Equation to calculate the position of the object
Here, H is a 3 × 3 matrix of the matrix, (x1, y1) is the position of the object in the saved image, and (x2, y2) is the calculated position of the object in the current frame.
You can check the source code of the print_ob Dejected_src node to get onversion using the homography matrix.
Here is the source code for this node.Video testing package find_object_2d on the example of the algorithms ORB and SIFT
Summary of algorithms: ORB is fast, but does not see remote objects and often does not correctly determine the geometry. SIFT sees remote objects, accurately determines the geometry, the disadvantages require large computational resources and paid for commercial use.
Questions to be solved by the robot EduMIP :
- Receive from the Logitech C920 camera on BeagleBone Blue already hardware-encoded video and transfer it in this form to a large computer in ROS.
- Connect distance sensors VL6180X, Vl53l0x and bumper to build a map in ROS. (Accessories already ordered)
- Write an algorithm in ROS that will process the map data and detected objects from the camera and build a route based on them.
If there are the same robotics enthusiasts like me who are ready to join the project, then write in a personal note, I need help on the above issues.