We continue to share our experience in organizing the data warehouse, which we started talking about in the previous post . This time we want to talk about how we solved the problem of installing CDH.

CDH installation
We start the Cloudera Manager server, add it to autoload and check that it has moved to the active state:
systemctl start cloudera-scm-server systemctl enable cloudera-scm-server systemctl status cloudera-scm-server
After he rose, follow the link "hostname: 7180 /", log in (admin / admin) and continue the installation from the GUI. After authorization, the installation will automatically begin and you will be taken to the page of adding hosts to the cluster:

It is recommended to add all the hosts that will somehow be connected to the environment being deployed (even if the Cloudera services are not located on them). These can be machines with continuous integration tools, BI or ETL tools, or Data Discovery tools. Inclusion of these machines in the cluster will allow you to install gateway services of the cluster (Gateways), containing files with the configuration and location of cluster services, which will simplify integration with third-party programs. Cloudera Manager also provides convenient means of monitoring and creating monitors of key metrics of all the cluster machines in a single window, which will simplify the localization of problems during operation. Hosts are added using the “New Search” button - a transition is made to the page for adding machines to the cluster, where it is proposed to provide data for their connection via SSH:

After adding the hosts go to the stage of choosing the installation method. Since we downloaded parls, we select the “Use Parcels (Recommended)” method, and now we need to add our repository. Click on the “More options” button, delete all the repositories installed there by default and add the repository address with the CDH parsel - “hostname / parcels / cdh /”. After confirmation, the CDH version presented in the downloaded parsel should be displayed to the right of the “Select the version of CDH” label. For this installation method, nothing can be configured on this tab:

On the next tab you will be prompted to install the JDK. Since we already did this at the stage of preparation for installation, we skip this step:

When you go to the next tab, the installation of the cluster components on the specified hosts begins. After the installation is completed, the transition to the next step will be available. If errors occur during the installation (faced with this situation when installing local Dev environments), you can see their details using the command “tail -f /var/log/cloudera-scm-server/cloudera-scm-server.log” and by pressing the “Details” button in the right part of the table:

At the next installation step, you will be prompted to select one of the prepared sets of services for installation. Services and their roles in the future can be configured manually, so it is not very important what to choose on this tab. In our case, it was usually installed "Core with Impala". Also here you can indicate the need to install Cloudera Navigator. If you are installing the Enterprise version, then you should install this useful tool:

On the next tab for the services from the selected set, you are prompted to select the roles and hosts on which they will be installed. Below are some guidelines for installing roles on hosts.
HDFS roles
NameNode - is placed in a single copy on one of the Master Nodes, preferably the most unloaded, because it is very important for the work of the cluster and makes a significant contribution to the utilization of resources.
SecondaryNameNode - is placed in a single copy on one of the Master Nodes, preferably not on the same node as NameNode (for ensuring fault tolerance).
Balancer - placed in a single copy on one of the Master Nodes.
HttpFS is an additional API for HDFS, you can not install it.
NFS Gateway - a very useful role, allows you to mount HDFS as a network drive. Put in a single copy on one of the Master Nodes.
DataNode - put on all Data Nodes.
Hive roles
Gateway - Hive configuration files. It is put on all hosts of a cluster.
Hive Metastore Server is a metadata server, put in a single copy on one of the Master Nodes (for example, the one where PostgreSQL is installed - it stores its data there).
WebHCat - can not install.
HiveServer2 - is placed in a single copy on the same Master Node as the Hive Metastore Server (the requirement for their joint work).
Roles hue
Hue Server - GUI for HDFS, put in a single copy on one of the Master Nodes.
Load Balancer - load balancer GUI for HDFS, put in a single copy on one of the Master Nodes.
Impala roles
Impala StateStore - placed in a single copy on one of the Master Nodes.
Impala Catalog Server - is placed in a single copy on one of the Master Nodes.
Impala Daemon - put on all Data Nodes (you can leave the default).
Cloudera Manager Services Roles
Service Monitor, Activity Monitor, Host Monitor, Reports Manager, Event Server, Alert Publisher are placed in a single copy on one of the Master Nodes.
Roles oozie
Oozie Server - is placed in a single copy on one of the Master Nodes.
Roles yarn
ResourceManager - put in a single copy on one of the Master Nodes.
JobHistory Server - is placed in a single copy on one of the Master Nodes.
NodeManager - put on all Data Nodes (you can leave the default value).
ZooKeeper roles
ZooKeeper Server - to ensure resiliency is placed in triplicate on the Master Nodes.
Cloudera Navigator roles
Navigator Audit Server - placed in a single copy on one of the Master Nodes.
Navigator Metadata Server - placed in a single copy on one of the Master Nodes.

The next after the distribution of roles is a tab with a short list of settings for the services to be installed. Their change will be available after the installation is completed and at this stage they can be left unchanged:

Following the settings of services is the configuration of databases for services that need them. Enter the full name of the host on which PostgreSQL is installed; in the Database Type lists, select the corresponding item and specify the data for connecting to the corresponding databases in the remaining fields. After all the data has been entered, click the “Test Connection” button and check that the databases are available. If so, then on the right side of the table, “Successful” will appear opposite each of the bases:

Everything is ready for service deployment. Go to the next tab and watch this process. If we did everything correctly, then all the steps will be completed successfully. Otherwise, the process will be interrupted at one of the steps and by clicking on the arrow an error log will be available:

Congratulations - CDH deployed and almost ready for use!

You can proceed to install additional parsley.
Installing Additional Parsers
In cases when the basic set of CHD services is not enough or a more recent version is required, you can install additional passwords that expand the available list of services that can be deployed in a cluster. In the course of our project, we needed Spark version 2.2 service to launch the developed tasks and the operation of Data Discovery tools. It is not included in CDH, therefore we will install it separately. To do this, click on the button “Hosts” and select the item from the drop-down list “Parcels”:

A tab with parsles opens, showing a list of clusters managed by the Cloudera Manager data and parcels installed on them. To add a Parsel with Spark 2.2, select the desired cluster and click the “Configuration” button in the upper right corner.

Click the "+" button, in the appeared line specify the repository address with the Spark 2.2 parsel ("hostname / parcels / spark /") and click the "Save Changes" button:

After these manipulations in the list of parsers on the previous tab, a new one should appear with the name SPARK2. Initially, it appears as available for download, so the next step is to download it by clicking the Download button:

The downloaded parsel is required to be scattered on the cluster nodes so that services can be installed from it. To do this, click the “Distribute” button, which appears on the right side of the line with the SPARK2 parsel:

The last step in working with a parsel is to activate it. Activate it by clicking the "Activate" button, which appears on the right side of the line with a parsel:

After confirmation, the service we need becomes available for installation. But there are nuances. To install some services in a cluster, you need to perform any additional actions in addition to installing parsel. This is usually written on the official website in the section dedicated to installing and updating this service (here’s an example for Spark 2 - www.cloudera.com/documentation/spark2/latest/topics/spark2_installing.html ). In this case, you need to download the Spark 2 CSD file (available on the “Version and Packaging Information” page - www.cloudera.com/documentation/spark2/latest/topics/spark2_packaging.html ), install it on the host with Cloudera Manager and reload the latter. Do this - download this file, transfer it to the correct host and execute the commands from the instruction:
mv SPARK2_ON_YARN-2.1.0.cloudera1.jar /opt/cloudera/csd/ chown cloudera-scm:cloudera-scm /opt/cloudera/csd/SPARK2_ON_YARN-2.1.0.cloudera1.jar chmod 644 /opt/cloudera/csd/SPARK2_ON_YARN-2.1.0.cloudera1.jar systemctl restart cloudera-scm-server
When Cloudera Manager comes up, everything will be ready to install Spark 2. On the main screen, click the arrow to the right of the cluster name and select the “Add Service” option from the drop-down menu:

In the list of services available for installation, select the one we need:

On the next tab, select the set of dependencies for the new service. For example, the one where the list is wider:

Next comes the tab with the choice of roles and hosts on which they will be installed, similar to the one that was during the installation of CDH. The role of the History Server is recommended to be installed in a single copy on one of the Master Nodes, and the Gateway on all servers in the cluster:

After selecting the roles, it is proposed to check and confirm the changes made to the cluster during the installation of the service. Here you can leave everything as default:

Confirmation of changes starts the installation of the service in the cluster. If everything is done correctly, the installation will be successfully completed:
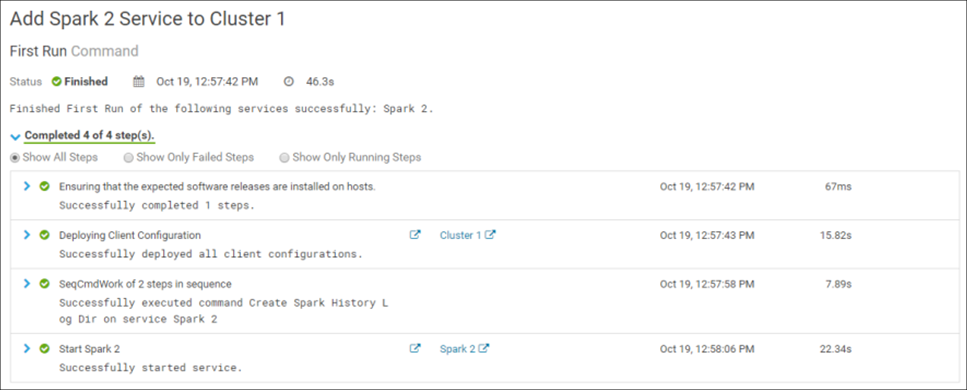
Congratulations! Spark 2 is successfully installed in the cluster:

To complete the installation process, you must restart the cluster. After that, everything is ready to go.
At the stage of installing the service errors may occur. For example, when installed on one of the environments, the Spark 2 Gateway role could not be deployed. In solving this problem, copying the contents of the / var / lib / alternatives / spark2-conf file from the host to which this role was successfully installed into a similar file of the problem machine helped. To diagnose installation errors, it is convenient to use the log files of the corresponding processes, which are stored in the / var / run / cloudera-scm-agent / process / folder.
That's all for today. The next post in the series will cover the topic of administering a CDH cluster.