So, you have purchased a new laptop, start to configure it, install the operating system, all the necessary software, toys. Nothing foreshadows trouble. And finally, having understood everything, you can relax and read an interesting article on the Internet. But something is disturbing your peace. Strange clicks coming from the depths of the device ...
Starting to listen, you periodically pick up the sound of an electric motor, such as that of an accelerating electric car that you once heard. Maybe leave everything as it is and do not touch, probably it is provided by the manufacturer? This beautiful thought, useful in many other situations, will be completely discouraged from launching any game or movie.
Periodic image hanging for 2-3 seconds will be your headache and nightmare for the next few days.
In the next such “hang” you will notice that it will be preceded by a click, and at the time of the hang you will hear the very sound of the electric motor. And, a little understanding of the computer hardware, you go to google with the question: "The hard disk does not live, what to do."
But seriously, the problem is not new, but even recently I saw comments on Habré, where people asked for help on this issue. For a quick google search, we are kindly offered the
wdidle3 utility. The only problem is that this is a DOS program that requires the creation of a bootable flash drive. And, for example, for my disk, it did not help.
Decision
The solution that I propose is especially useful if you have an SSD installed as the main drive, and the stock HDD is used as an add-on. drive. If you want to play a game or work from a hard disk, you press one button and it does not park the time embedded in the Windows power plan (20 minutes by default). In normal mode, it will use its standard behavior and turn off after 8 seconds of inactivity, without disturbing you with its noise and without consuming the battery. The wdidle utility will not give you that choice.
Actually to the point. The program we will use is called
HDDScan . Moreover, versions older than 3.2 have worked for me not quite correctly, therefore I recommend to dwell on it.
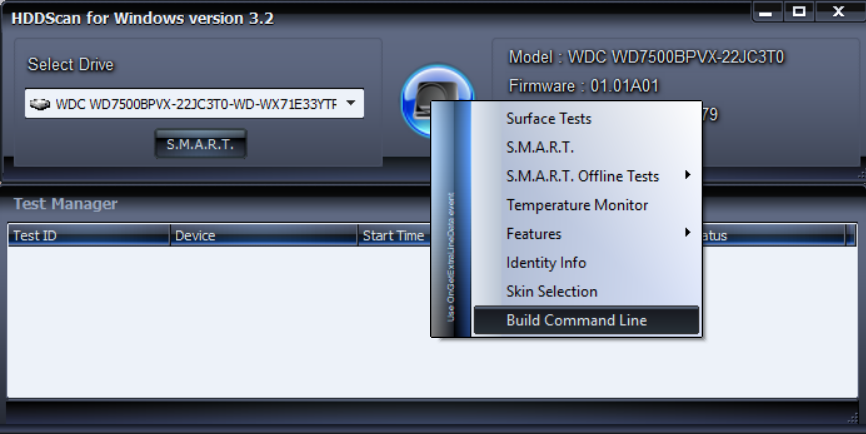
Download this portable program and unpack it in a convenient place for us. We start, and if there are more than one disk, on the left we select our HDD. Next, press the "big blue button" in the center and select "Build Command Line".
In the window that opens, we do the following procedure: opposite the “Advanced Power Managment” section, select Disable, click Save, and save the bat-file. Similarly, select Enable and save another batch file.
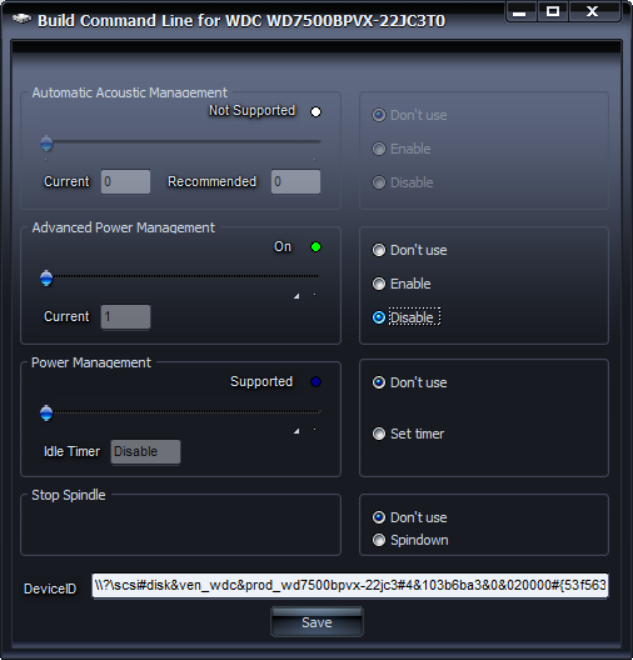
As a result, we have two bat-files of approximately the same content:
"C:\Programs\HDDScan\HDDScan.exe" "\\?\scsi#disk&ven_wdc&prod_wd7500bpvx-22jc3#4&103b6ba3&0&020000#{53f56307-b6bf-11d0-94f2-00a0c91efb8b}" -APM 0
and
"C:\Programs\HDDScan\HDDScan.exe" "\\?\scsi#disk&ven_wdc&prod_wd7500bpvx-22jc3#4&103b6ba3&0&020000#{53f56307-b6bf-11d0-94f2-00a0c91efb8b}" -APM 1
At this point, it would be possible to finish, these files allow you to disable the APM function by transferring control over the parking time of Windows, and accordingly enable it to return to the original behavior. But, firstly, this is not very nice and convenient, secondly, a UAC request will be invoked when the bat-file is launched. To overcome these inconveniences, I suggest using Windows Scheduler.
We start (if anything, enter a “scheduler” in the launch to find it), and create a task.
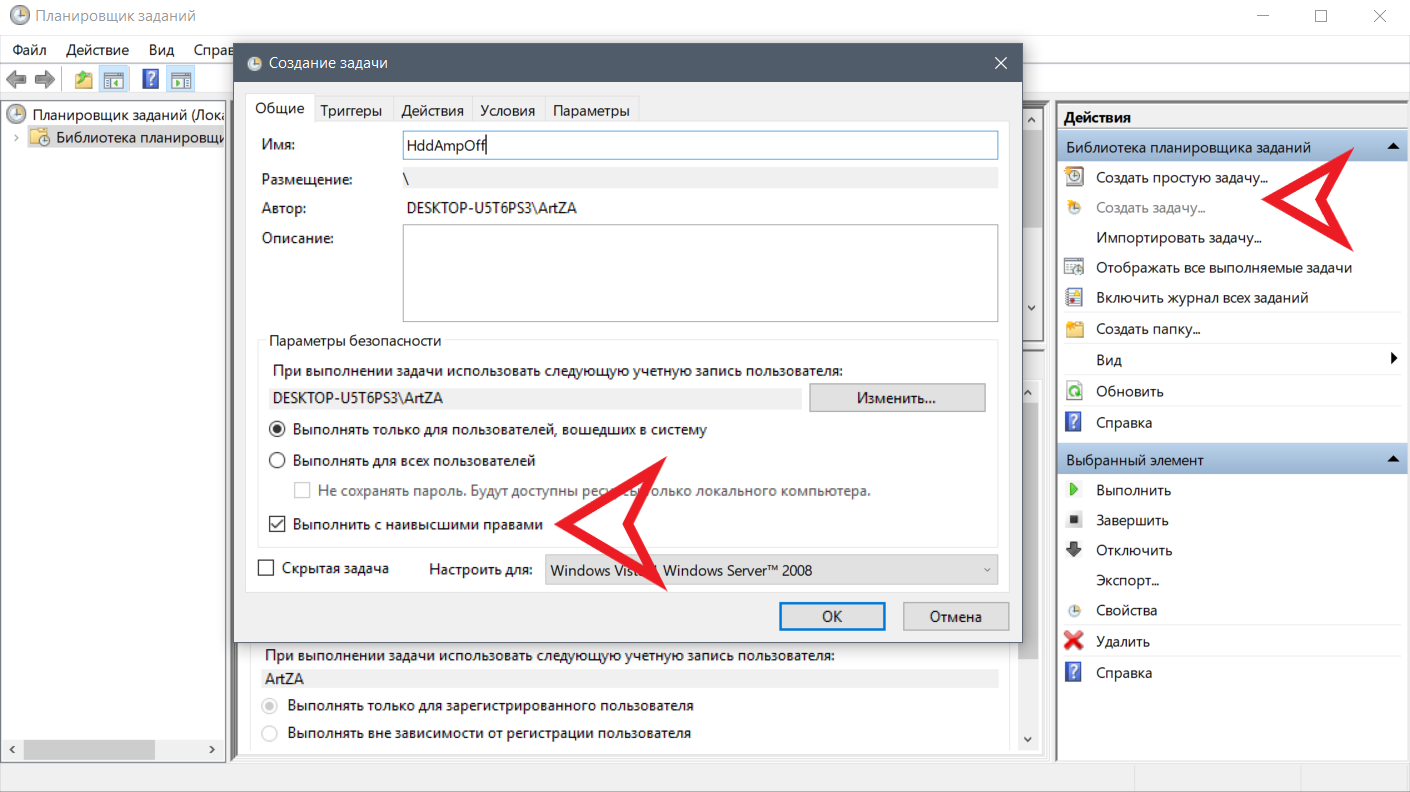
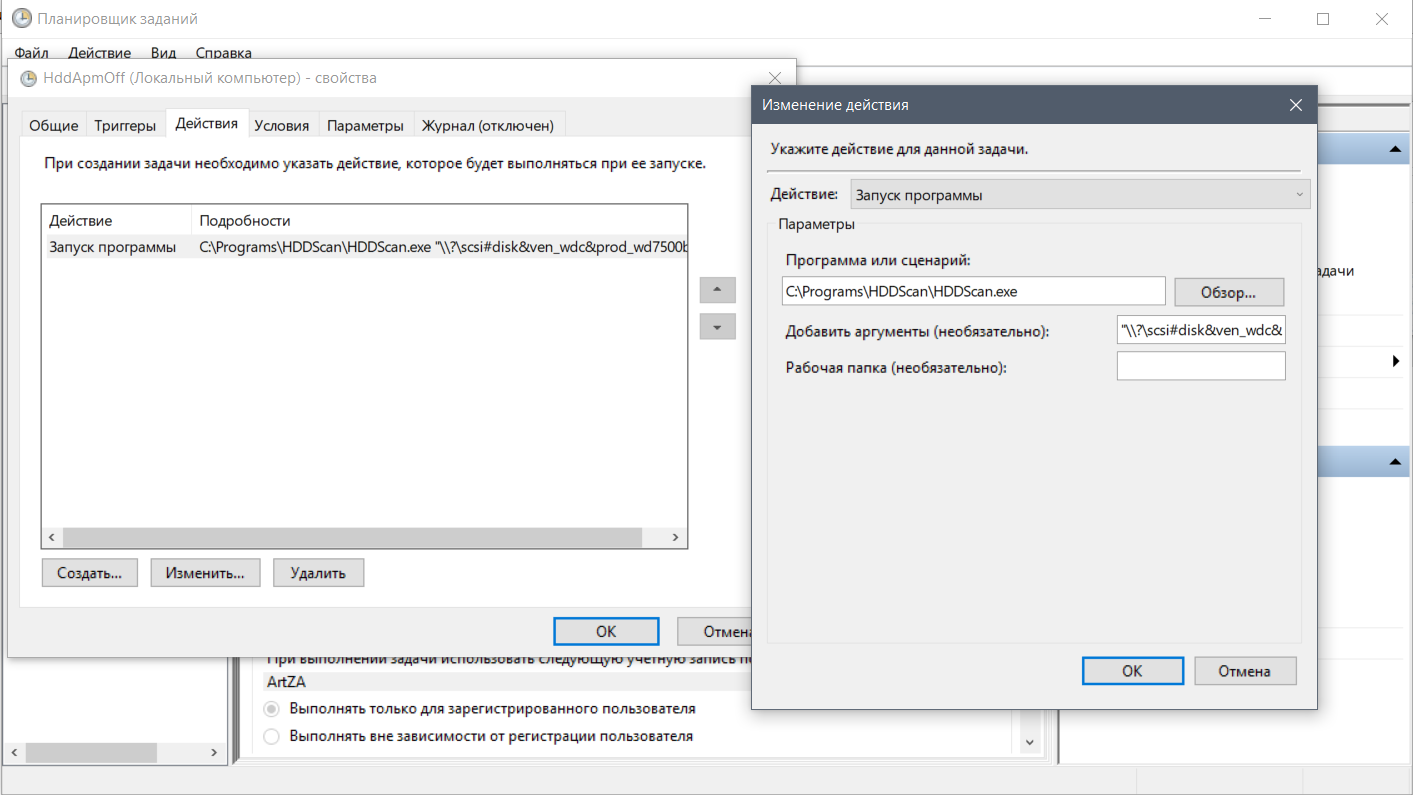
To start off APM. We give a meaningful name, and most importantly do not forget to set the execution with the highest rights. Go to the Actions tab, click Create. Here we indicate the path to our HDDScan program, and in “add arguments”, everything that goes in the batch file after the path to the program. For example:
"\\?\scsi#disk&ven_wdc&prod_wd7500bpvx-22jc3#4&103b6ba3&0&020000#{53f56307-b6bf-11d0-94f2-00a0c91efb8b}" -APM 0
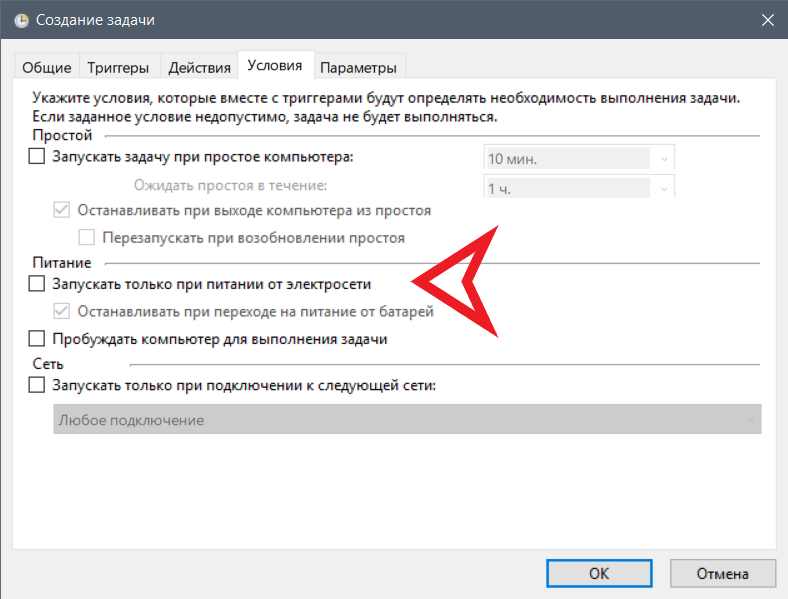
And the final step, on the Conditions tab, remove the check mark in front of “Run only when powered from the mains”.
Fuh, we create a task, we similarly perform to enable APM (use the argument from the second batch file). As a result, our scheduler should be two more tasks, remember their names. We don’t need bat files anymore, you can get rid of them.
The last stage of our research is the creation of shortcuts to the task scheduler. Everything is simple, in a secluded place PKM -> Create -> Label. On the proposal of the path, we introduce the following:
C:\Windows\System32\schtasks.exe /run /tn
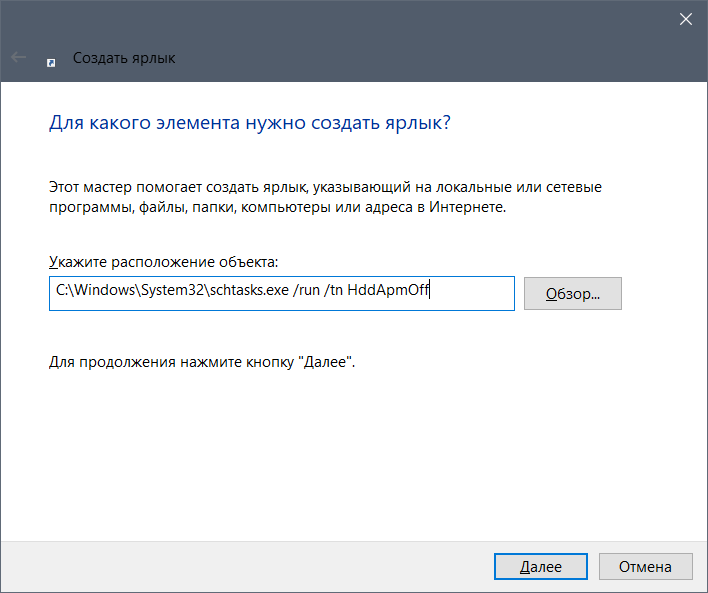
Create a shortcut first for one, then for the second task. We get two labels that we put in a safe place, and, for example, we throw on the taskbar. For beauty, you can apply corresponding icons to them.

In fact, you can operate with the scheduler as you like, turn off the APM immediately at system startup, turn it off with the launch of an application, etc. I suggested only a fairly versatile and convenient way, especially if you have two disks.