At first I wrote a long preface where such a task came from, and then it seemed to me boring and I deleted it.
So, the task: the creation of an autonomous UAV for monitoring the state of power lines (PTL).
Because:
- this is a hobby project and I can be very wrong in the calculations
- flying objects are dangerous to sentient beings and their property,
then this article should be taken only as an expanding horizon, and not a guide to action.
List of defects for detection on power lines.
UAV requirements
- Vertical take-off and landing (without catapults and parachutes), i.e. a copter
- Able to fly, fly at a given point, go back and sit down in automatic mode.
- You can edit the flight task, give a command to take off and land from anywhere in the world.
- Broadcast telemetry and video in real time via the Internet
- Uploading photos and videos from the onboard camera to the server during or after the flight
- Charging or mechanized battery replacement without human intervention.
As well as two conflicting requirements:
- Reliable electronics (if somewhere falls, consider lost)
- The relatively low cost of the experiment (if somewhere falls, consider lost)
Ideally, the degree of autonomy would be fantastic: the drone itself flies along a pre-planned route, uploads a photo to the server, software on the server detects defects in the photo and makes a request to the repair team with the coordinates of the work sites. The drone itself should not require the attention of a person until the end of the working life of any part, for example, a battery or bearings.
It is clear that this task is not for one year, but I will begin, and someone, maybe, will pick up and continue.
For example, ready-made industrial versions of autonomous complexes:
one ,
two ,
three ,
four ,
five ,
six ,
seven ,
eight ,
nine ,
ten ,
eleven ,
twelve ,
thirteen ,
fourteen . I wrote requests to everyone as a potential buyer to find out the prices. Of these, ready for sale: 2; ready for sale in Russia: 0.
Select flight controller
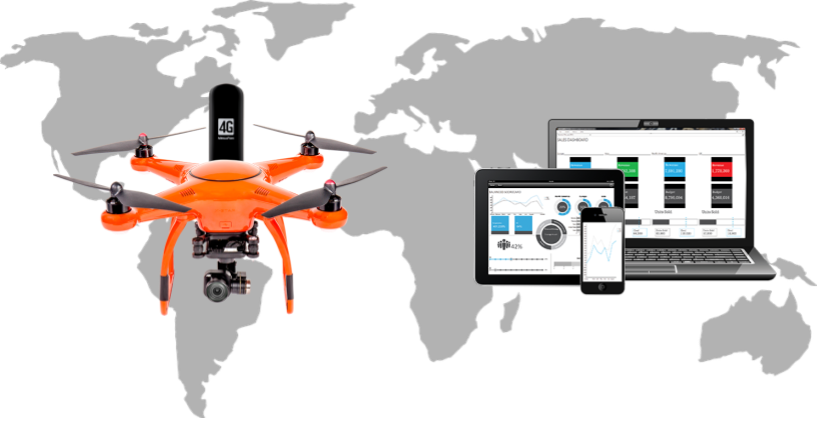
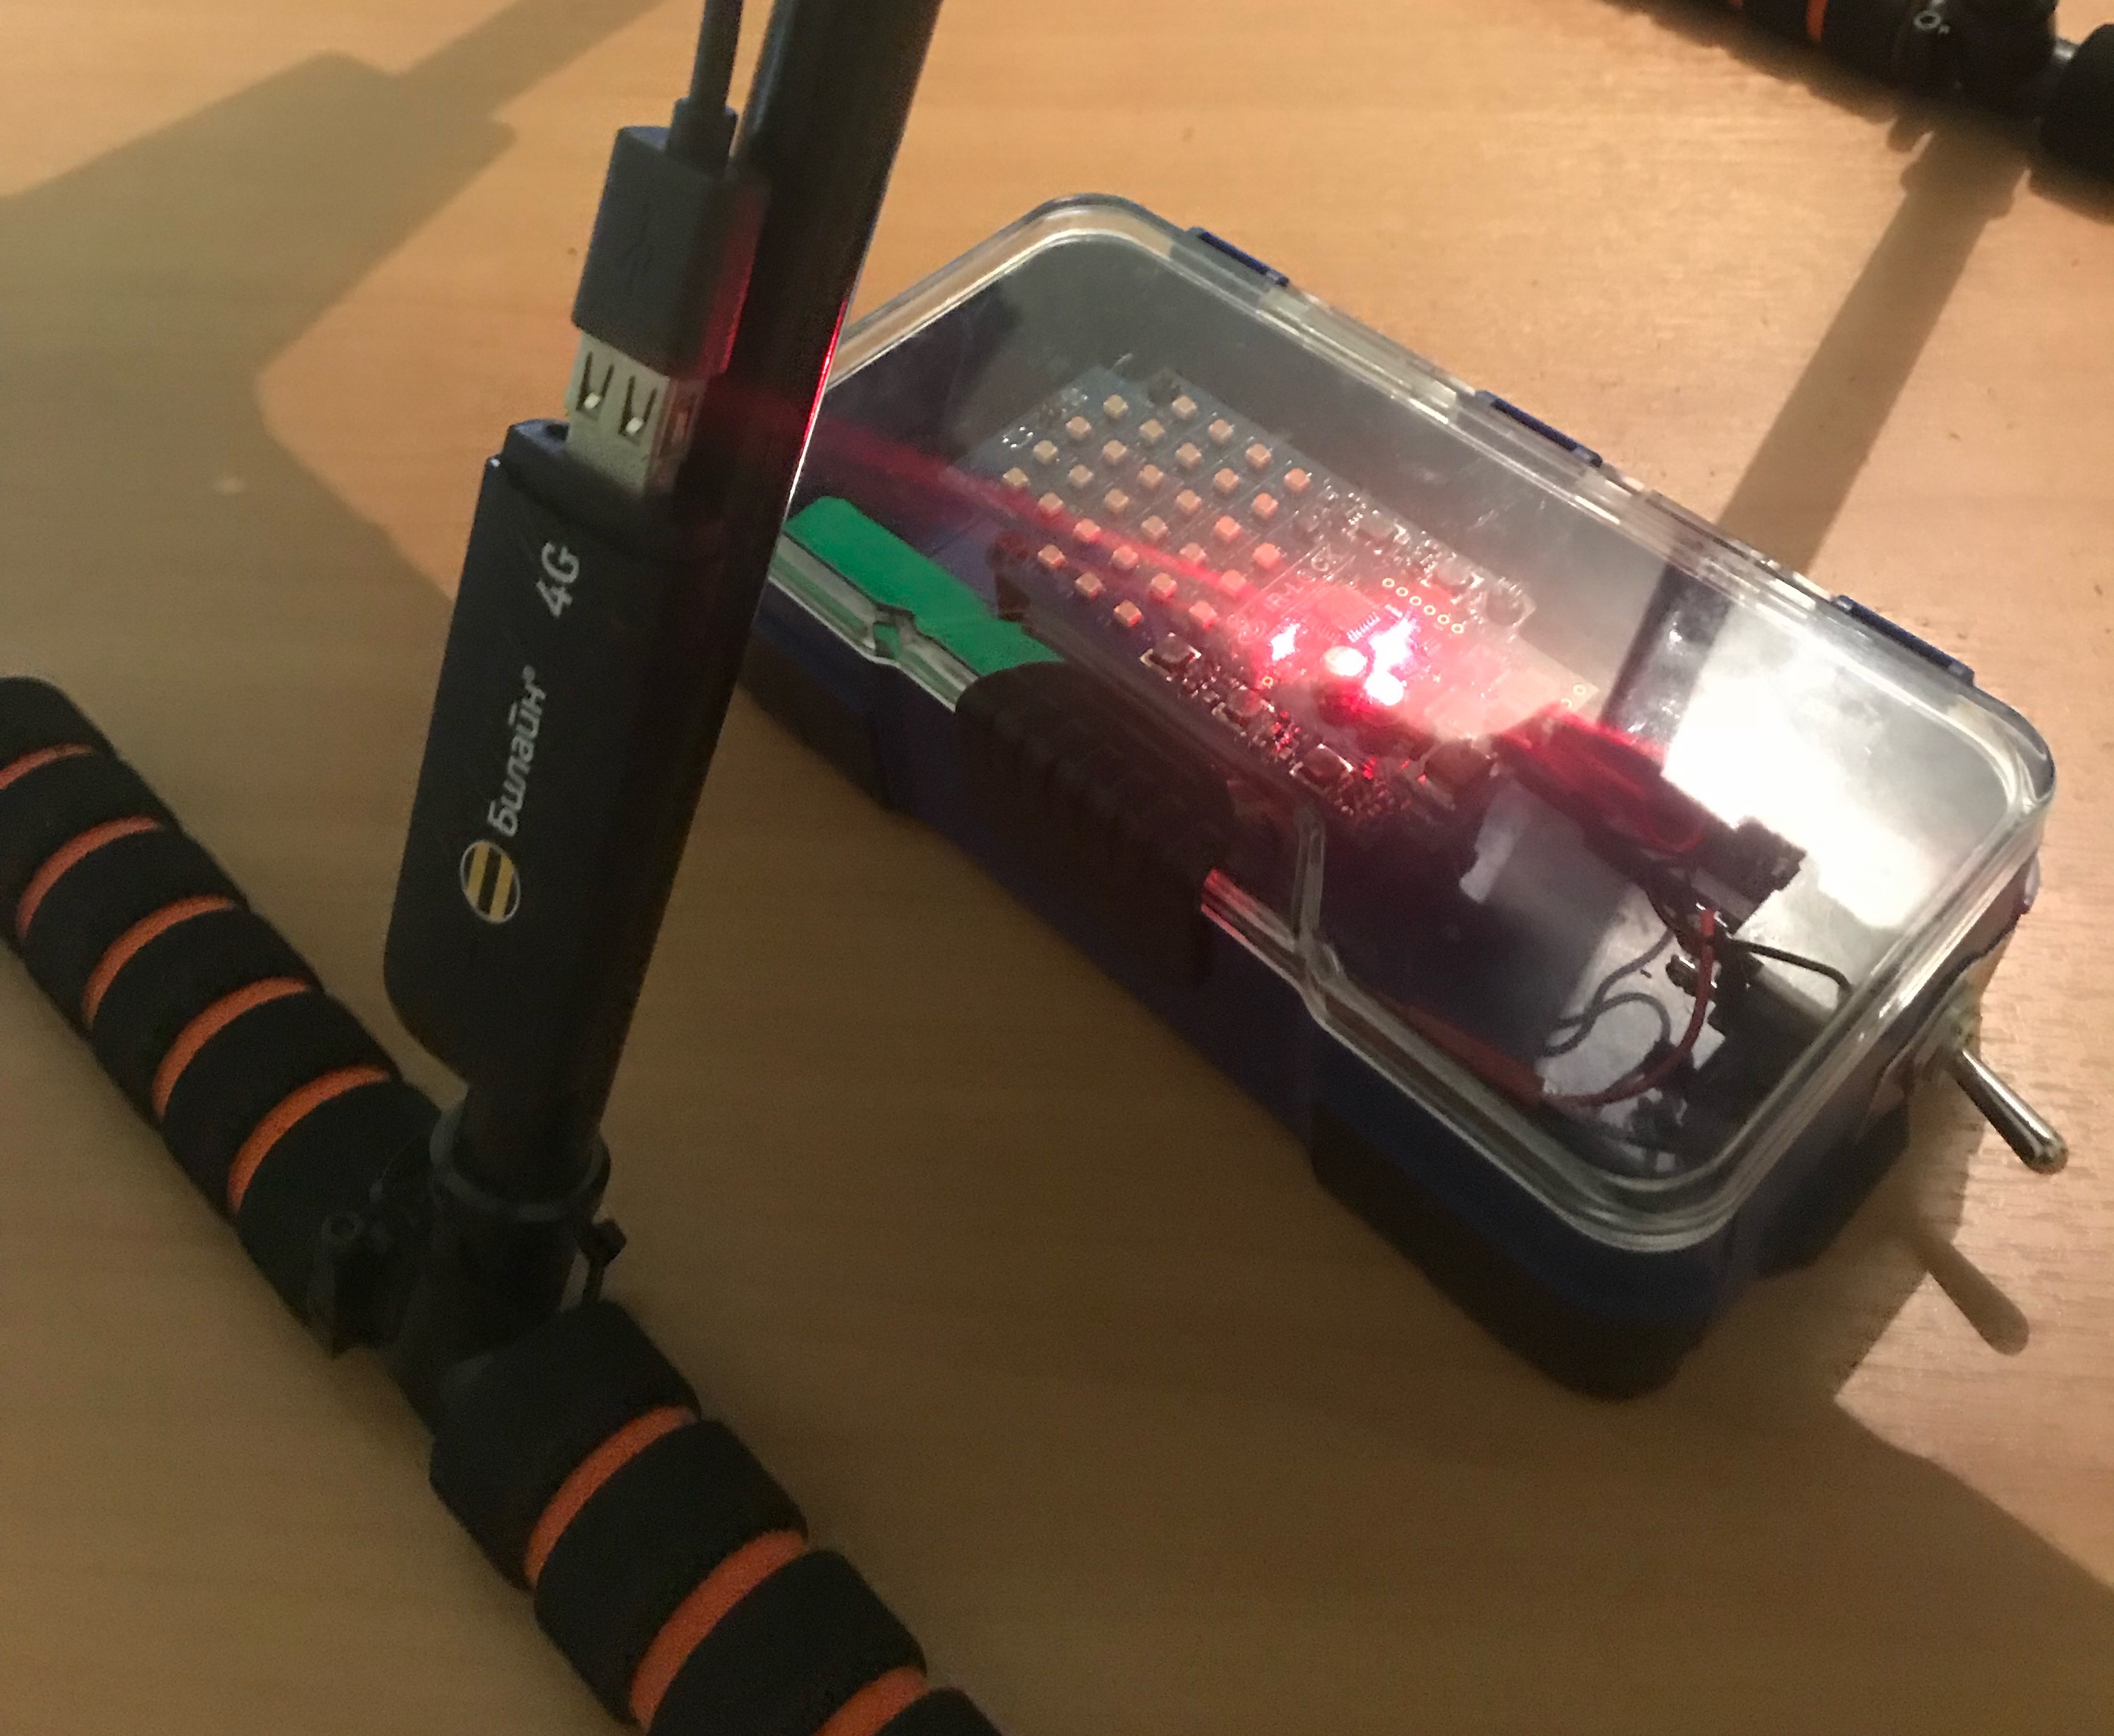
Since I need to broadcast video and telemetry over the Internet, I immediately think of putting a 4G modem and a camera on the drone and make a webcast out of this kit. There were such solutions:
one ,
two ,
three . These are ordinary motherboards with an external USB 4G modem and a camera. For encoding and broadcasting video
gstreamer is used. But these things themselves are not able to control the drone, they must be used in conjunction with the flight controller.
The flight controller is the drone's brain. It monitors the status of the position sensors (gyroscope, accelerometer, compass), GPS coordinates, the position of the knobs on the control panel and, based on these data, controls the motors to hang at one point or fly somewhere. The flight controller will need to be somehow connected with the on-board computer so that you can download the flight task or specify an arbitrary point where to fly and when to turn on the camera.
On sale you can find a lot of different controllers are very different from each other in price and functionality. Some of them work on their own software, and some use open-source software, such as the
Ardupilot and its fork
PX4 .
With the Ardupilot, I played on another
8-bit atmega , which did not have a USB-bootloader, and they were stitched on the programmer. I haven’t come across him since then and was pleasantly surprised when I found out that he can now work on 64-bit Linux computers, he has a huge community of hobbyists and pro users, a long list of sensors supported out of the box and painted
plans for 2018-2019 . During this time, he managed to grow into a project
DroneCode , and then
disconnect from it.
At first glance, all the necessary functions are implemented in it: automatic takeoff and landing, loading of flight missions, there are desktop and mobile applications for all major OS families. The control programs (GCS - Ground Control Station) communicate with the onboard controller with short messages
using the MAVLink open
protocol via a set of radio modems (the drone sends telemetry, GCS sends control commands). I suspect that these messages will turn out to be launched via the Internet.
Take a look at the
list of supported controllers and select something. There are a half dozen options from small to large and with different characteristics.
Of all the variety of controllers, I liked several options:
| Flight controller | Erle PXFMini | Emlid edge | Navio 2 | Erle Brain 3 | PixHawk 2 Cube |
| Additional computer | Raspberry Pi Zero W | not | Raspberry pi 3 | not | Raspberry pi 3 |
| | | | | |
| Kit weight, g | 84 | 97 | 98 | 145 | 150 |
| Processors, total qty | one | 2 | 2 | one | 3 |
| OS simultaneously running | one | one | one | one | 2 |
| IMU sensors, sets | one | 2 | 2 | one | 3 |
| Air pressure sensor | one | 2 | one | one | one |
| Power backup | not | 2x | 3x | not | 2x |
| GPS, Glonass | external module
with additional magnetometer | external module
with additional magnetometer | built-in receiver, external antenna | external module
with additional magnetometer | external module |
| Video input | CSI on Raspberry | HDMI | CSI on Raspberry | CSI | CSI on Raspberry |
| WiFi | there is | there is
Long Range 2km
+52 g | there is | there is | there is |
| | | | | |
| Set cost, $ | 212 | 700 | 215 | 341 | 331 |
The lightest set (84 g) is obtained from the
Raspberry Pi Zero W microcomputer (9 g), the
Erle PXFMini controller (15 g), the native external GNSS module (46 g) and an additional
USB hub (14 g).

The working processor in this kit is one - on the Raspberry Pi. It has control of PWM motor controllers, reading sensors, Linux OS with all the giblets and video decoding from the camera. Since there are no USB ports in Pi Zero, in this version you have to use an external hub. IMU sensors and power input without redundancy.
The next set (97 g) from a Hong Kong company with Russian names in the development team is an
Emlid Edge controller (59 g) with a GNSS module (38 g). The GNSS module operates under the
UAVCAN protocol and is additionally equipped with a magnetometer and an air pressure sensor. A separate ARM Cortex-M3 processor is responsible for PWM here, Linux OS is spinning on the main ARM Cortex-A53 quad-core.
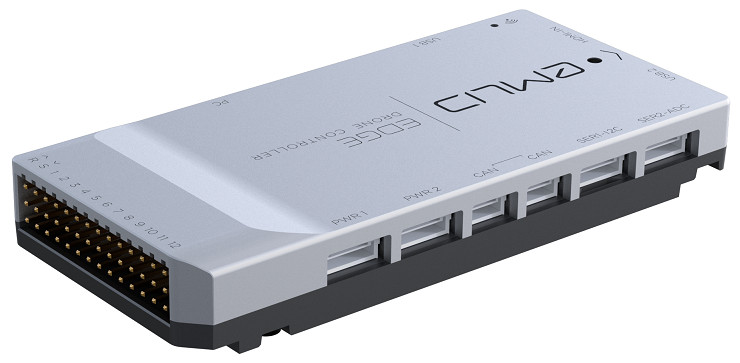
The controller has an HDMI video input, which allows you to connect to it directly any camera with such an output, for example GoPro 4 or 5. The relatively high cost is explained by the long-range wifi transceivers included (up to 2 km with HD video broadcast). The weight of the on-board module (52 g) is not included in the general table, since I need 4G communication, but this option can be borne in mind: from a long-range wifi, you can make a spare communication channel through a fixed router with wired Internet.
The next option (98 g) consists of the famous
Raspberry Pi 3 microcomputer (45 g) with the
Navio 2 controller (23 g) from the same Emlid and an external GNSS antenna (30 g). The controller has a separate Cortex-M3 processor to control the PWM on 14 channels and decrypt incoming SBUS and PPM signals from the receiver. It, in turn, is controlled through a driver in the Linux kernel, which runs on Raspberry.

The controller is equipped with a pair of separate IMU sensors (accelerometer, gyroscope, magnetometer) MPU9250 and LSM9DS1, one air pressure sensor and a
U-blox NEO-M8N GNSS module that sees GPS, Glonass and BeiDou with an external antenna via the MCX connector.
You can power this “pie” of 5 volts simultaneously from three sides, which work as independent sources duplicating each other: the main power connector on the shield, PWM servo outputs, micro-USB to Raspberry.
The
Erle Brain 3 controller (100 g) with an external GPS module (45 g) by its weight, price and sensor set looks in the table so that I will not even insert a photo here.
Next we have the most reliable and heaviest kit (150 g), which consists of the popular
PixHawk 2 Cube flight controller (80 g) with an open architecture and the Raspberry Pi 3 computer. Instead of the Raspberry, in this case, you can use any lightweight single-board
device , for example,
Odroid XU4 ,
NVIDIA Jetson or any other with the right interfaces and the right weight.
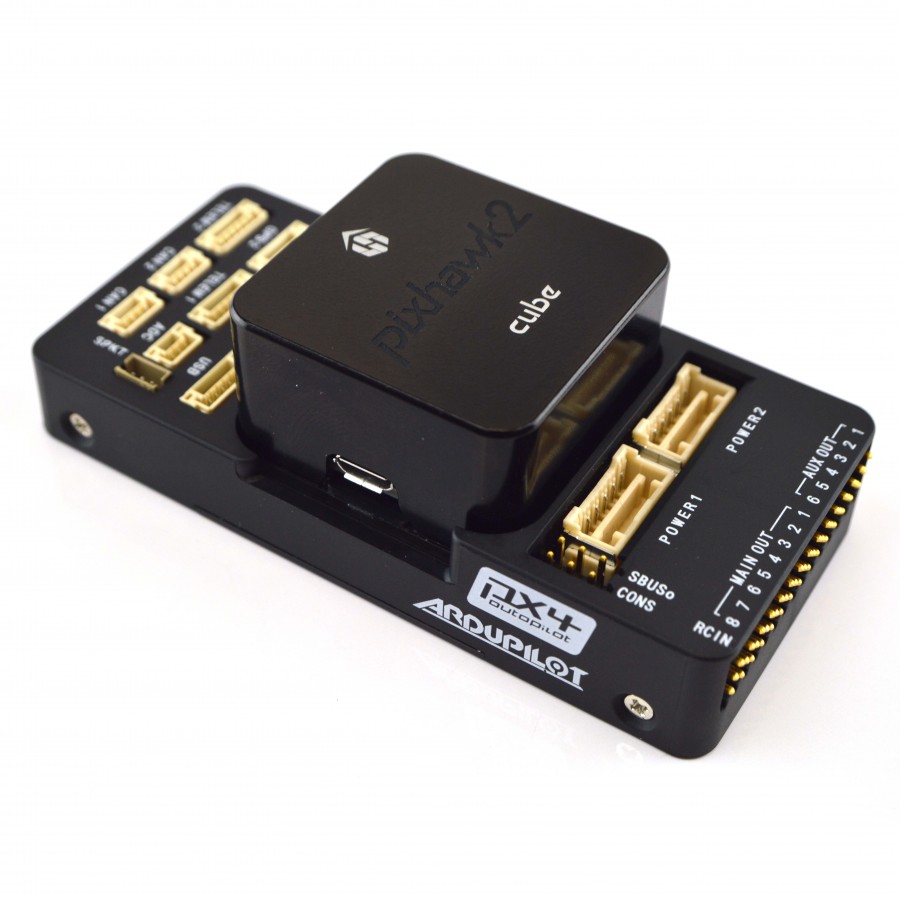
PixHawk itself has 2 processors: the first 32-bit STM32F427 Cortex M4 - the main one, which runs the real-time OS (RTOS)
NuttX and the second backup (failsafe) 32-bit STM32F103. The controller is made in the form of modules: IMU processors and sensors are installed in the cube (on an anti-vibration mount, and even heated), and the power and connectors to the entire periphery are derived from the base. It is assumed that the basics can be different and everyone can develop their own for specific requirements, on which you can then put the finished cube. By the way, there is a ready-made version with a connector for installing an
Intel Edison microcomputer. But since Intel no longer releases these computers, Raspberry will also be used as an onboard computer in this kit.
Raspberry is used as an additional computer to communicate with the Internet and you can run any resource-intensive tasks on it (for example, pattern recognition in OpenCV), without fear that failures in this process will hang up critical functions, such as motor control.
So, considering the weight, characteristics and price for the first place for me, the Navio 2 + Raspberry kit comes out, and the second one is the Pixhawk 2 Cube + Raspberry (+52 g). Now, if under Pixhawk there was a base in the connector for a small Raspberry Zero, and also USB, it would be more interesting. But you can’t buy this one yet, but it is not interesting to make it yet.
I will note in notes that increased reliability costs an additional 52 grams and $ 110. According to the total calculation results, these figures may be insignificant.
Autonomous charging
As can be seen in the finished versions above, there are several approaches to preparing an autonomous drone for the next flight: charging the battery through the contact pads, contactless induction charging, and mechanized battery replacement with subsequent charging at the station.
Each method has its pros and cons, I will write about them separately, but in any case, for their operation, the drone must be able to land at the desired point with almost centimeter accuracy.
Landing “to the point”
For an accurate fit, you can use a standard onboard computer camera, visual markers and OpenCV to recognize them. Here is
one solution that you can google.
Another fresh
one appeared when I wrote this article. But image recognition is quite a laborious process for Raspberry, and you don’t feel like loading it without much need. Also, the quality of recognition will strongly depend on the material from which the marker is made and the lighting conditions. It is desirable that this is a separate sensor and give ready coordinates of the desired visual point, regardless of the presence and angle of incidence of light. And this is in the list of supported equipment Ardupilot, called
IR-Lock .
 Airobotics
 from the list above also uses this solution. It is based on the open-source camera module
Pixy CMUcam5 . This module is equipped with a camera and a processor, and it can be “taught” to recognize certain images of objects, and then, at the output, obtain ready coordinates of these objects in the image.
Knowing the coordinates of the recognized image in the image and the distance to it, the flight controller calculates how far and in which direction to move the drone.
The IR-Lock modification consists in the fact that the
IR lamp from the LEDs is used as a marker to be recognized, and on the camera the usual lenses are replaced with those that let only the IR light through. As a result, in any light, the camera sees the flashlight glow in white on a black background (and nothing more), which greatly improves the recognition accuracy.
For normal operation of this sensor, a
rangefinder is also needed, which will measure the height above the ground. The developers recommend using a laser rangefinder, such as
LightWare LW20 (20 grams and $ 299, measures up to 100 meters), or cheap and short
VL53L0X (less than 1 gram and $ 10, measures up to 2 meters), which has become
supported in recent versions of the Ardupilot. For some reason, an ultrasonic sensor for landing purposes is not credible to the developers of IR-Lock.
By the way, DJI drones automatically sit using ultrasound and stereo cameras.
Hang rooted to the spot
For the drone to hang in one place and not “float”, GPS alone is not enough. Unfortunately, because of the state of the atmosphere, the coordinates from GPS receivers can float within tens of meters and for centimeter accuracy you need to use
GPS RTK corrective systems. This system uses a ground station, as a standard for coordinate deviations, and radio communication with the board to send the values of these deviations. Such a thing is necessary for shooting photoplans and then gluing them together into large maps, and for the purpose of hovering in place, I’ll confine myself to the
PX4Flow optical sensor.
It works on the same principle as the optical mouse. Unlike IR-Lock, it does not recognize a specific image and in the Ardupilot they work in different flight modes. The camera image is analyzed for an offset 400 times per second, and the calculated offset values can be read by the controller using the I2C protocol. The sensor (
open-hardware ) weighs 15 grams and has everything you need on your board: a 168 MHz Cortex M4F CPU (128 + 64 KB RAM), a 752 × 480 MT9V034 optical sensor and a L3GD20 3-axis gyroscope. For its normal operation it is also recommended to use a laser range finder, instead of an ultrasonic one. Although the module itself provides a connector just for the ultrasonic sensor.
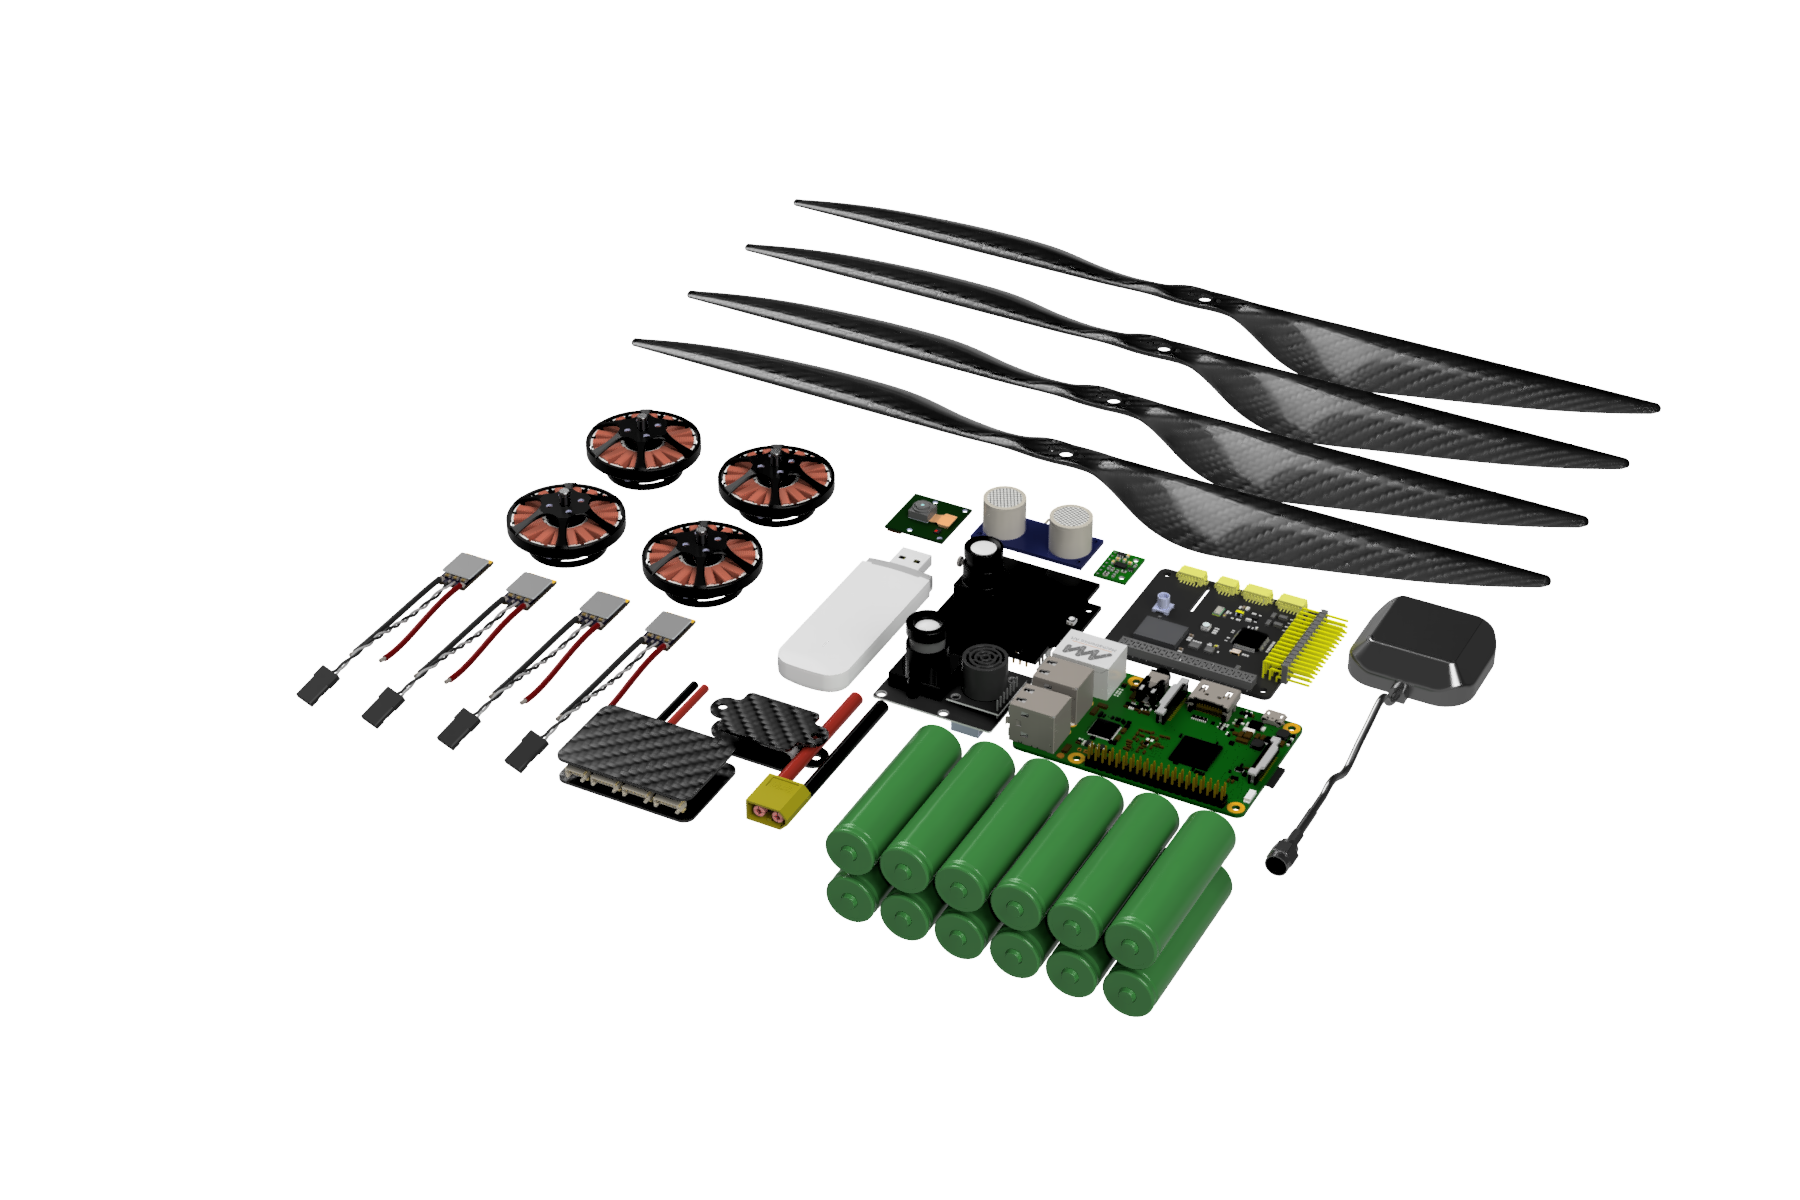
Minimum Electronics Kit
Here is what gathered:
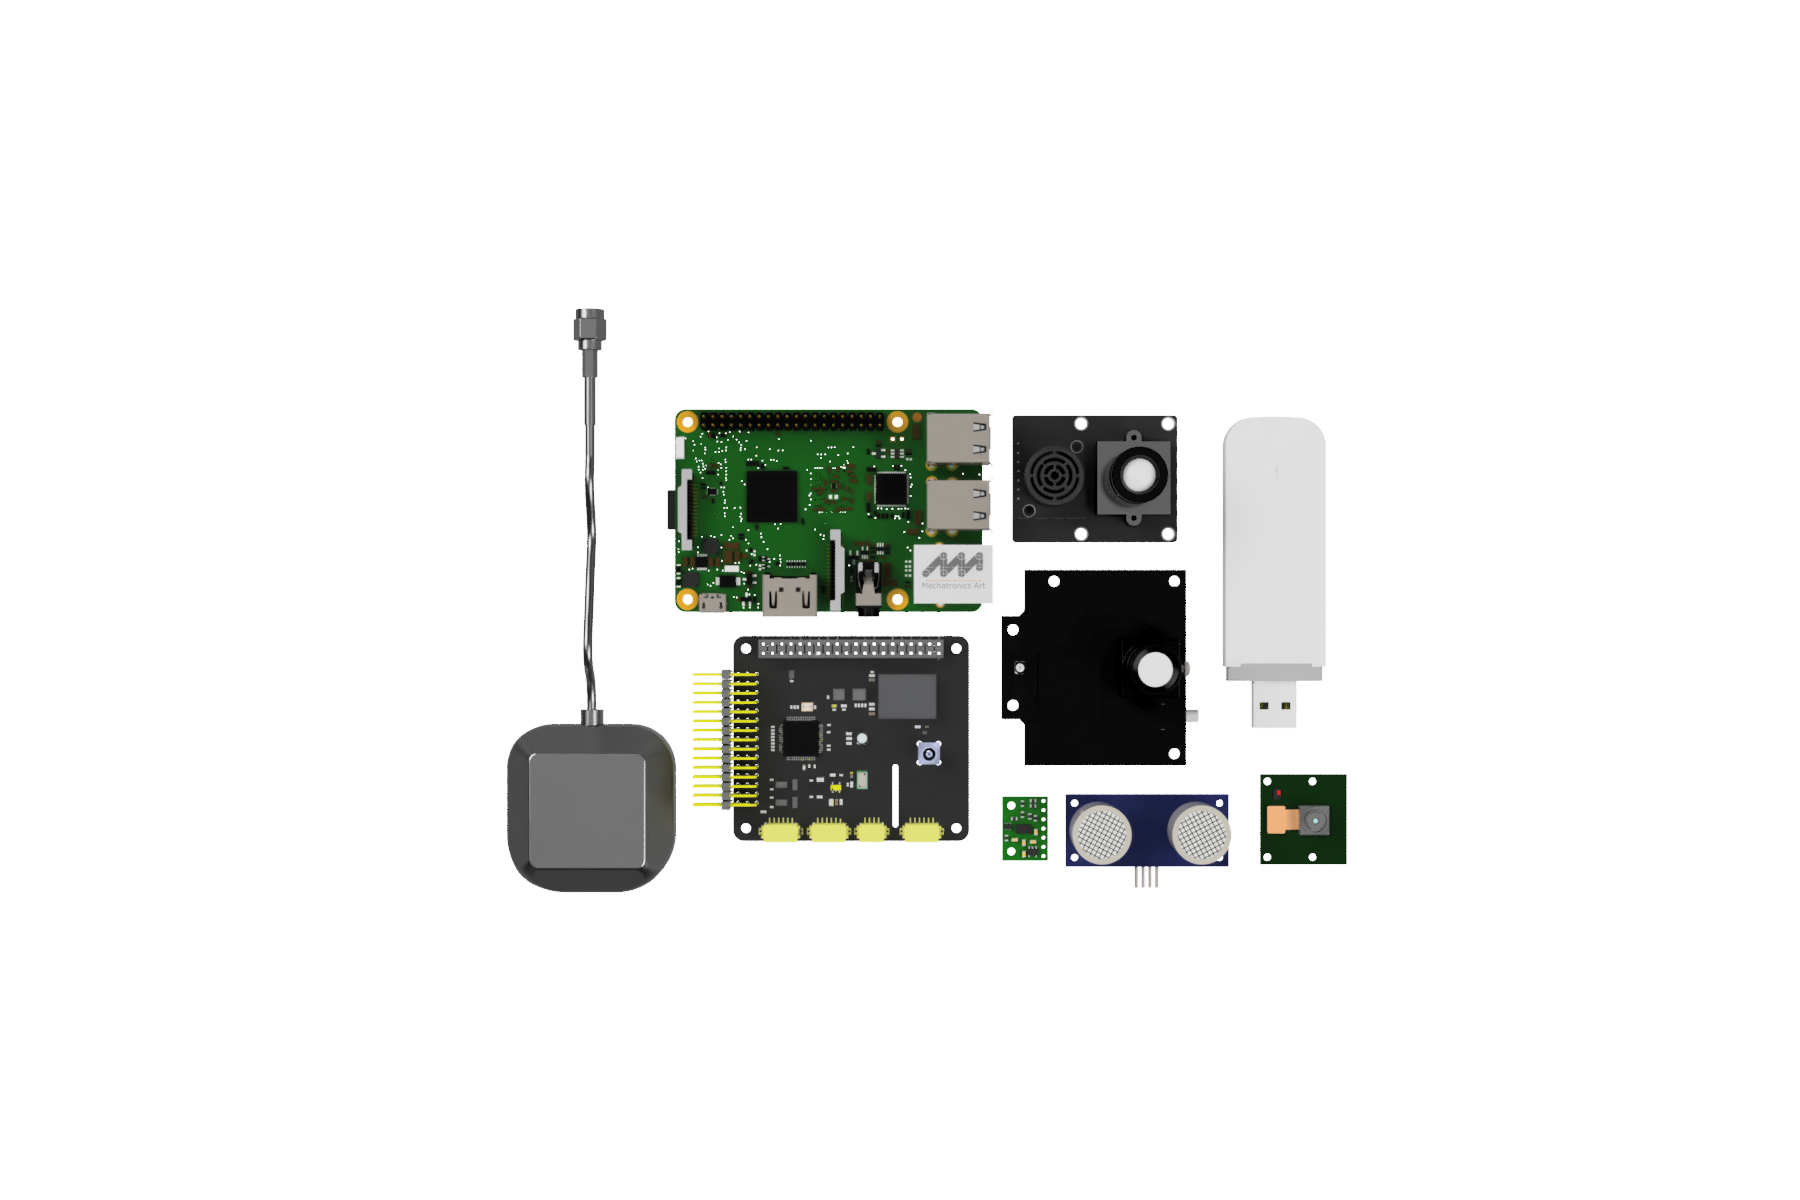
The total weight is 199 grams. All components operate at 5 volts and consume almost 2 Amperes (10 watts) in video broadcast mode.
In the set there is an ultrasonic distance sensor that will look ahead for obstacles. I left the stereo vision and circular lidars for later, if there is a real need for them.
Payload
Since the native camera from Raspberry does average quality photos, and also does not know how to capture photos simultaneously with video, it will be used only for web-broadcast, and as the main camera you need a suitable one for detecting defects on power lines. For most of the positions from the list of detected defects,
GoPro Hero 5 Session , multispectral
Parrot Sequoia , dual
Sentera Double 4K and infrared
FLIR Vue Pro are suitable . Each of them weighs about 100 g.
To stabilize the camera in order to improve the quality of images in the load with her fly 2 or 3 axial suspension.
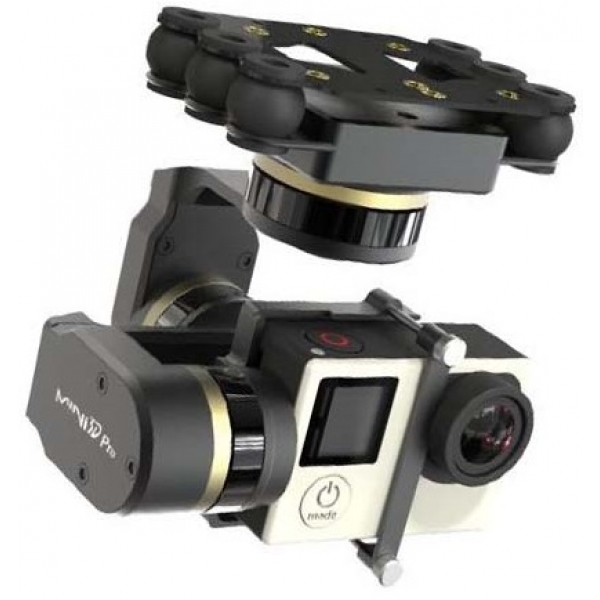 Simple
 3-axis suspensions weigh about 160 g and are powered by 12 volts, have an operating current at such a voltage of about 50 mA and a maximum current of 700 mA when the motors are jammed.
Nutrition
For powering all electronics, sources of 5 volts (minimum 2.2 amps) and 12 volts (minimum 1 amps) are required. With regard to the backup power supply of the flight controller, you need two independent sources of 5 volts. The power supply system can be made from individual modules of a suitable rating or you can find a ready-made “3 in 1”, for example,
such (24 g, max input voltage up to 28 Volt, outputs for 3A). A
current sensor (22 g) will be connected to it in order to be able to measure the consumption of mAh on the battery.
Electronics kit + camera + suspension + power supply weigh 505 g.
Motors and propellers
On many professional drones I have seen
T-Motor's motors and propellers. Apparently, not casual. In the Ardupilot documentation, they are also
recommended as a propulsion system for professional drones. Therefore, we will look for suitable motors from them.
To drone flew for a long time, you need engines with maximum efficiency. The efficiency of the motor and propeller bundles is measured by the amount of thrust in grams per 1 watt of electricity consumed.
To find out which motor is the most suitable, you need to know the total weight of the fully assembled drone, taking into account the frame, the battery and the motors themselves with screws. The battery is needed so that it has enough minutes for 30 flights. The frame is needed so that everything fits on it and the screws do not touch anything.
Too many unknowns, so I will use the online
calculator for E-calc quadcopters .
Having played around with the calculator, I chose the
Antigravity 4004 KV300 (53 g)
motors with
15x5 screws (27 g). In the optimal mode at a supply voltage of 24 volts, such a set pulls 474 grams at a current of 1.4 A. The efficiency is 14.11 g / Watt, the ratio of thrust to its own weight = 5.9: 1. At full speed, the thrust is 1311 grams at a current of 7.5 A. The copter will be with four motors, i.e. quad. Optimum take-off weight = (474 g * 4 motors) = 1896 g, maximum (taking into account the thrust-to-weight ratio 2: 1) = (1311 g * 4 motors) / 2 = 2622 g
Motors are controlled by speed controllers. Motor power supply voltage = 24 Volts, maximum operating current = 7.5 A, therefore a controller is needed for such a voltage and with operating current, taking into account the margin, at least 10A. At T-Motor the easiest regulator (7 g without wires) for such a voltage is
FPV 35A-32bit 3-6S . It is made on the basis of the popular
BLHeli-32 firmware, with closed code, but with a wide range of settings and a
large number of analogs .
Subtotal:VMG (screw-motor group), consisting of motors, propellers and regulators (4 pieces each) weighs 346 g.
Together with the electronics and the payload (346 + 505), it turns out to be 851 g. Taking into account fasteners, wires and connectors (let’s estimate +100 g) = 951 g.
With optimal weight, the frame and the battery remains (1896 - 951) = 945 g. With a maximum (2622 - 951) = 1671 g.
Frame
Calculate the minimum frame size so that the selected 15-inch propellers do not interfere with each other to create traction. The size of the frame manufacturers indicate in the distance between the axes of the motors located diagonally from each other.
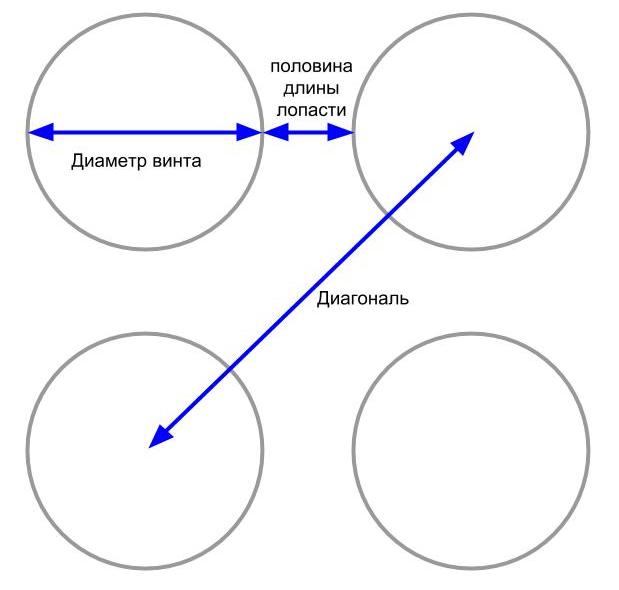
From the picture you can see the hypotenuse, which is calculated from the leg, equal to the sum of the screw diameter and the distance between the propellers. Neighboring blades of a 15-inch propeller will spin 1 millimeter apart with a frame diagonal of 540 mm. Add a little space and the size of a suitable frame will be approximately 600-700 mm.
On the market you can find many of them, for example,
once : 600mm and 750g,
two : 650mm and 450g,
three : 690 and 675g,
four : 650mm and 750g. They all differ in the design and availability of folding elements (chassis, rays) for easy transportation.
I will postpone the choice of a specific instance for my needs, for further calculation I will bear in mind the weight of the frame equal to 450 g.
A battery of 495 g remains for optimum weight and 1221 g for maximum.
Battery
To select a battery, you need to know what it should give current.
At full speed, the engines will “eat” 30A (7.5A * 4 motors), and the electronics will be about 0.45A (10 Watts). Taking into account a small margin, we round off the minimum operating current of the battery at 35A. For Li-Po batteries with a high current output of 30C, the minimum capacity will be 1.2 Ah (35/30), and for lighter Li-Po and Li-Ion with a current output of 10C, the minimum capacity is 3.5 Ah (35/10) .
As an option, the 6S2P
Sony VTC6 Li-Ion
assembly with BMS weighs approximately 630 g (at 6 Ah capacity). With this battery drone will weigh 2031 g, which is more optimal at 135 g, but within the maximum. Now let's calculate how long the copter can hang under ideal conditions. With a total weight in 2031 for each motor accounts for 508 g. Let's look at the characteristics of the motor and find the current consumed with such a burden. It will be approximately equal to 1.6A. 4 motors and electronics will give a total of 6.85A (1.6 * 4 + 0.45). Taking into account the discharge of the battery up to 20%, it will turn out (6 Ah * 80% / (6.85 A)) = 0.7 hours or 42 minutes.
Layout
While I was choosing the right frame and thinking how to place all this on it and what to fasten, I came to the conclusion that it would be easier to draw several parts and order a 3D printing from plastic and a milling from carbon. A pair of ready-made pieces of iron and fasteners can be ordered on Aliexpress.
Experimenting a bit with the layout and center of gravity, this is how the frame turned out:
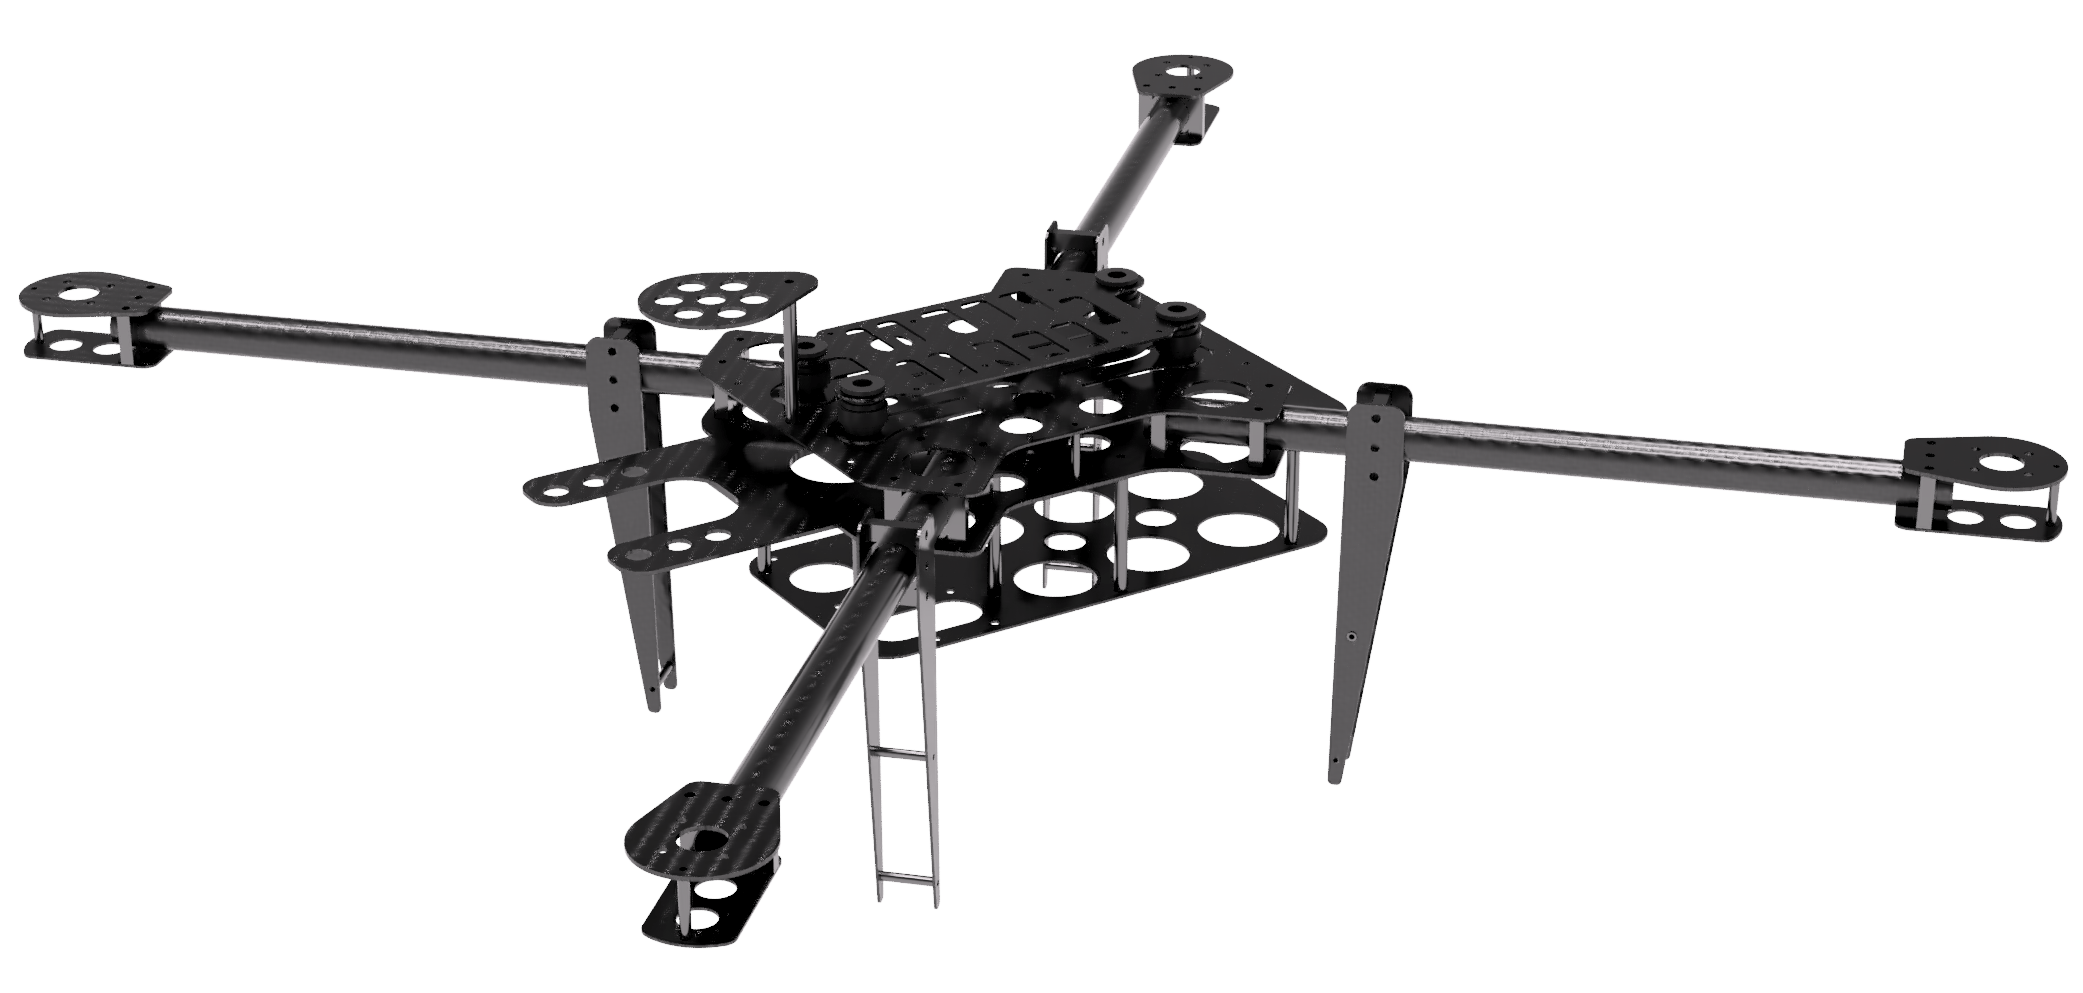
It consists of carbon tubes and plates, aluminum parts and fasteners made of titanium. The estimated frame weight is 350 g with a 700 mm diagonal.
3D model of the frame and
parts list .
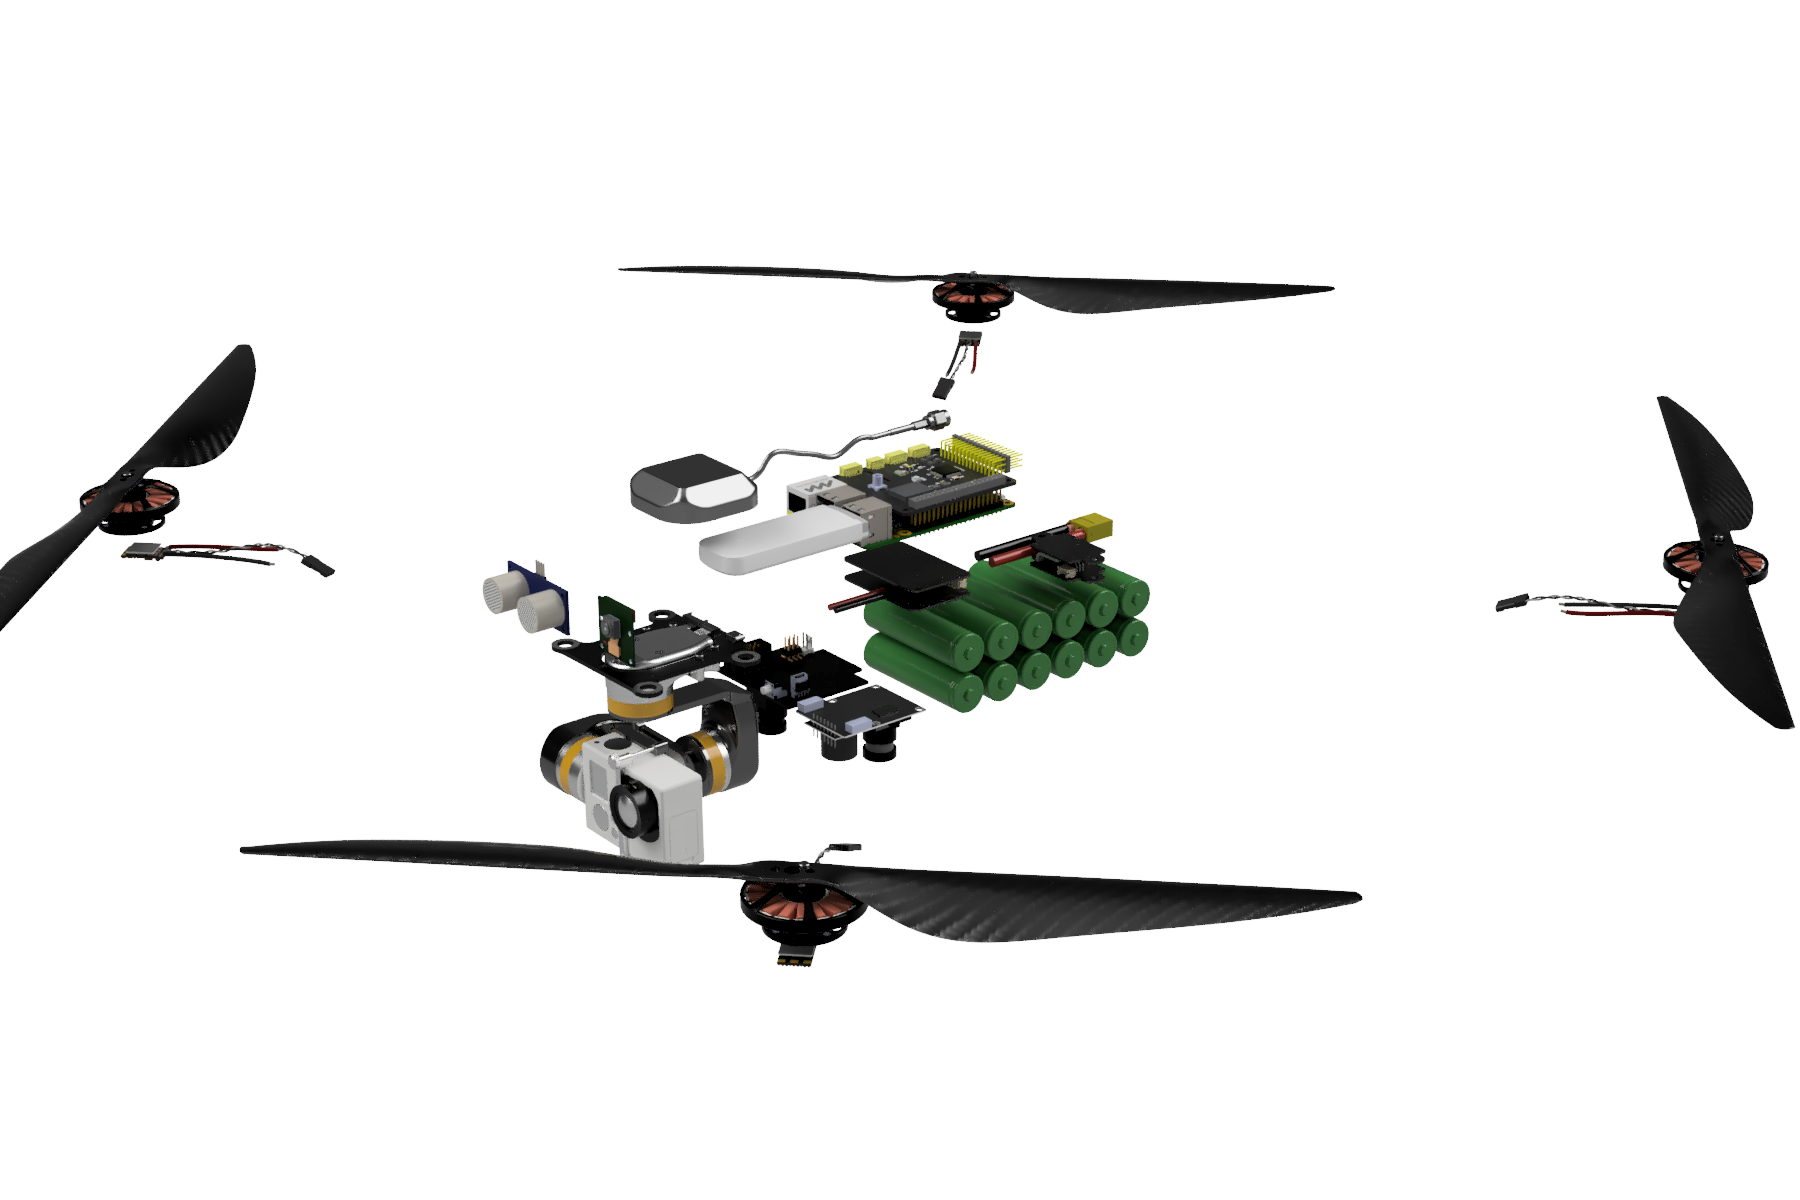
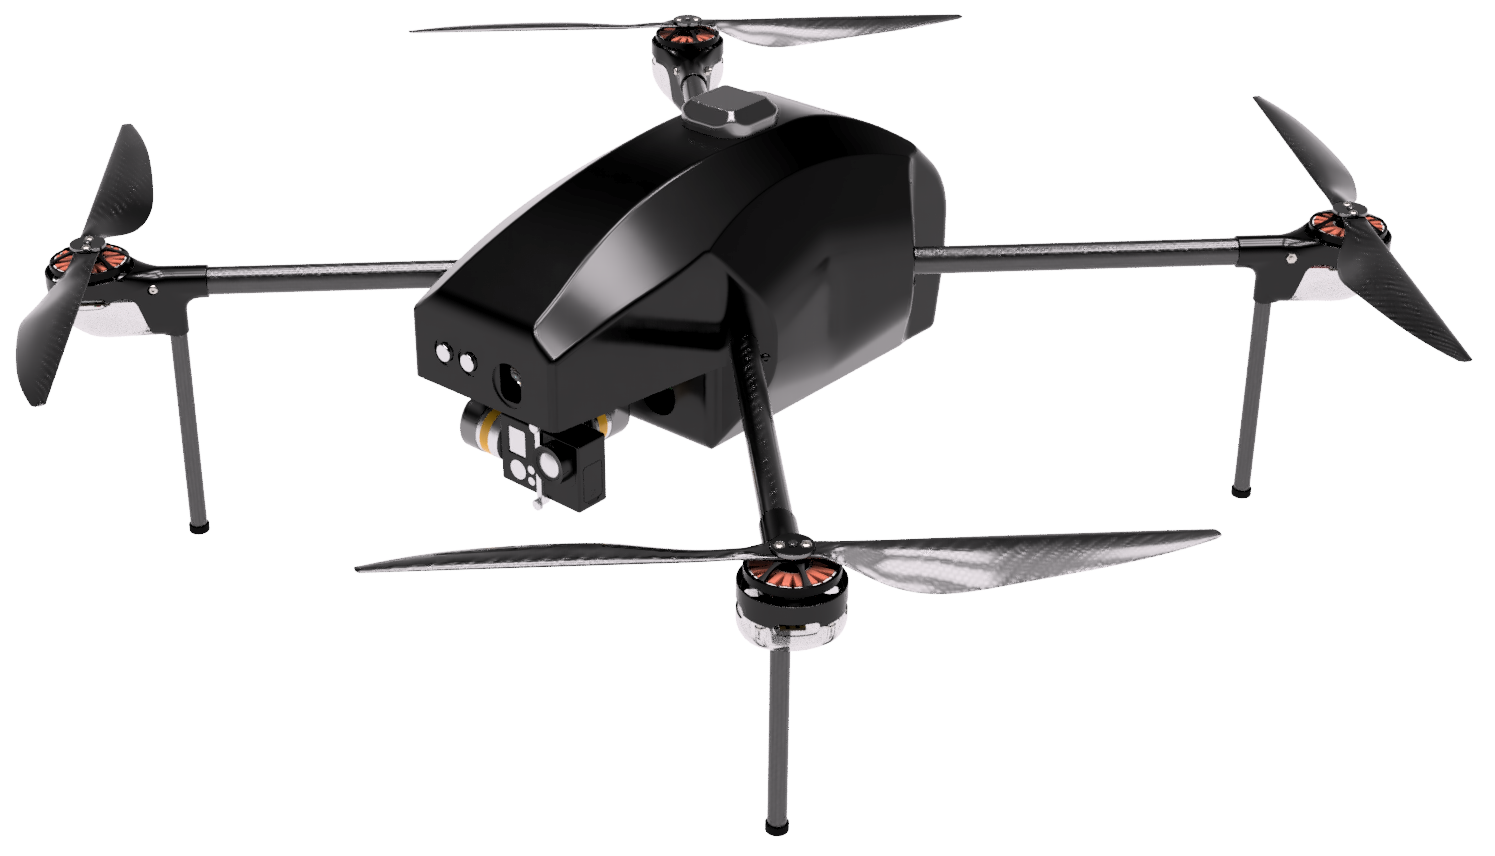
Fully assembled model (without wires):
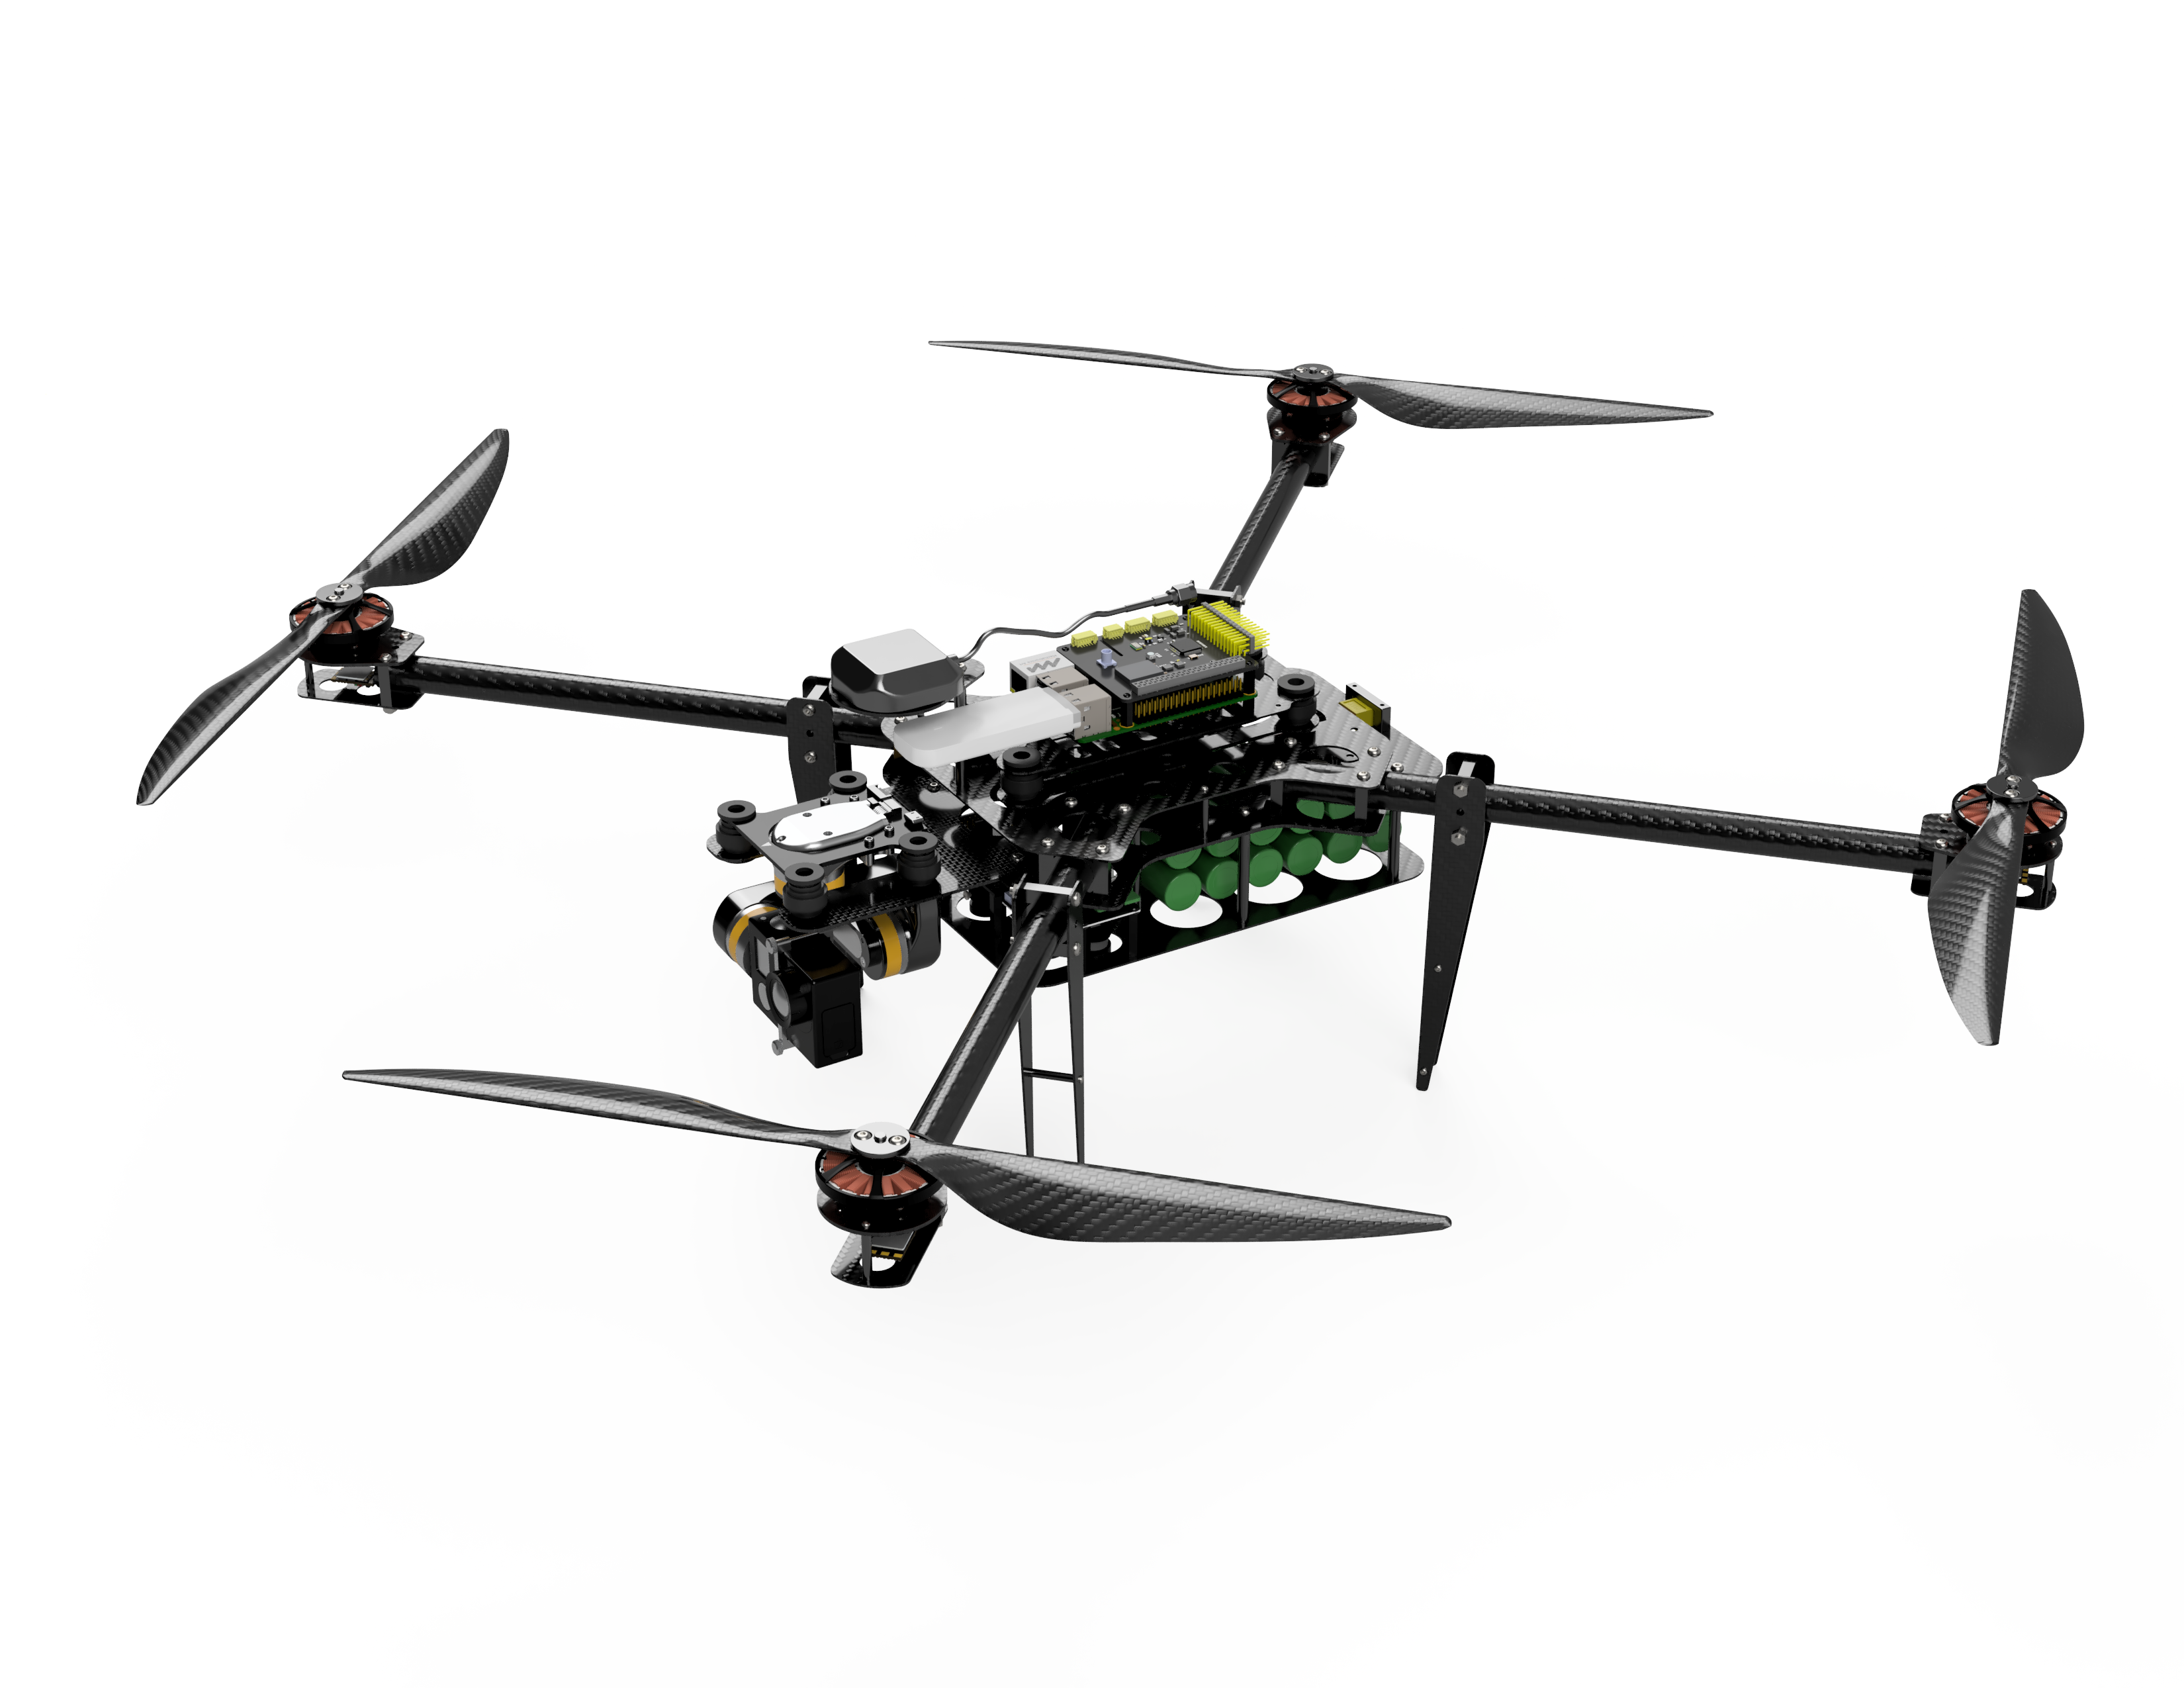
The total weight of the copter with electronics, battery Li-Ion 6S2P and wires should get 1931
Yes, it also seemed to me that the drone was too naked for the standalone version and the light rain would easily wet the onboard electronics. Therefore, I added a little plastic:
 3D model of the frame
 .
List of frame details .
3D model complete .
List of components .
The weight of an empty frame with a case of 384 g, the total weight of 2020 g, the estimated time of hovering per charge (battery discharge up to 20%): 44 minutes.
Charging box
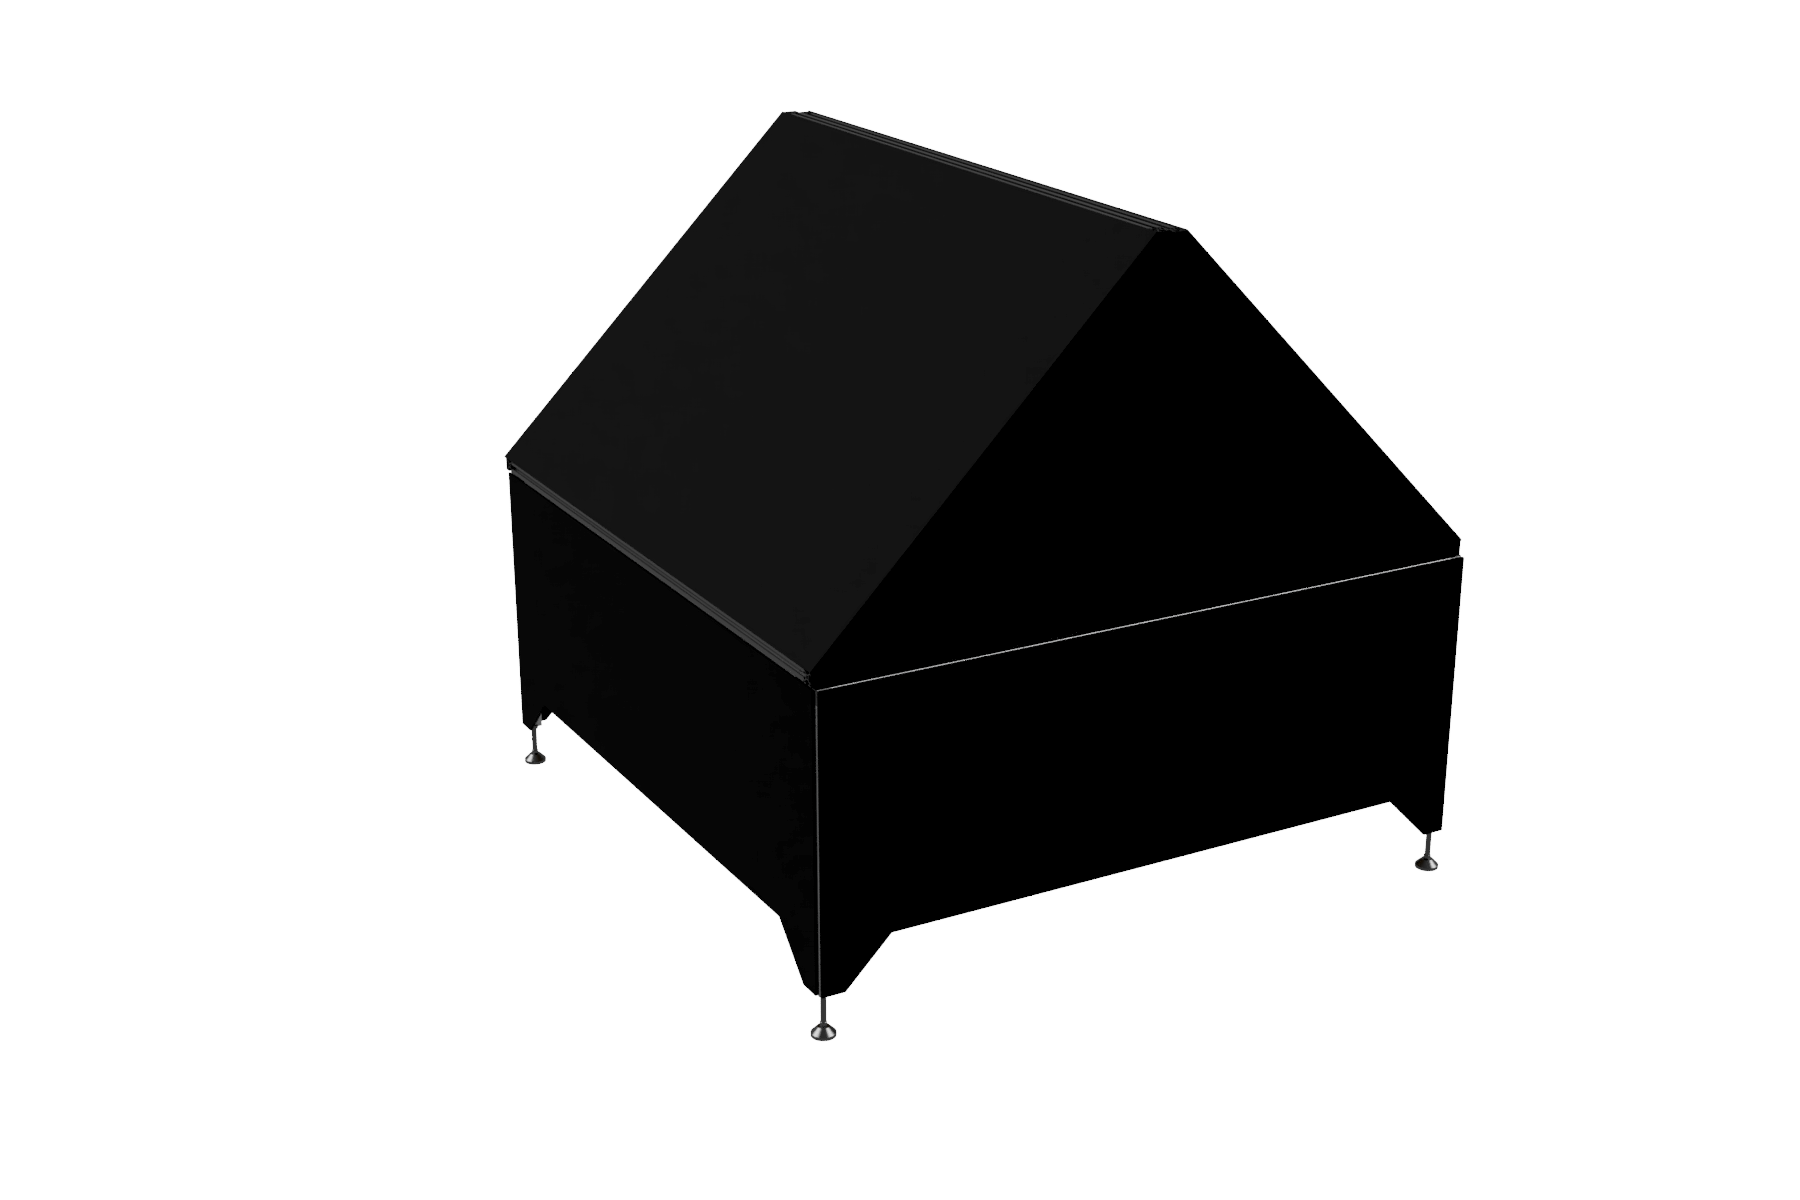
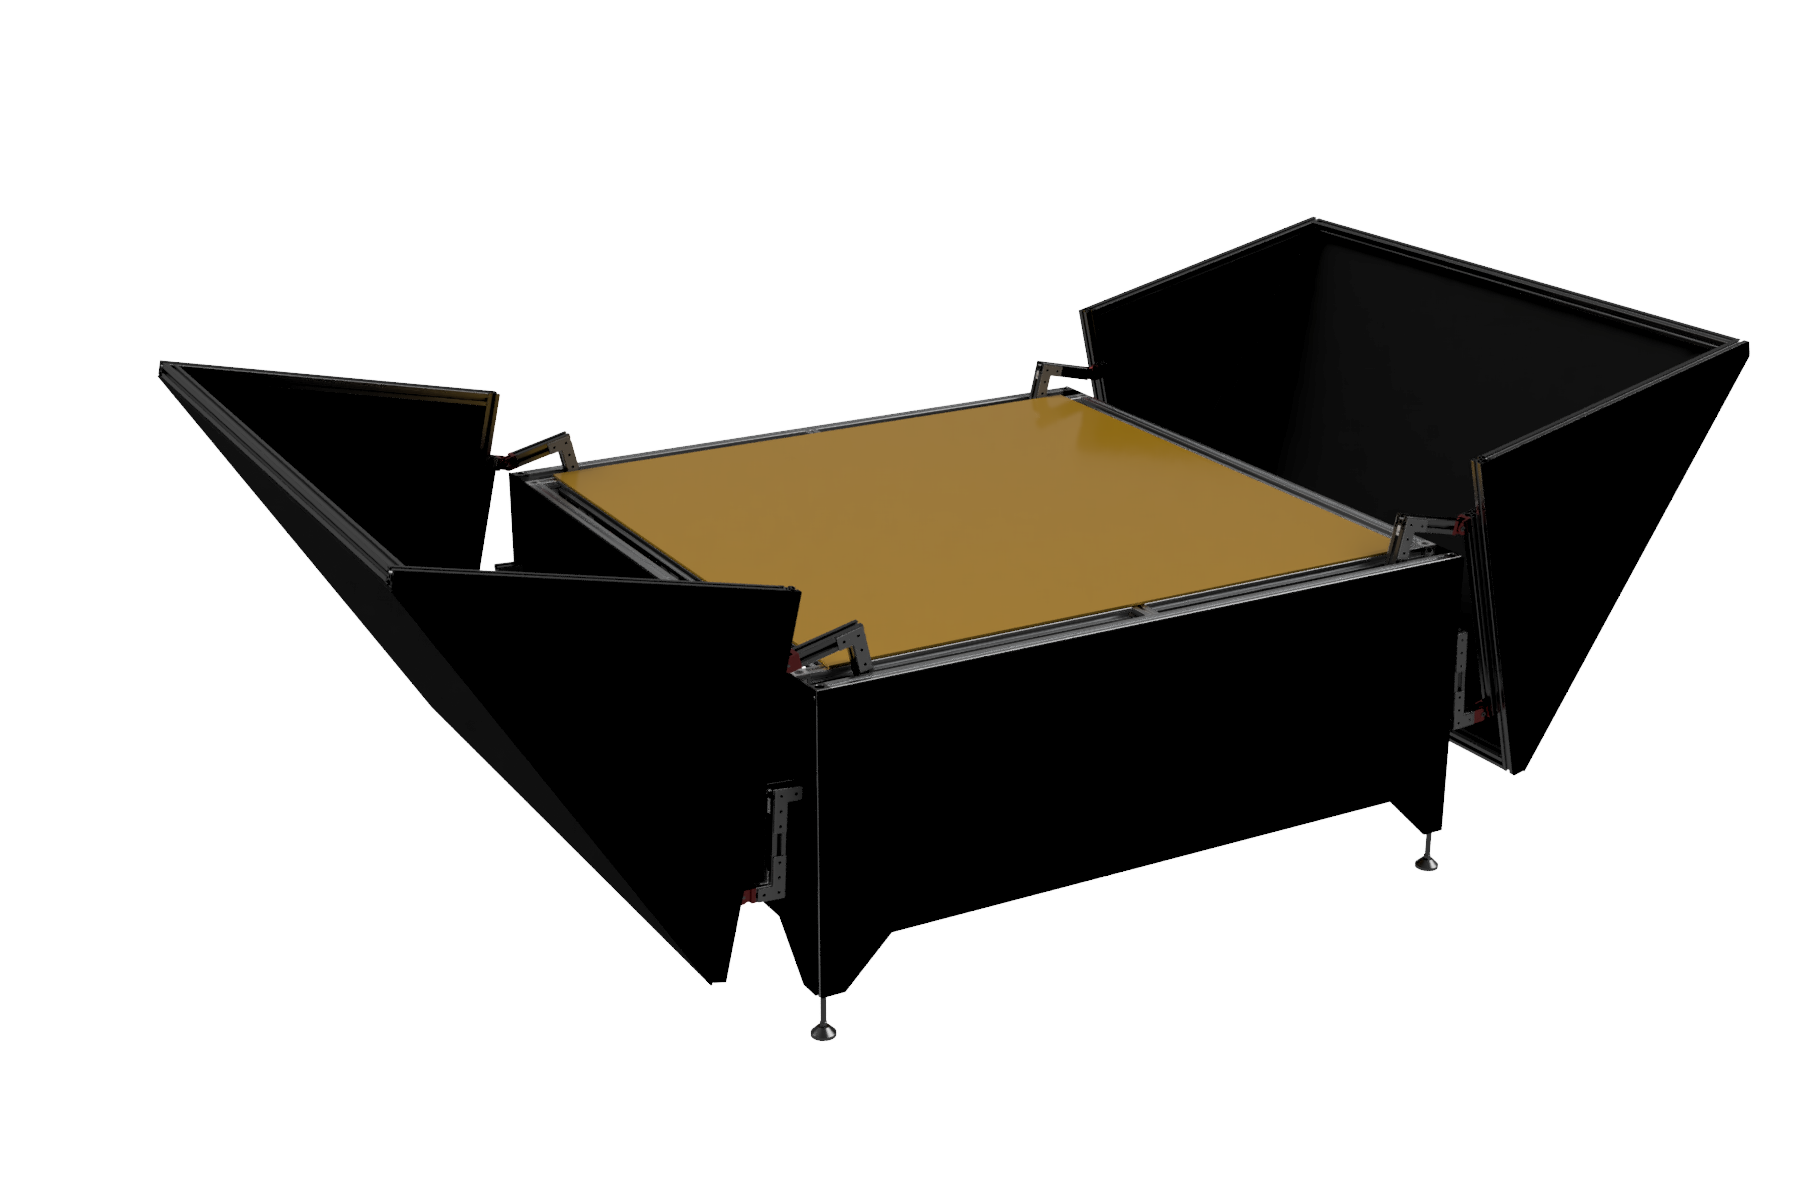
Charging box will be made of aluminum profile, mounting hardware and aluminum sandwich panels. It will have a router, a computer, weather sensors and a camera with a view of the landing zone. I decided to make a sloping roof of the two wings, so that in winter there would not accumulate snow on it and would not interfere with the opening. The mechanism of opening the valves has not been fully thought out yet, and the charging system has not been determined (I need tips).
In the next article I will tell you how to set up and launch the drone via the Internet using the GUI or the command line, about the options for charging systems from which I now choose, software for controlling the driver and analyzing images, and why my first flight through the Internet lasted so long:
To be continued...Part 2 about software.