 In the last post I told you how SSHeller helps you quickly and easily deploy an OpenVPN server. In version 1.1.0 , another plugin was added - Docker .
I want to immediately warn you that if your hands are sharpened under the console, and managing Docker via the command line seems convenient and intuitive, you don’t need to read further, don’t write anything in the comments, I already know that you don’t need SSHeller.
And who needs it? First of all, developers of web applications, as well as all those who easily and quickly need to raise any service, be it a website, a blog, or an improvised file sharing service.
How it works
Need a server with almost any modern Linux distribution. But, unlike OpenVPN, for Docker, I would recommend Debian 9 or Ubuntu 18.04 . Things are a bit worse with Fedora and Centos , since you need to install more packages, additionally configure autorun, and work with the repository is a little different.
The most important thing is that it should be either a physical or virtual machine, but not a container (LXC, OpenVZ will not work). And you need SSH access. In the last publication there is a detailed description of how to register and start the server in DigitalOcean, and at the end - a little less detailed instructions for Linode. Both of these services offer simple cars for $ 5 / month and bonuses when registering via a referral link. For starters, this will be quite enough.
As soon as we have an IP, login and password to the server, you can install SSHeller. You can download it from releases on GitHub , there are versions for macOS, Windows and Linux. After launch we add our server, connect to it and go to the Docker plugin.
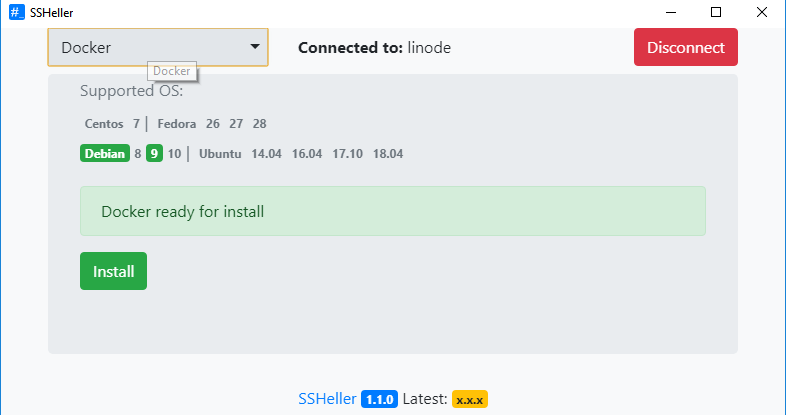
If the Docker is not already installed on the server, you can do this by clicking the Install button.
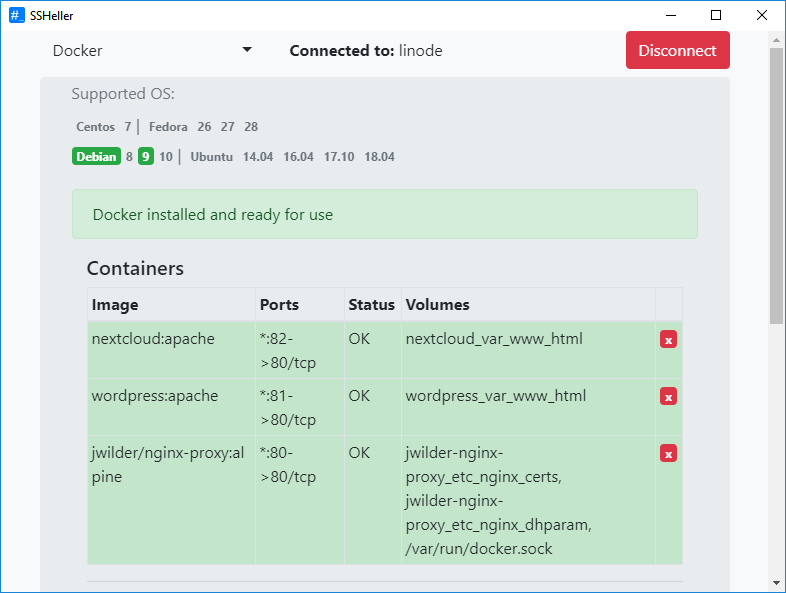
In less than a minute, the installation will be completed, a report will open not read and close, and in the main window there will be a list of containers, volumes and the launch form of a new container.

Main functions
Container run
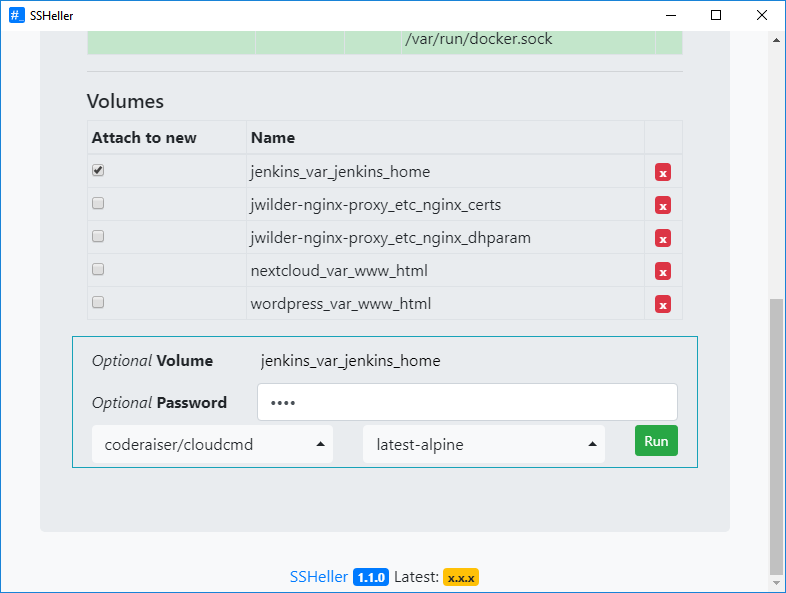
At the very bottom of the workspace there is a block for launching a new container. It displays:
- the volume selected from the list above, which will be connected to the container, if it supports it
- the password that will be set for the application in the container, again, if it supports it
- container image selection
- and selecting the tag image
You can choose any official Docker image and a few more. Their list is specified in the https://github.com/delfer/ssheller/blob/master/plugins/docker-profiles.json file and at the time of publication it is:
- jwilder / nginx-proxy - automatically configured Nginx to access containers through the domain name, not the port
- panubo / vsftpd - FTP server
- coderaiser / cloudcmd - WEB-interface for access to files
- webdevops / php-apache-dev - build Apache + PHP + modules for development (displays errors)
- webdevops / php-apache - build Apache + PHP + modules for the "sell" (does not display errors)
- webdevops / php-nginx-dev - build Nginx + PHP + modules for development (displays errors)
- webdevops / php-nginx - build Nginx + PHP + modules for "sell" (does not display errors)
Most containers will ignore the contents of the Password field, except those listed in the docker-profiles.json ( parameters section):
- panubo / vsftpd - password for connecting via FTP as admin
- coderaiser / cloudcmd - password for login as admin
- mysql / mariadb / postgres / influxdb - password to connect to the db database under the admin user
- rabbitmq / couchdb / orientdb - password for connecting as admin
Important features:
- Tags are loaded automatically after selecting an image. Search available
- The container will be available on the port indicated by its author. If the port is busy, the first free one will be selected.
- The container will be available on the domain <container name>. <Server domain> if there are corresponding records in DNS
- Volumes will be created for the container if they are specified by the author of the image, or they are specified in docker-profiless.json ( volumes section)
Useful tips:
- jwilder / nginx-proxy needs to be started first so that it takes port 80
- panubo / vsftpd should be run last, as it starts up changing the access rights to the folder in order to have full access to it
- It is almost always better to use an image with an
alpine or latest-alpine tag - they work just like normal ones, but they load faster with less weight. - if you need MySQL - use MariaDB better, if, of course, you are not exactly sure that MariaDB is not suitable for you
- if you are running something with PHP , then you most likely do not need
fpm , but you need apache
Additional Information
After clicking on the RUN button, as soon as the container is launched, a window will appear with a report showing the completed docker run . She will tell a lot of interesting things about how everything is actually arranged.
Access via domain name
If you run several containers with a web interface, such as Wordpress and NextCloud, and you want to access them not through specifying the IP and port, but by the domain name, then you need to follow two simple conditions:
- First run jwilder / nginx-proxy
- Have a wildcard DNS record
Those. if, for example, you have an example.com domain, then you need to add an * type A record to it and indicate the server's IP. In this case, the launched worpdress container will be available at http://wordpress.example.com
And if there is no domain - no problem, you can use the nip.io service - you do not need to register or add entries. If, for example, your server has IP 172.104.129.183 , and jwilder / nginx-proxy and nextcloud are running on it , then the latter will be available at http://nextcloud.172.104.129.183.nip.io
Run two containers with one volume
It often happens, for example, that one container publishes files ( nginx ), and the second loads ( panubo / vsftpd ). Or the second is needed to view / download the contents of the first.
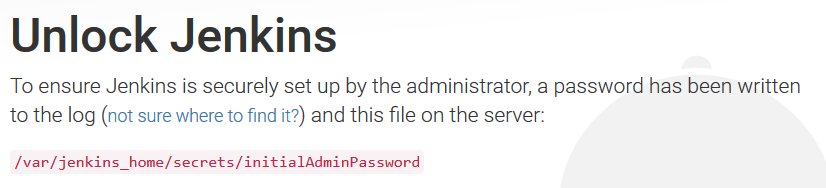
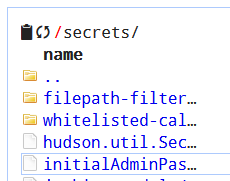
For example, Jenkins after launch asks for the password recorded in the file.
- Run Jenkins
- Choose his volume
jenkins_var_jenkins_home - We specify the password for access
- Run the coderaiser / cloudcmd
- Open up http: // coderaiser-cloudcmd . <domain>, enter the
admin username and password from item 3 - We look at the password from Jenkins
Container Interactions
It is also necessary to connect from one container to another. For example, during installation, wordpress will ask you to specify the database connection parameters: server address ( host ) and port.
localhost for interaction between containers will not work.
In general, you need to specify the external IP address of the server and the port displayed
before the arrow ( -> ) in the list of containers. For simplicity, the ability to simply specify the word host added instead of the IP address of the server.
In addition to MySQL, PostgreSQL, MongoDB, Redis, memcached, Tomcat, InfluxDB, CouchDB, etc. can be useful.
Examples of using
File sharing
- Run nginx: alpine
- Enter the administrator password for the web interface
- Select the volume
nginx_usr_share_nginx_html - Run the coderaiser / cloudcmd: latest-alpine
Now you can go to http: // <server address>: 8000 to upload files with authorization, and direct links will be available via http: // <server address> . You only need to specify the full path to the file.
Wordpress
- We invent and enter the password for the database
- Running mariadb
- Start wordpress: apache
- Go to the address http: // <server address> , start the installation and specify the connection settings to the database:
- Database name:
db - Username:
admin - Password - the one that entered in paragraph 1
- Database server:
host - Table prefix - any
LAMP
- We invent and enter the password for the database
- Running mariadb
- Launch webdevops / php-apache-dev: alpine
- Choose a
webdevops-php-apache-dev_app - We invent and enter the password for the FTP server
- Run panubo / vsftpd
Now you can upload .php files to ftp: // <server address> and run them by going to http: // <server address>
PS
Not all containers are available in the application, and some of the available ones do not work without additional settings - edit the file on GitHub and send your pull requests. If you do not know how - open Issue . This will help the development of the project.
Other ways to support the project, as well as a lot of useful information - in the file README .