Angular 6 allows literally in several commands to create a basis for a Progressive Web Application (PWA), to create a layout for navigation pages, tables, dashboard.
We need angular-cli version not lower than 6.0.0, so check the version of the installed package:
ng --version
and, if necessary, install the latest version:
npm i -g @angular/cli
We do all this, because there are differences in the structure of projects that are created by angular-cli 6 versions and projects created by earlier versions. There are also differences in functionality. Just about some of these features this article.
So, we will create a typical project immediately with the routing functionality, since it is planned to implement and demonstrate the possibilities of deferred module loading (lazy loading modules):
ng new angular-pwa-ci --routing
To make it easier to track the changes that will occur with the project, we will make the first commit.
git init git add . git commit -m "Initial commit"
The following team will turn our project into a Progressive Web Application (PWA)
ng add @angular/pwa --project "angular-pwa-ci"
The issuance of the results of the command contains the following:
Spoiler header Installed packages for tooling via yarn. CREATE ngsw-config.json (392 bytes) CREATE src/assets/icons/icon-128x128.png (1253 bytes) CREATE src/assets/icons/icon-144x144.png (1394 bytes) CREATE src/assets/icons/icon-152x152.png (1427 bytes) CREATE src/assets/icons/icon-192x192.png (1790 bytes) CREATE src/assets/icons/icon-384x384.png (3557 bytes) CREATE src/assets/icons/icon-512x512.png (5008 bytes) CREATE src/assets/icons/icon-72x72.png (792 bytes) CREATE src/assets/icons/icon-96x96.png (958 bytes) CREATE src/manifest.json (1085 bytes) UPDATE angular.json (3571 bytes) UPDATE package.json (1389 bytes) UPDATE src/app/app.module.ts (605 bytes) UPDATE src/index.html (390 bytes)
Let's make another commit.
And let's hasten to make sure how our application now meets the requirements for PWA.
To do this, we use the lighthouse utility, which will audit our application and generate a detailed report on its results.
If this utility is not yet installed, you can install it with the command:
npm i -g lighthouse
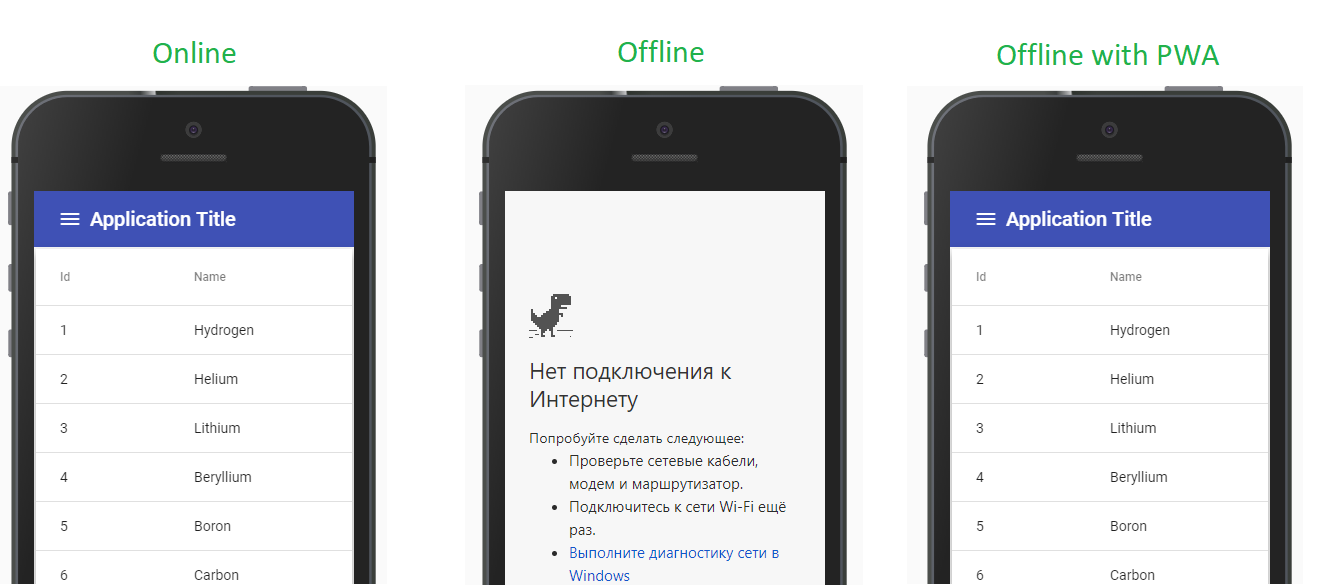
This utility, in particular, will check the display of content by our application when javascript is disabled in the browser. Therefore, we check the presence in the src/index.html file
<noscript>Please enable JavaScript to continue using this application.</noscript>
Now we will build our project in production mode, as the default tinctures provide for the work of service workers only in prodaction mode.
ng build --prod
The rest of this article will describe the auto-deploy procedure for the free hosting provided by the firebase service, but now for development we will have enough local server, which we will write now. Create a server.js file in the project root
If you are using Visual Studio Code as editor, I recommend installing the Angular Essential extension, which includes the Angular v6 Snippets extension , with which you can start typing:
ex-node-
Agree with the proposed snippet, specify the desired port and folder in which the files to be displayed are located. And that's all. You can run:
node server.js
Our application is available at http://localhost:8080 and we can run an audit.
lighthouse http://localhost:8080
The utility will create a localhost_2018-06-08_23-42-21.report.html file in the root of our project. Open it in the browser and see the results of the audit. We did not score 100%, but still ahead.
In order to organize our application's auto-heat on firebase, you will not need an account at http://firebase.com .
After that install firebase-tools . We will install locally, since this package will be used later for auto-heating.
npm i -D firebase-tools
And in order not to write the long path node_models/firebase-tools/bin/firebase each time - we also install globally.
npm i -g firebase-tools
Log in to the firebase service:
firebase login
This command will open the default browser on the page where you will be asked to give permission to the application. We give consent. You can work on.
Creating a new project is only possible in the Firebase Console, so let's go to https://console.firebase.google.com and create a new project, which we call angular-pwa-ci .
The following command will create configuration files.
./node_modules/firebase-tools/bin/firebase init
This command will bring up a dialogue where we:
- select the
angular-pwa-ci project; - from services we will use only
hosting ; - folder for synchronization, we specify
dist/angular-pwa-ci/ ; - configure our application as a SPA (redirect all requests to index.html);
- refuse to rewrite index.html.
Now we will lay out our application on a hosting in the manual mode
./node_modules/firebase-tools/bin/firebase deploy --only hosting
In issuing this command, the address at which our application will be available will be indicated. For example, https://angular-pwa-ci.firebaseapp.com .
And now we will audit our application again.
lighthouse https://angular-pwa-ci.firebaseapp.com
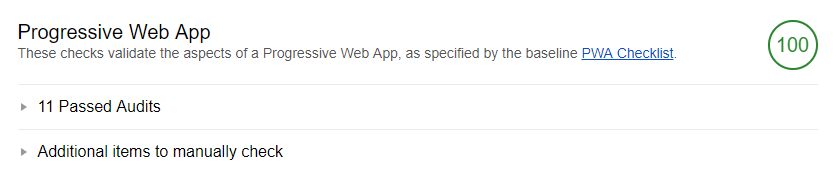
Here our application has become 100% PWA.
Lazy loading modules
A little decorate our application. At the same time exploring another of the possibilities of angular 6.
Add angular / material support for our project.
ng add @angular/material@6.2.1 @angular/cdk
UPD: The version for angular / material is specified, since the last 6.3 gives an error.
Now create the navigation page of our application.
ng g @angular/material:material-nav --name=nav -m app
It is time to make changes to the code of our project in manual mode.
// src/app/app.component.html <app-nav></app-nav>
// src/app/nav/nav.component.ts @Component({ - selector: 'nav', + selector: 'app-nav', templateUrl: './nav.component.html', styleUrls: ['./nav.component.css'] })
Create a module
ng gm table --routing
In the created table module, create a component with ready-made markup and styles.
ng g @angular/material:material-nav --name=table --flat=table -m table
// src/app/app-routing.module.ts -const routes: Routes = []; +const routes: Routes = [ + { + path: 'table', + loadChildren: './table/table.module#TableModule' + }, + { + path: '', + redirectTo: '', + pathMatch: 'full' + } +];
// src/app/table/table-routing.module.ts -const routes: Routes = []; +const routes: Routes = [ + { + path: '', + component: TableComponent + } +];
routerLink link to routerLink and add router-outlet
// src/app/app.component.html <mat-toolbar color="primary">Menu</mat-toolbar> <mat-nav-list> - <a mat-list-item href="#">Link 1</a> + <a mat-list-item routerLink="/table">Table</a> <a mat-list-item href="#">Link 2</a> <a mat-list-item href="#">Link 3</a> </mat-nav-list> @@ -25,5 +25,6 @@ </button> <span>Application Title</span> </mat-toolbar> + <router-outlet></router-outlet> </mat-sidenav-content> </mat-sidenav-container>
After that, run our application in ng serve development mode. Note. If before you were in this mode, then you need to restart.
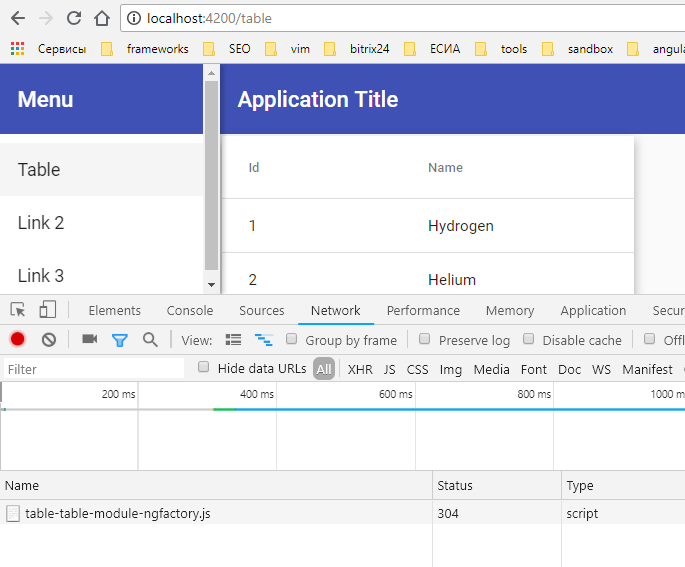
We can observe that an extra chunk has been created.
And in the developer panel on the network tab, we will see that, when clicking on the link, our table module is loaded dynamically.
Create another function module and component with markup for the dashboard
ng gm dashboard --routing ng g @angular/material:material-dashboard --flat=dashboard --name=dashboard -m dashboard
Actions to change the code are similar to the table module.
As a result, we get a PWA application with two dynamically loaded functional modules.
It's time to move on to implementing our application's automatic deployment on a firebase.
CD for Firebase
We will need an account at https://travis-ci.org and an account at https://github.com .
Create an angular-pwa-ci repository in github and place our application code in it
git remote add https://github.com/< >/angular-pwa-ci.git git push -u origin master
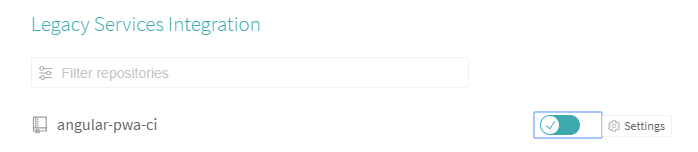
After that, we connect our angular-pws-ci repository angular-pws-ci service. To do this, on the page https://travis-ci.org/profile/ click the synchronization button, and in the list by the repository we will connect angular-pwa-ci
For the deployment of our application, we need the key for this, we will execute the command
firebase login:ci
The issuance of this command will contain a key. Copy its value and add it to the travis-ci environment variables under the name FIREBASE_TOKEN

It remains to add to our project file .travis.yml
language: node_js node_js: - "node" before_script: - npm i -g firebase-tools script: - npm install - npm run build - firebase use --token $FIREBASE_TOKEN angular-pwa-ci - firebase deploy -m "build $TRAVIS_BUILD_ID" --non-interactive --token $FIREBASE_TOKEN cache: directories: - "node_modules"
We commit to commit and send ours to github. As a result, the trigger that runs the job on travis-ci will work. Upon completion, our project on the firebase hosting will be updated.
Project source code is available.
Demo project
You can play with the code