→
First partA thermomug is not a thermos. Its task is not to brew rosehip, but to provide a comfortable temperature of the drink. This means a rapid cooling of a freshly prepared hot beverage (from 95-80 ° C to 65-60 ° C). And then keeping the temperature as long as possible.
Since water has a very large heat capacity, solving this problem by the “massiveness” method leads to excessive weighting of the circle. The solution could be the use of a phase transition.
 The principle of operation of the thermo mug at the phase transition. Picture borrowed from Joeveo.
First, the material in the walls takes away excess heat from the drink, passing into the liquid phase. Then, when the beverage cools down below the crystallization temperature of the filler, the filler hardens, giving off heat.
Since I had a broken thermomug in stock, it was decided to try a phase transition on it. Well, for those who wanted to go with Kickstarter with this idea, the news (good for potential buyers and bad for potential sellers): everything has already been
stolen thought up to us.
Overview
An Internet search gave several results for a “thermomug at the phase transition”.
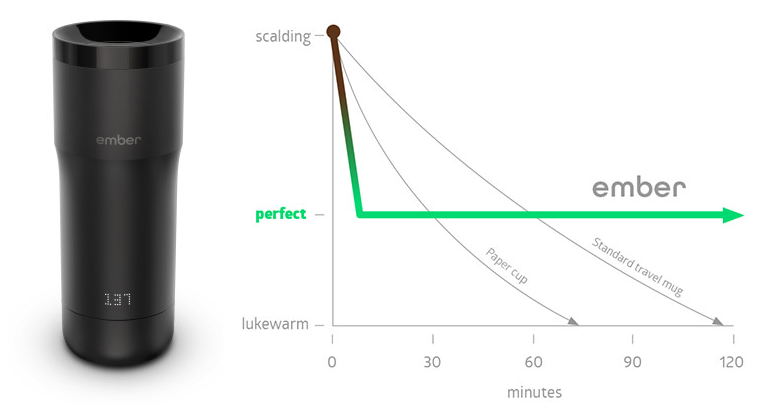 Ember
Ember for $ 150. Oddly enough at their
office. less information
site .
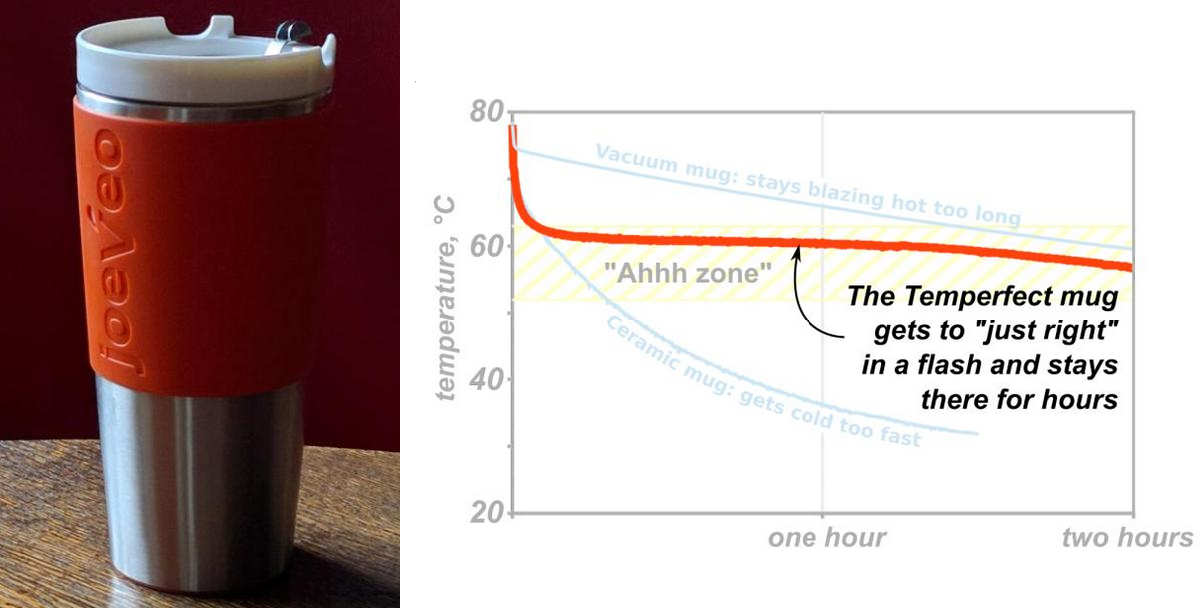 Joeveo
 for $ 40.
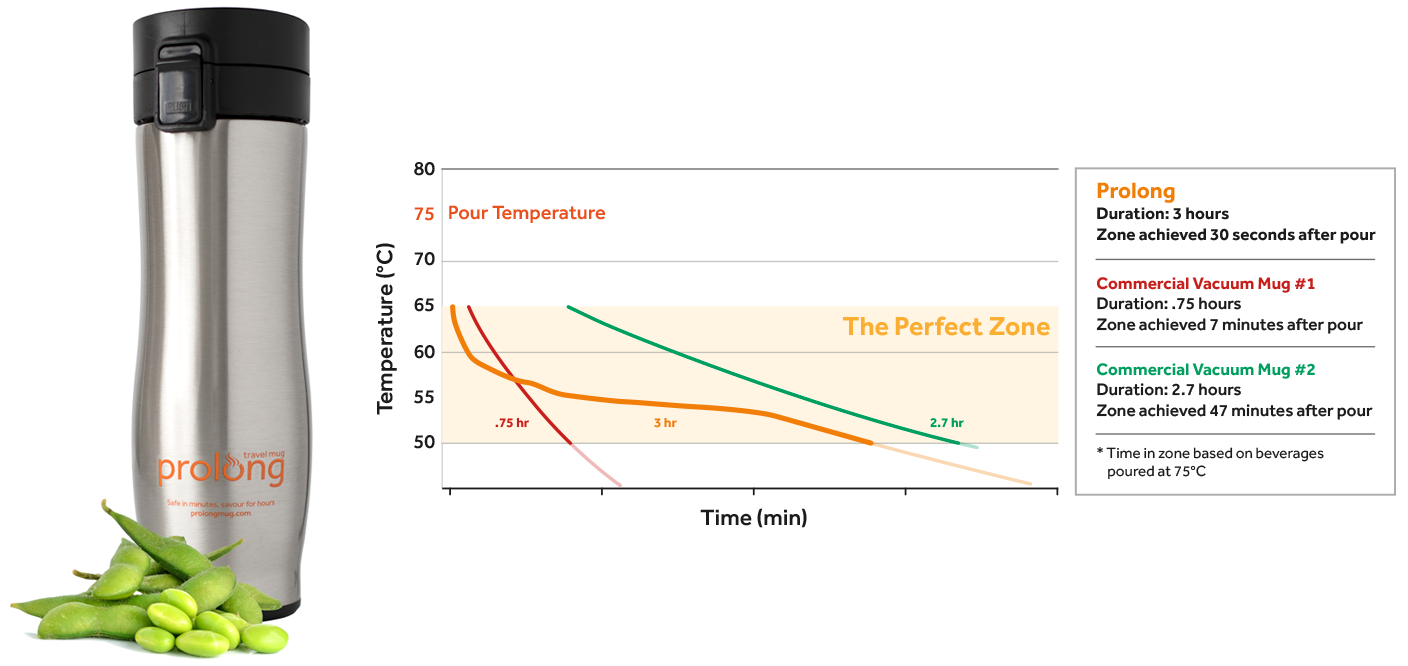 Prolong
 for $ 40.
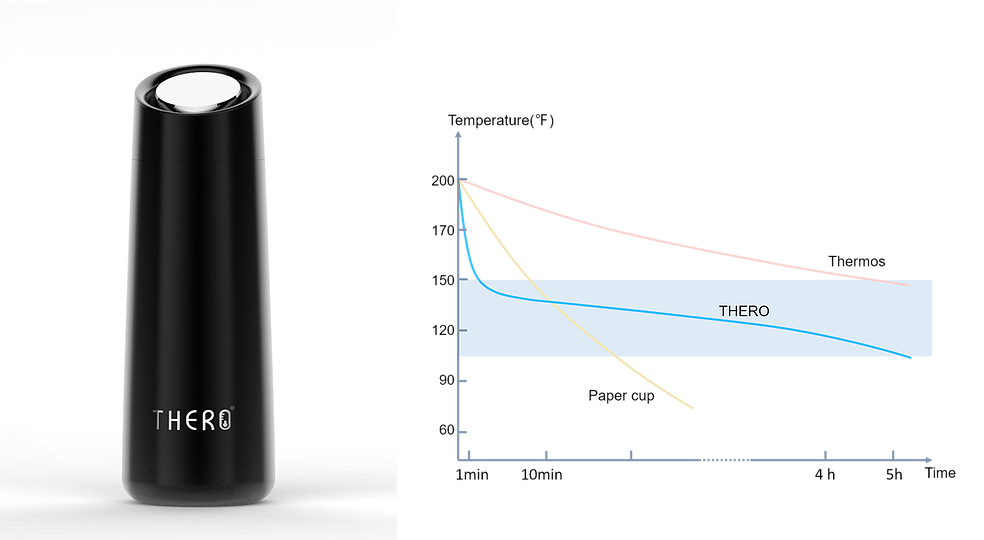 Thero
Thero for $ 60
 Lexo
Lexo for $ 38-44 depending on weight.
All the projects listed above use the same phase transition
principle , described back in 2009. Fraunhofer IBP. I wonder how things are with patents, given that some companies are suing even because of the corners of the corners?
It is noteworthy that the majority of manufacturers of a thermomug on the phase transition on their “miracle graphs” show the pouring temperature - 80 ° C. Prolong - 75 ° C. Ember does not show at all. And only Thero pours water from a boiling kettle (and this is just 95 ° C). Cooling a drink at 15 ° C or 35 ° C is not a bad difference.
Assembly
But first, disassembly.
As you can see in the photo, the cunning Chinese engineers laid a couple of minutes in keeping the temperature of the drink.
1. The sides of the inner glass for a centimeter protrude above the plastic.
2. The mounting screw creates a thermal bridge with the lower outer metal cup.
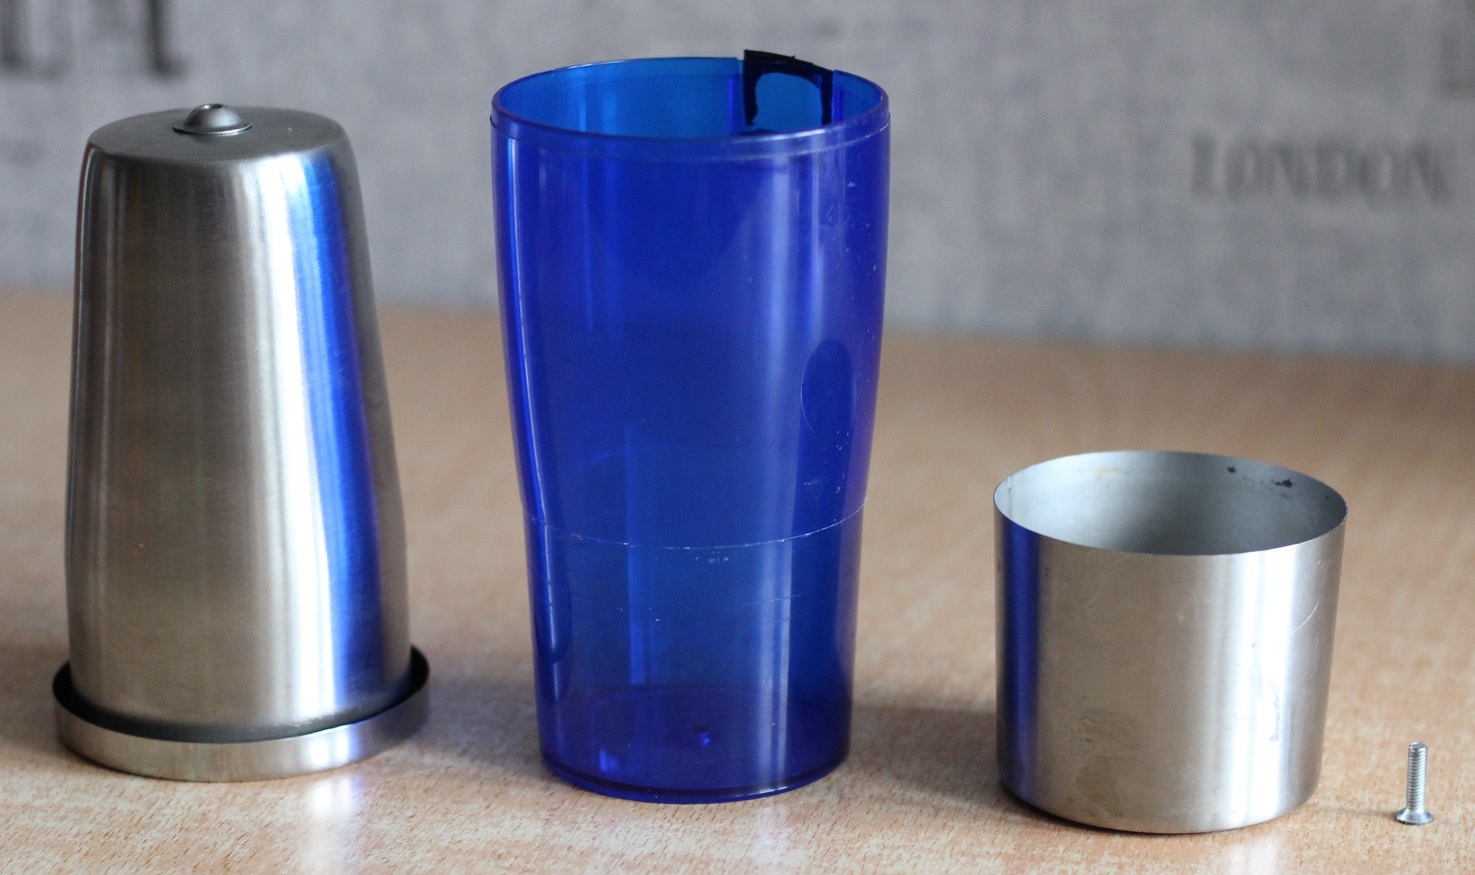 Disassembled thermomug.
I, unfortunately, do not have an environmentally friendly one, with a melting point of exactly 58 degrees, with high heat of material melting, but there are candles from Swedish comrades.
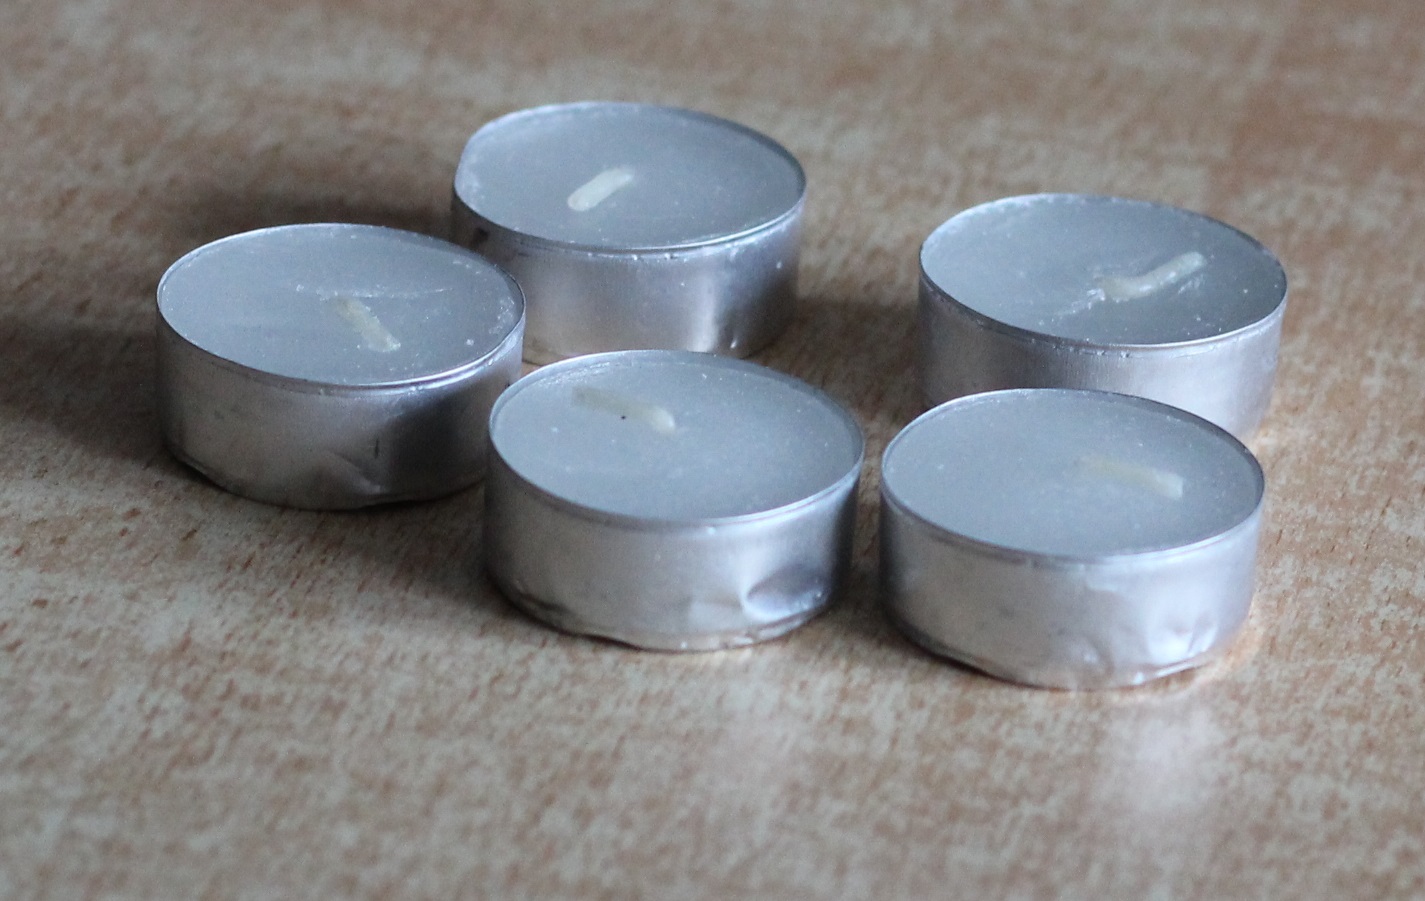 Candles from Ikea.
First, the required volume of filler was measured by the water displacement method. Then melt is prepared. We melt Candles in a water bath. They are convenient because they are easy to dose.
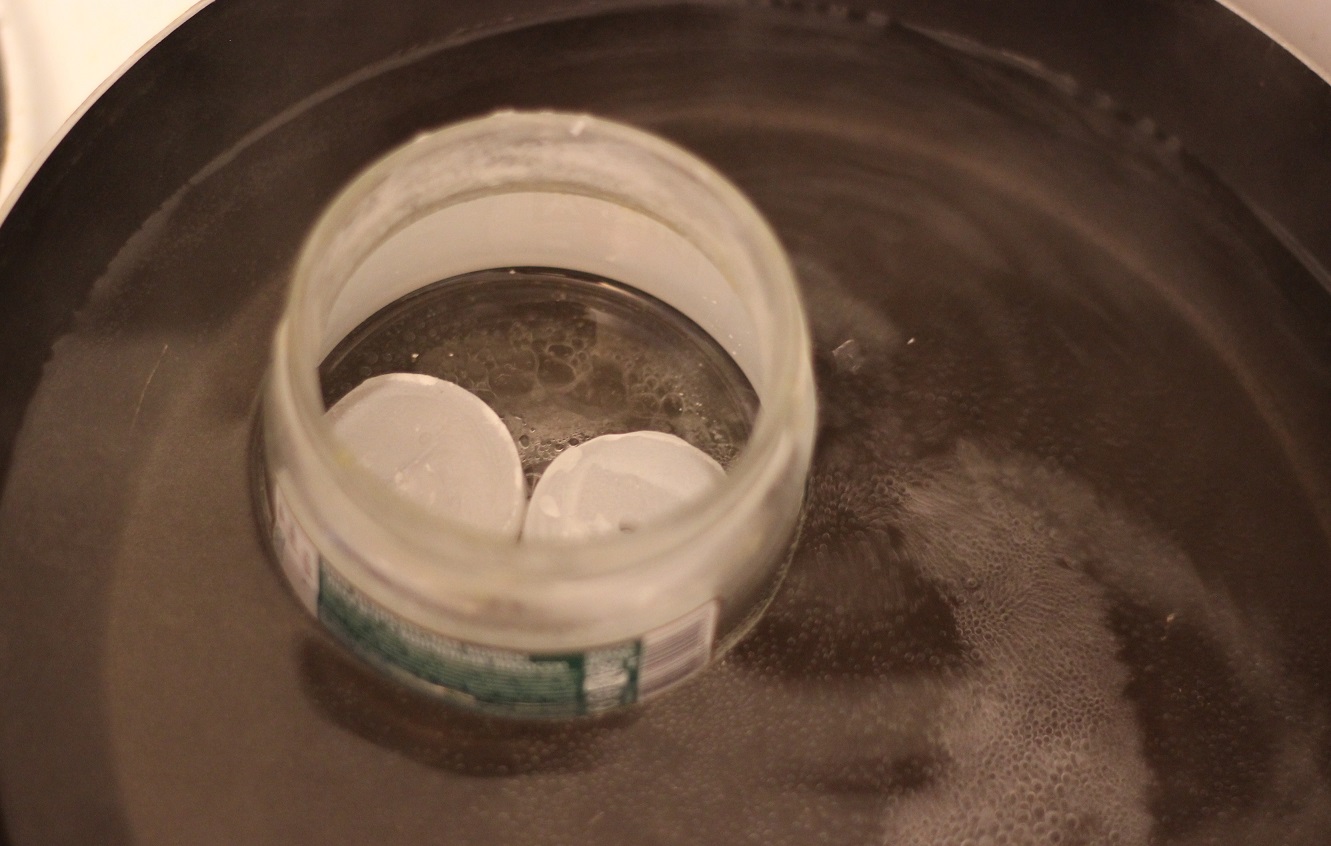 Melting candles on a water bath.
Fill, insert the inner cup, tighten the fastening screw - the thermomug on the phase transition is ready.
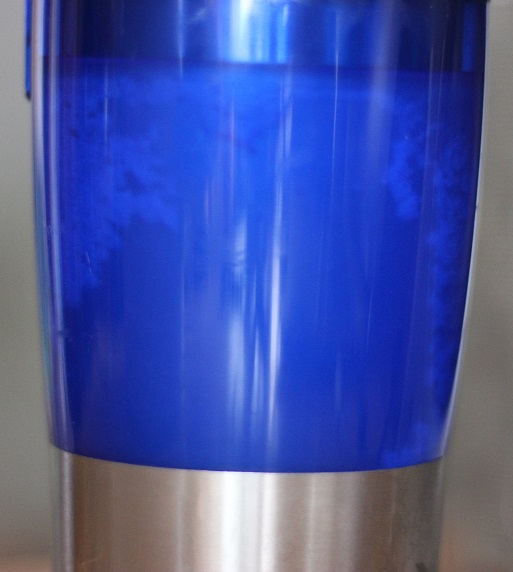 Frozen paraffin between the walls of the thermomug.
Measurements
Since we are going to compare the mug with the models on sale, we will fill the water with the same temperature - 80º. Fill the hot water and see how the wax melts in the walls.
 Paraffin melting is the same phase transition.
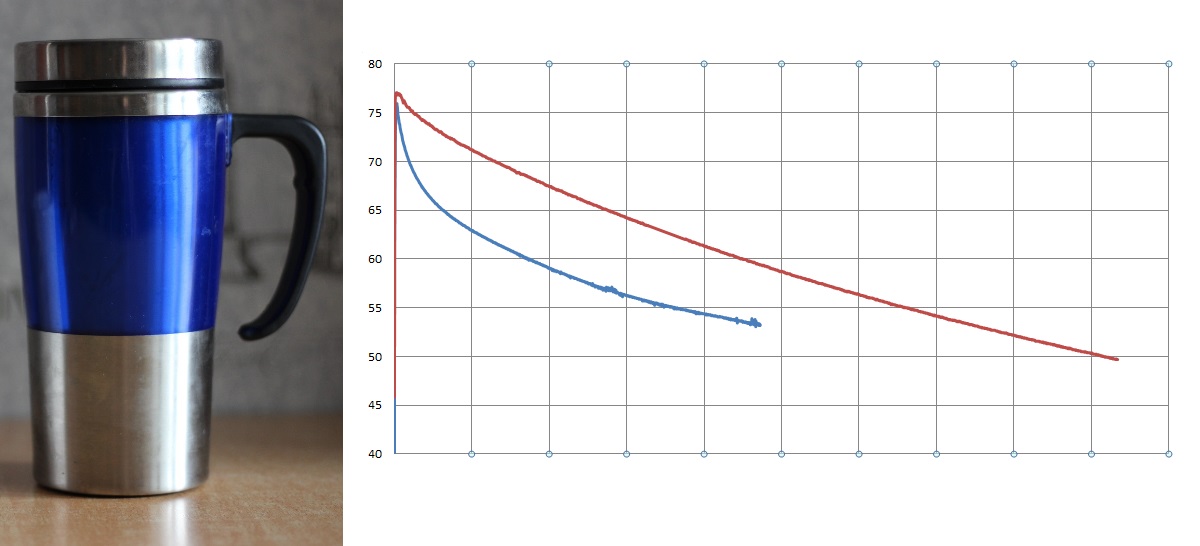
The graph is a comparison of the original thermomug with its alteration into a thermomug at the phase transition.
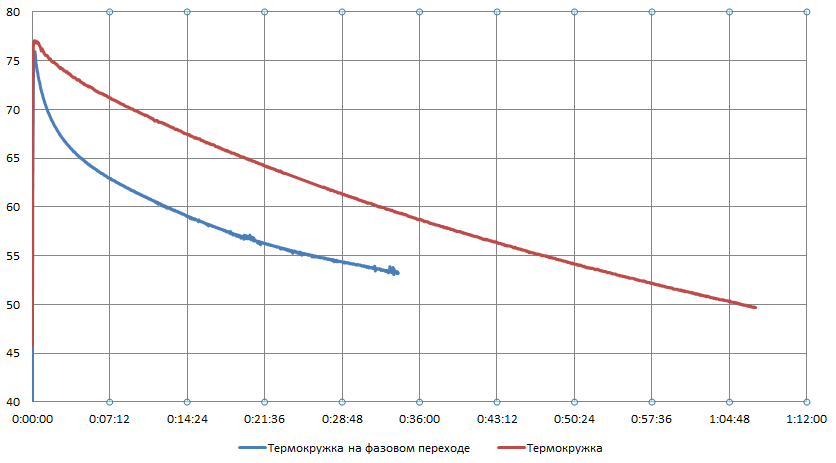 Comparison of conventional thermomugs and thermomugs on the phase transition.
Rapid cooling is obtained, but the temperature retention is so-so. Paraffin was added to the thermal bridge from the screw, which filled the space between the walls. In addition, paraffin increased the heat transfer to the screw: if earlier the contact was only at the fixing point of the inner glass, now along the entire length of the screw. And industrial thermomugs not only have no such miscalculations, as they have walls of three layers.
results
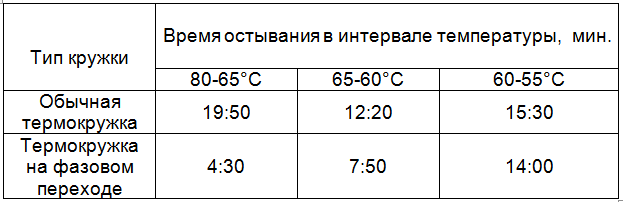 Cooling time intervals
I continue to count as in the first part from 60 to 55 ° C. Although in the above descriptions for some thermomugs, the interval is taken from 65 and as much as 50.
The cooling of this homemade mug from 55 to 50 ° C reaches 30 minutes. so if you take the interval 65-50 ° C, the retention time will be almost an hour (52 minutes).
findings
- It was possible to make a thermomug, which cools down from 80 to 65 ° C in 4:30, while the original thermomug - 19:50
- At the same time, the interval from 60 to 55 ° C compared to a conventional thermocup is less than just half past one.
- The interval of 65-60 ° C and 55-50 ° C, each can count in the "time of attainment" or "retention time" depending on temperature preferences.
- The original design features did not allow to extend the "hold time comfortable temperature"
- This result was achieved at an initial temperature of 80 ° C. If you use freshly boiled water (95 ° C), the result will be quite different. To correct it, you will need to pour less water, use more paraffin or special material as a filler.