A long time ago, my mom had an application on the phone that allowed you to change the brightness of the screen by swiping your finger along its left edge. Mom got used to it, and then switched to a new phone and there already that application from the store disappeared. Actually, having not found analogues, I decided to write it myself and give it to her for my birthday. A step-by-step guide to creating and the result is in this article.
To create this application, we need two permissions - permission to change the system settings (directly adjust the brightness) and the resolution of the overlay on top of other applications. Both of these permissions since the version of Android 6.0 can not be obtained simply by specifying them in the manifest - they must be requested from the user separately.
The structure of our application will be the following - the main activity, which will have two buttons - one will start the service that will draw the SeekBar for brightness control, and the second will stop this service. Let's start with our main activity. Here is the markup file:
MainActivity markup<?xml version="1.0" encoding="utf-8"?> <LinearLayout xmlns:android="http://schemas.android.com/apk/res/android" xmlns:app="http://schemas.android.com/apk/res-auto" android:layout_width="match_parent" android:layout_height="match_parent" android:orientation="vertical" > <Button android:id="@+id/startService" android:layout_width="match_parent" android:layout_height="wrap_content" android:layout_alignParentTop="true" android:layout_centerHorizontal="true" android:layout_marginTop="27dp" android:text=" " /> <Button android:id="@+id/stopService" android:layout_width="match_parent" android:layout_height="wrap_content" android:layout_alignLeft="@+id/startService" android:layout_below="@+id/startService" android:layout_marginTop="39dp" android:text=" " /> </LinearLayout>
And this is how the activity itself will look like:
mainActivity import android.content.Intent; import android.net.Uri; import android.os.Build; import android.os.Bundle; import android.provider.Settings; import android.support.v7.app.AppCompatActivity; import android.view.View; import android.widget.Button; public class MainActivity extends AppCompatActivity { @Override protected void onCreate(Bundle savedInstanceState) { super.onCreate(savedInstanceState); setContentView(R.layout.activity_main);
Now we will create the BrightnessChekingService service, I have already indicated its functions above. Do not forget - in case you create it manually, you need to register it in the manifest
BrightnessChekingService import android.app.Service; import android.content.Context; import android.content.Intent; import android.graphics.PixelFormat; import android.os.Build; import android.os.IBinder; import android.provider.Settings; import android.view.Gravity; import android.view.WindowManager; import android.widget.SeekBar; public class BrightnessChekingService extends Service{ private WindowManager windowManager; private WindowManager.LayoutParams params; private VerticalSeekBar seekBar; private Context context; public void onCreate () { super.onCreate();
And finally, let's create a VerticalSeekBar class which will be a custom version of the regular SeekBar, the difference will be that our SeekBar will be vertical
VerticalSeekBar import android.content.Context; import android.graphics.Canvas; import android.util.AttributeSet; import android.view.MotionEvent; import android.widget.SeekBar; public class VerticalSeekBar extends SeekBar { public VerticalSeekBar (Context context) { super(context); } public VerticalSeekBar(Context context, AttributeSet attrs, int defStyle) { super(context, attrs, defStyle); } public VerticalSeekBar(Context context, AttributeSet attrs) { super(context, attrs); } protected void onSizeChanged(int w, int h, int oldw, int oldh) { super.onSizeChanged(h, w, oldh, oldw); } public synchronized void setProgress(int progress) { super.setProgress(progress); onSizeChanged(getWidth(), getHeight(), 0, 0); } protected synchronized void onMeasure(int widthMeasureSpec, int heightMeasureSpec) { super.onMeasure(heightMeasureSpec, widthMeasureSpec); setMeasuredDimension(getMeasuredHeight(), getMeasuredWidth()); } protected void onDraw(Canvas c) { c.rotate(-90); c.translate(-getHeight(), 0); super.onDraw(c); } @Override public boolean onTouchEvent(MotionEvent event) { if (!isEnabled()) { return false; } switch (event.getAction()) { case MotionEvent.ACTION_DOWN: case MotionEvent.ACTION_MOVE: case MotionEvent.ACTION_UP: setProgress(getMax() - (int) (getMax() * event.getY() / getHeight())); onSizeChanged(getWidth(), getHeight(), 0, 0); break; case MotionEvent.ACTION_CANCEL: break; } return true; } }
Here is how the application manifest will look like:
Manifesto <?xml version="1.0" encoding="utf-8"?> <manifest xmlns:android="http://schemas.android.com/apk/res/android" package="com.example.bright"> <uses-permission android:name="android.permission.WRITE_SETTINGS" /> <uses-permission android:name="android.permission.SYSTEM_ALERT_WINDOW" /> <application android:allowBackup="true" android:icon="@mipmap/ic_launcher" android:label="@string/app_name" android:roundIcon="@mipmap/ic_launcher_round" android:supportsRtl="true" android:theme="@style/AppTheme"> <activity android:name=".MainActivity"> <intent-filter> <action android:name="android.intent.action.MAIN" /> <category android:name="android.intent.category.LAUNCHER" /> </intent-filter> </activity> <service android:name=".BrightnessChekingService" android:enabled="true" android:exported="true"></service> </application> </manifest>
That's all, a simple, but soul-ready birthday present for mom is ready. It turned out we have such a thing:
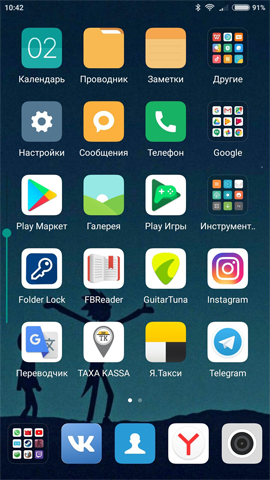
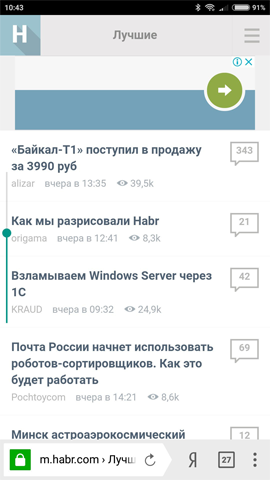
For the demonstration, I removed the line that sets the transparency, since in this mode the strip is almost invisible. If desired, you can add buttons that adjust the size of the strip, its position on the screen and transparency.
Here it is possible to take. If someone would use I would like to get feedback, as I tested only on the seventh android. And I want to express my deep gratitude to those who are already testing the application and reporting bugs - you are incredibly helping me. Thank!