Today we will tell you how you can quickly and easily set up two-factor authentication and encrypt important data, even with the possibility of using biometrics. The decision will be relevant for a small company or just for a personal computer or laptop. It is important that for this we do not need a public key infrastructure (PKI), a server with the role of a certificate services center (Certificate Services), or even a domain (Active Directory). All system requirements will be reduced to the Windows operating system and the user's electronic key, and in the case of biometric authentication also a fingerprint reader, which, for example, may already be built into your laptop.
For authentication, we will use the software of our development - JaCarta SecurLogon and the JaCarta PKI electronic key as an authenticator. The encryption tool will be a regular Windows EFS, access to encrypted files will also be carried out via the JaCarta PKI key (the same one used for authentication).
Recall, JaCarta SecurLogon is a certified FDEC of Russia software and hardware solution from Aladdin RD, which allows a simple and quick transition from single-factor authentication based on a pair of login-password to two-factor authentication in the OS via USB-tokens or smart cards. The essence of the solution is quite simple - JSL generates a complex password (~ 63 characters) and writes it into the protected memory of the electronic key. In this case, the password may be unknown to the user himself, the user only knows the PIN code. By entering a PIN code during authentication, the device is unlocked, and the password is transmitted to the system for authentication. Optionally, you can replace the PIN input by scanning the user's fingerprint, and you can also use the PIN + fingerprint combination.
EFS as well as JSL can work in standalone mode, without requiring anything except the OS itself. In all Microsoft operating systems of the NT family, starting with Windows 2000 and newer (except for home versions), there is built-in EFS (Encrypting File System) data encryption technology. EFS encryption is based on the capabilities of the NTFS file system and the CryptoAPI architecture and is designed to quickly encrypt files on the hard disk of a computer. EFS uses the user's private and public keys for encryption, which are generated when the user first uses the encryption function. These keys remain unchanged as long as his account exists. When encrypting a file, EFS randomly generates a unique number, the so-called File Encryption Key (FEK) with a length of 128 bits, with which files are encrypted. The FEK keys are encrypted with a master key that is encrypted with the key of the system users who have access to the file. The user's private key is protected by the password hash of the user himself. Data encrypted using EFS can only be decrypted using the same Windows account with the same password from which encryption was performed. And if you store the encryption certificate and the private key on a USB token or smart card, then accessing the encrypted files will also require this USB token or smart card, which solves the problem of password compromise, as it will be necessary to have an additional device in electronic key.
Authentication
As already noted, the configuration does not need AD or a certificate authority, you need any modern Windows, JSL distribution and license. The setting is simple to ugliness.
You need to install the license file.

Add user profile.
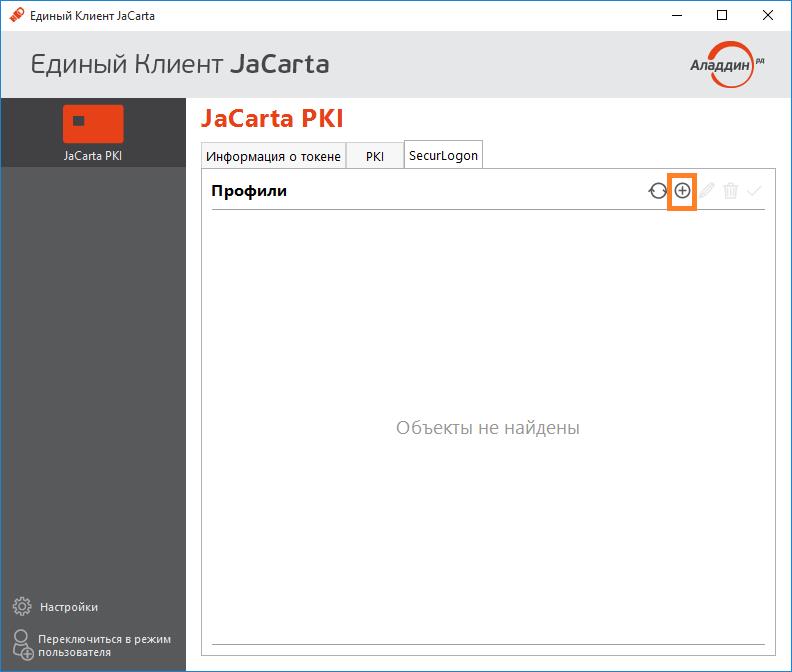

And start using two-factor authentication.
Biometric authentication
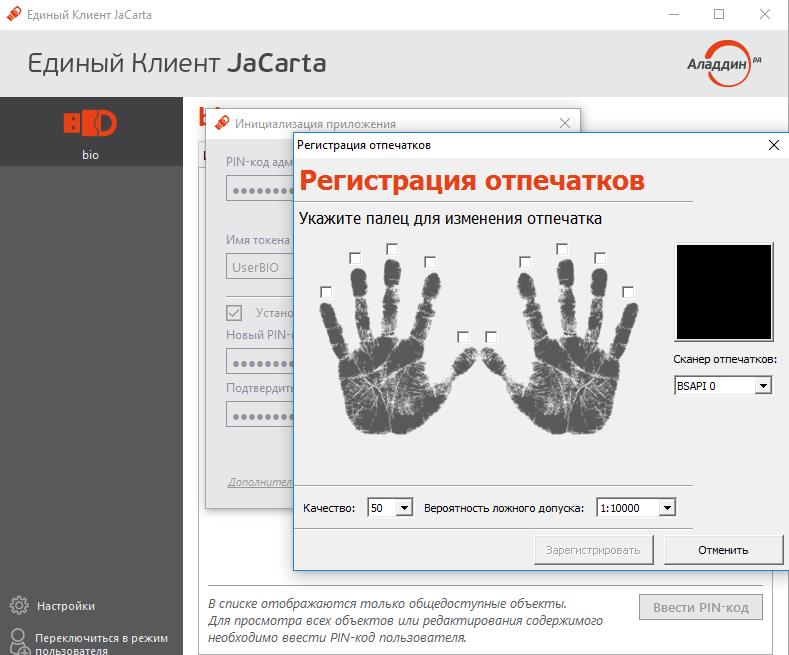
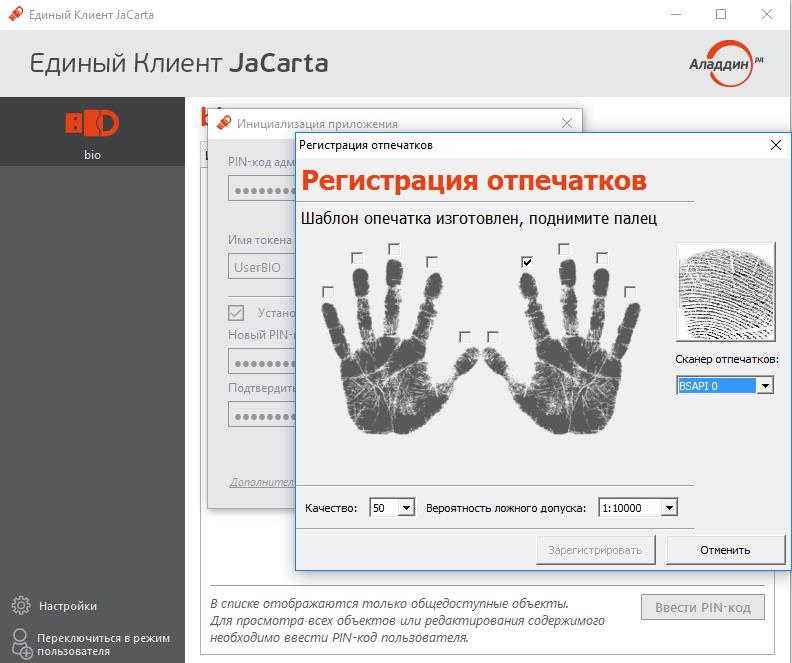
It is possible to use biometric fingerprint authentication. The solution works on the Match On Card technology. The print hash is written to the card during the initial initialization and is subsequently checked against the original. From the map does not go anywhere, in some databases are not stored. To unlock such a key, use a fingerprint or a combination of PIN + fingerprint, PIN or fingerprint.
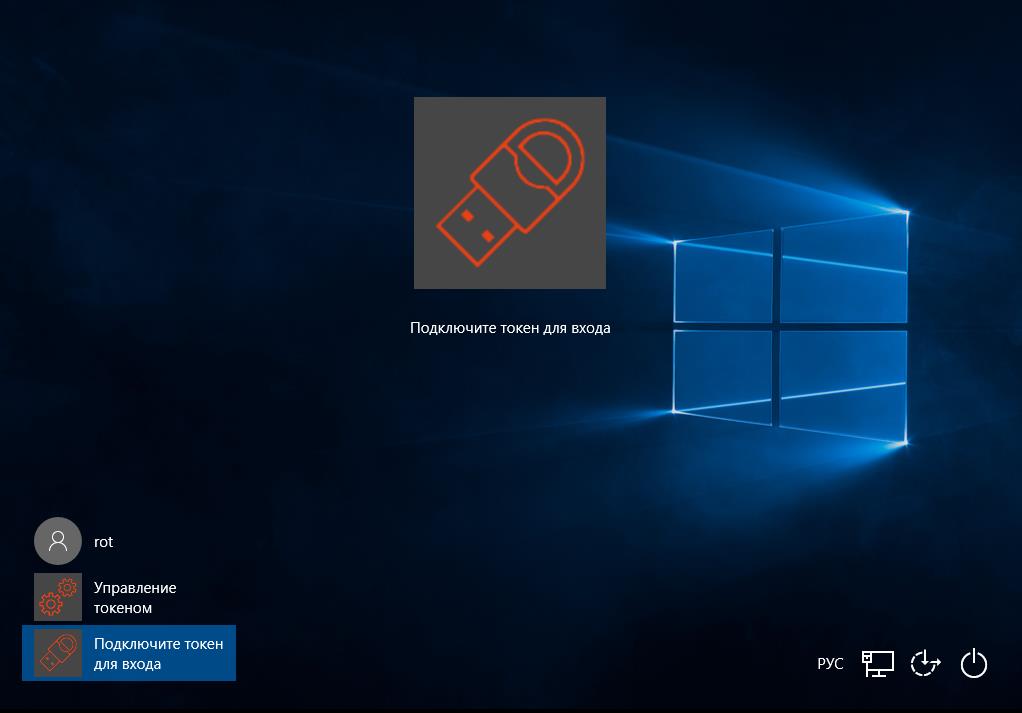
To start using, you just need to initialize the card with the necessary parameters, record the user's fingerprint.
In the future, the same window will pop up before entering the OS.
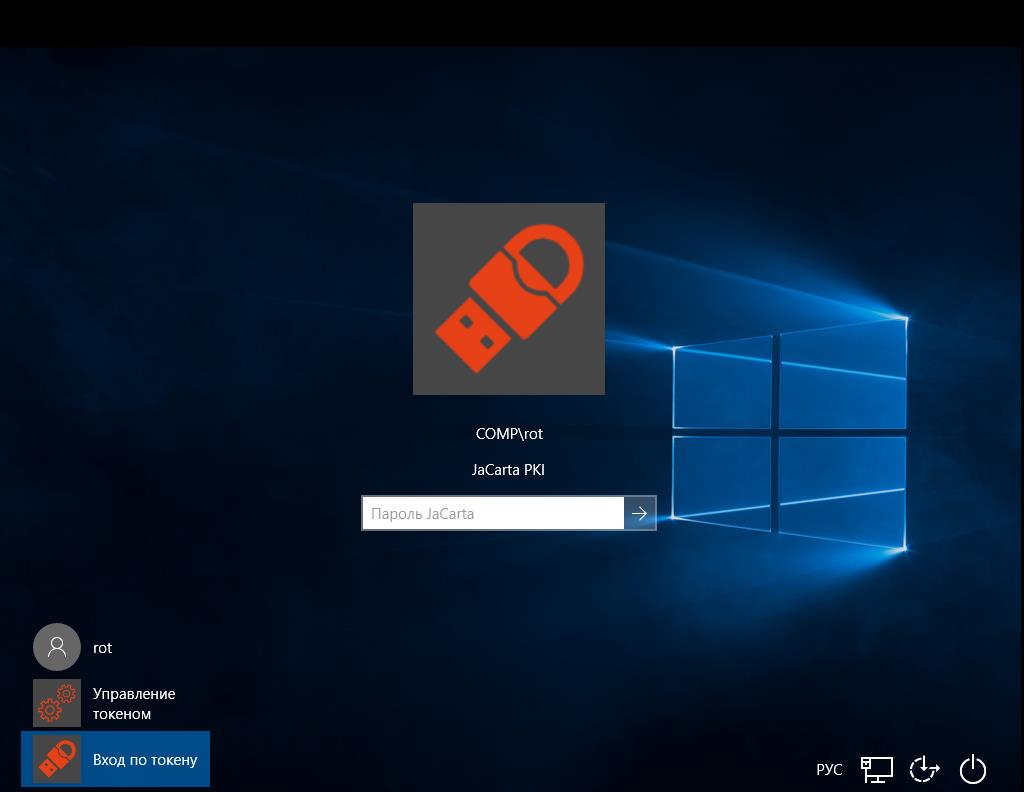
In this example, the card is initialized with the ability to authenticate by fingerprint or PIN code, and the authentication window informs it.
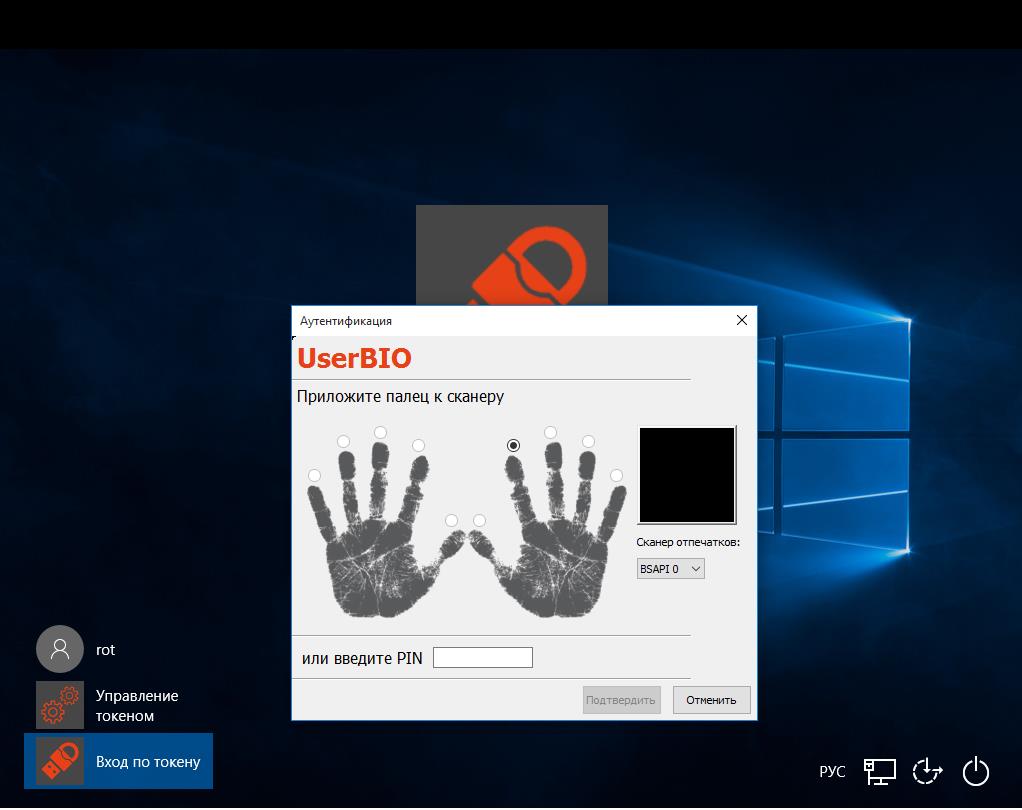
After presenting a fingerprint or PIN, the user will be taken to the OS.
Data encryption
Setting up EFS is also not very difficult, it comes down to setting up a certificate and releasing it to an electronic key and setting up encryption directories. As a rule, it is not required to encrypt the entire disk. Really important files, access to which to third parties is not desirable, are usually located in separate directories, and not scattered anywhere on the disk.
To issue the encryption certificate and private key, open the user account, select - File encryption certificate management. In the opened wizard, create a self-signed certificate on the smart card. As we continue to use the smart card with a BIO applet, we need to present a fingerprint or PIN to write the encryption certificate.

In the next step, specify the directories that will be associated with the new certificate, if necessary, you can specify all the logical drives.

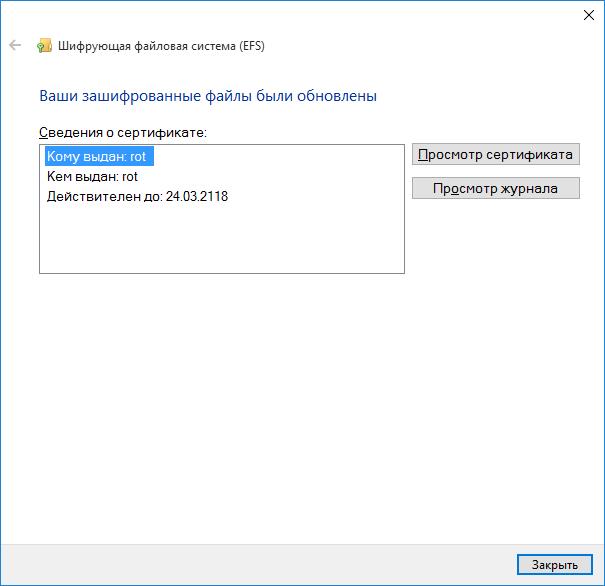
Next, the system will once again ask for a PIN or show an imprint, the certificate will be issued directly to the smart card.
Next you need to set up specific directories. In our example, this is the Documents folder in the user's hamster. Open the folder properties and select - Encrypt content to protect data.

Next, specify to apply the settings only to the current folder or include all subdirectories.

The encrypted directory itself and the files in it will be highlighted in a different color.

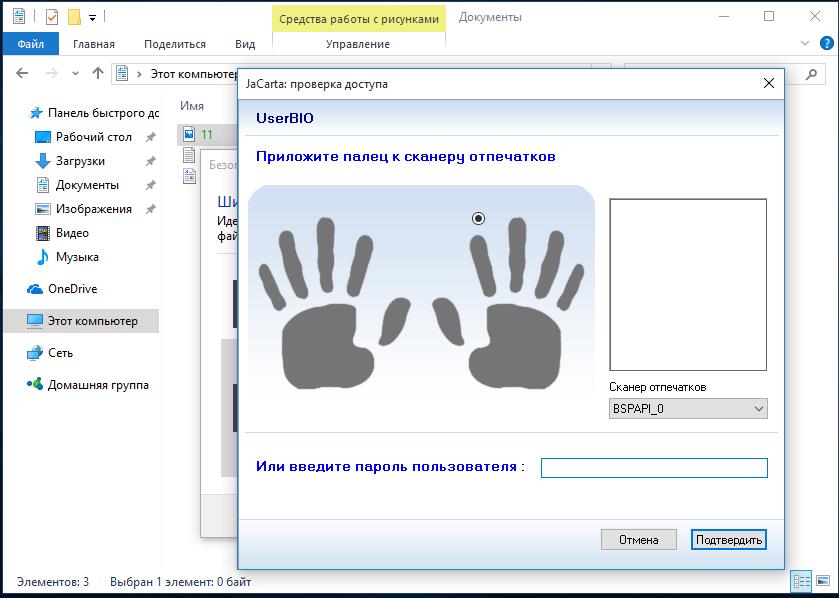
Access to files is carried out only with the presence of an electronic key, upon presentation of a fingerprint or PIN, depending on what is selected.
This completes the setup.
You can use both scenarios (authentication and encryption), you can stop at one thing.