Despite the low price, Anet A8, even without modifications, allows you to print models of good quality.
Example 3d printing without modifications on Anet A8 (model from the network) But, there are no limits to perfection, the owners add belt tensioners, change linear bearings and
increase the rigidity of the frame , fixing it on a sheet of chipboard / plywood and installing spacers.
In this article I will describe the nuances that I encountered in the process of moving from acrylic to steel frame.
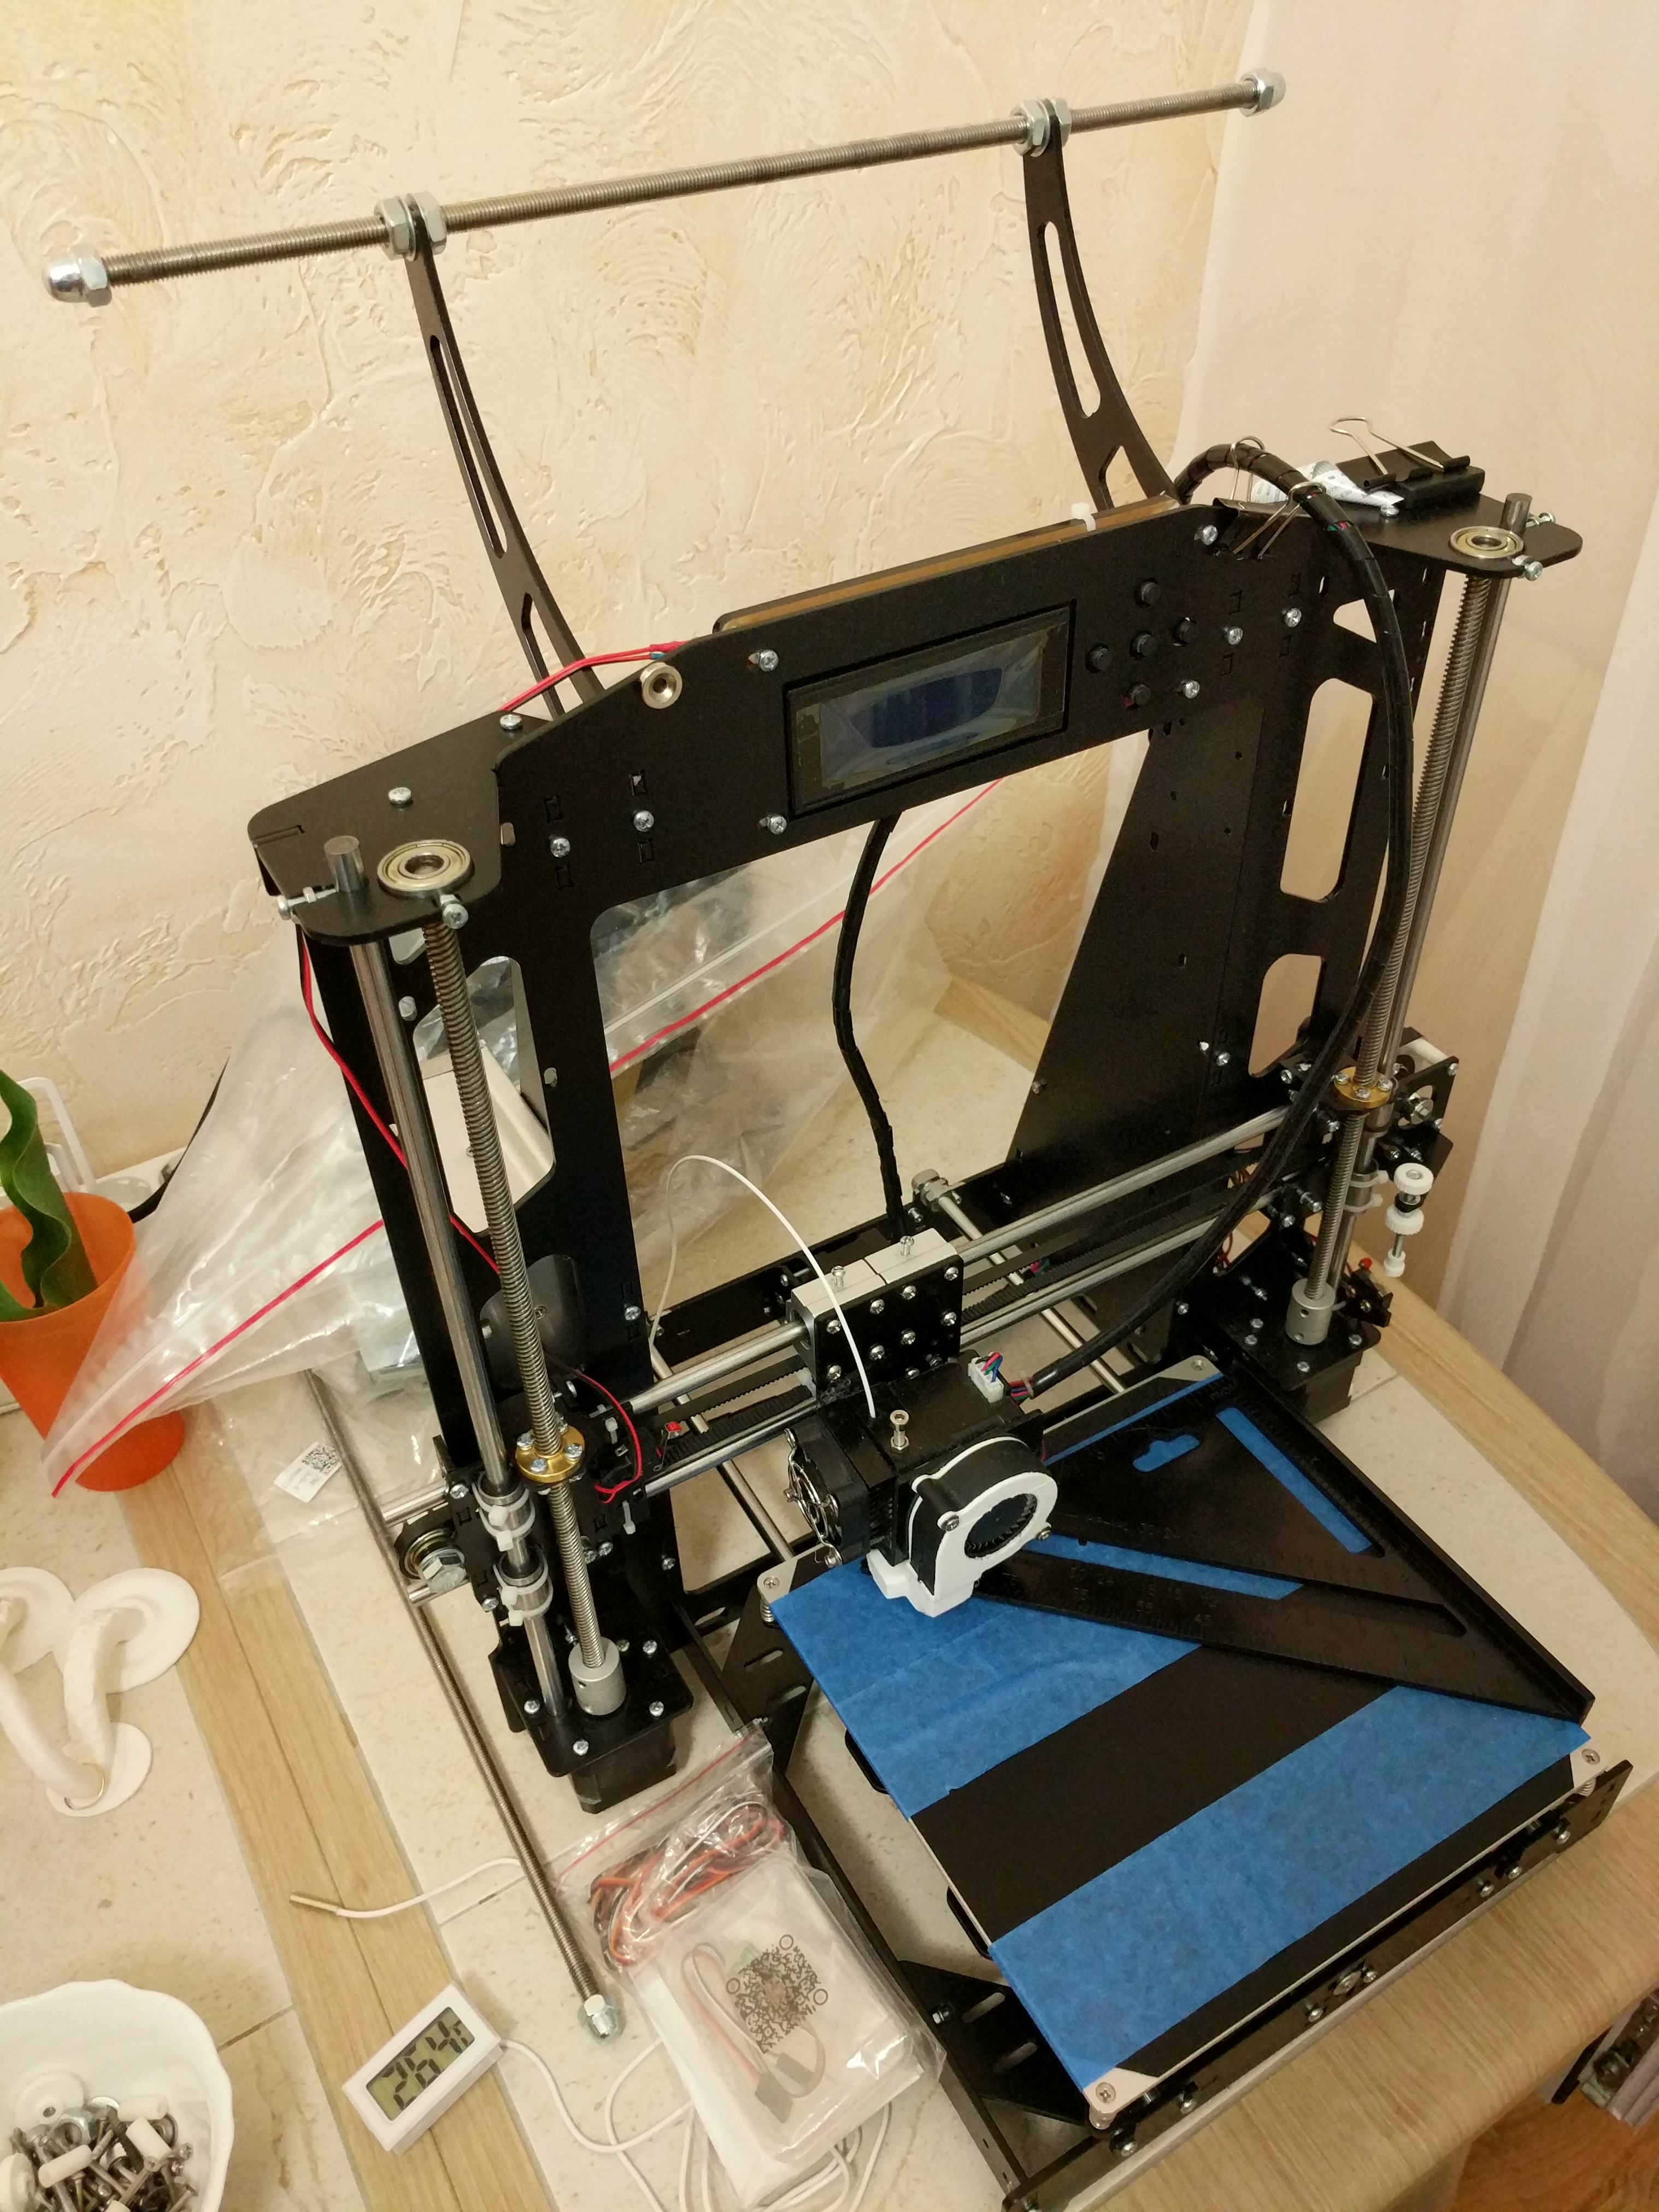
A little backgroundOn the advice of experts from the network, I collected my Anet A8 using the thread lock, blue, from the nearest car shop. Unfortunately, the composition of the retainer entered into a reaction with acrylic and led to the occurrence of cracks. Since I fixed the printer on a laminated chipboard, it did not cause serious consequences. Nevertheless, perfectionism did not give me peace, and at some point I could not resist and ordered a steel case / chassis / frame.

Equipment
Included came a sliced, painted sheet of steel, remotely resembling the original acrylic and a set of screws, nuts, and washers.
The manufacturer of the case considers that for modernization we need to purchase:
* Polished shaft with a length of L = 396 mm x 2pcs (I got out without it, details below)
* Linear bearing lm8uu x 4pcs
* Toothed belt GT2 - 1 meter x 1pc
* Bearing 608zz x 2pcs (for example from a spiner)
I would add
* nylon ties
* nuts "with grover" self-locking, 3mm hole
* plastic insert mounting motor Y-axis
Assembly
Sufficiently detailed instructions are on the site of the manufacturer of the case. I will describe the difficulties that I personally encountered.
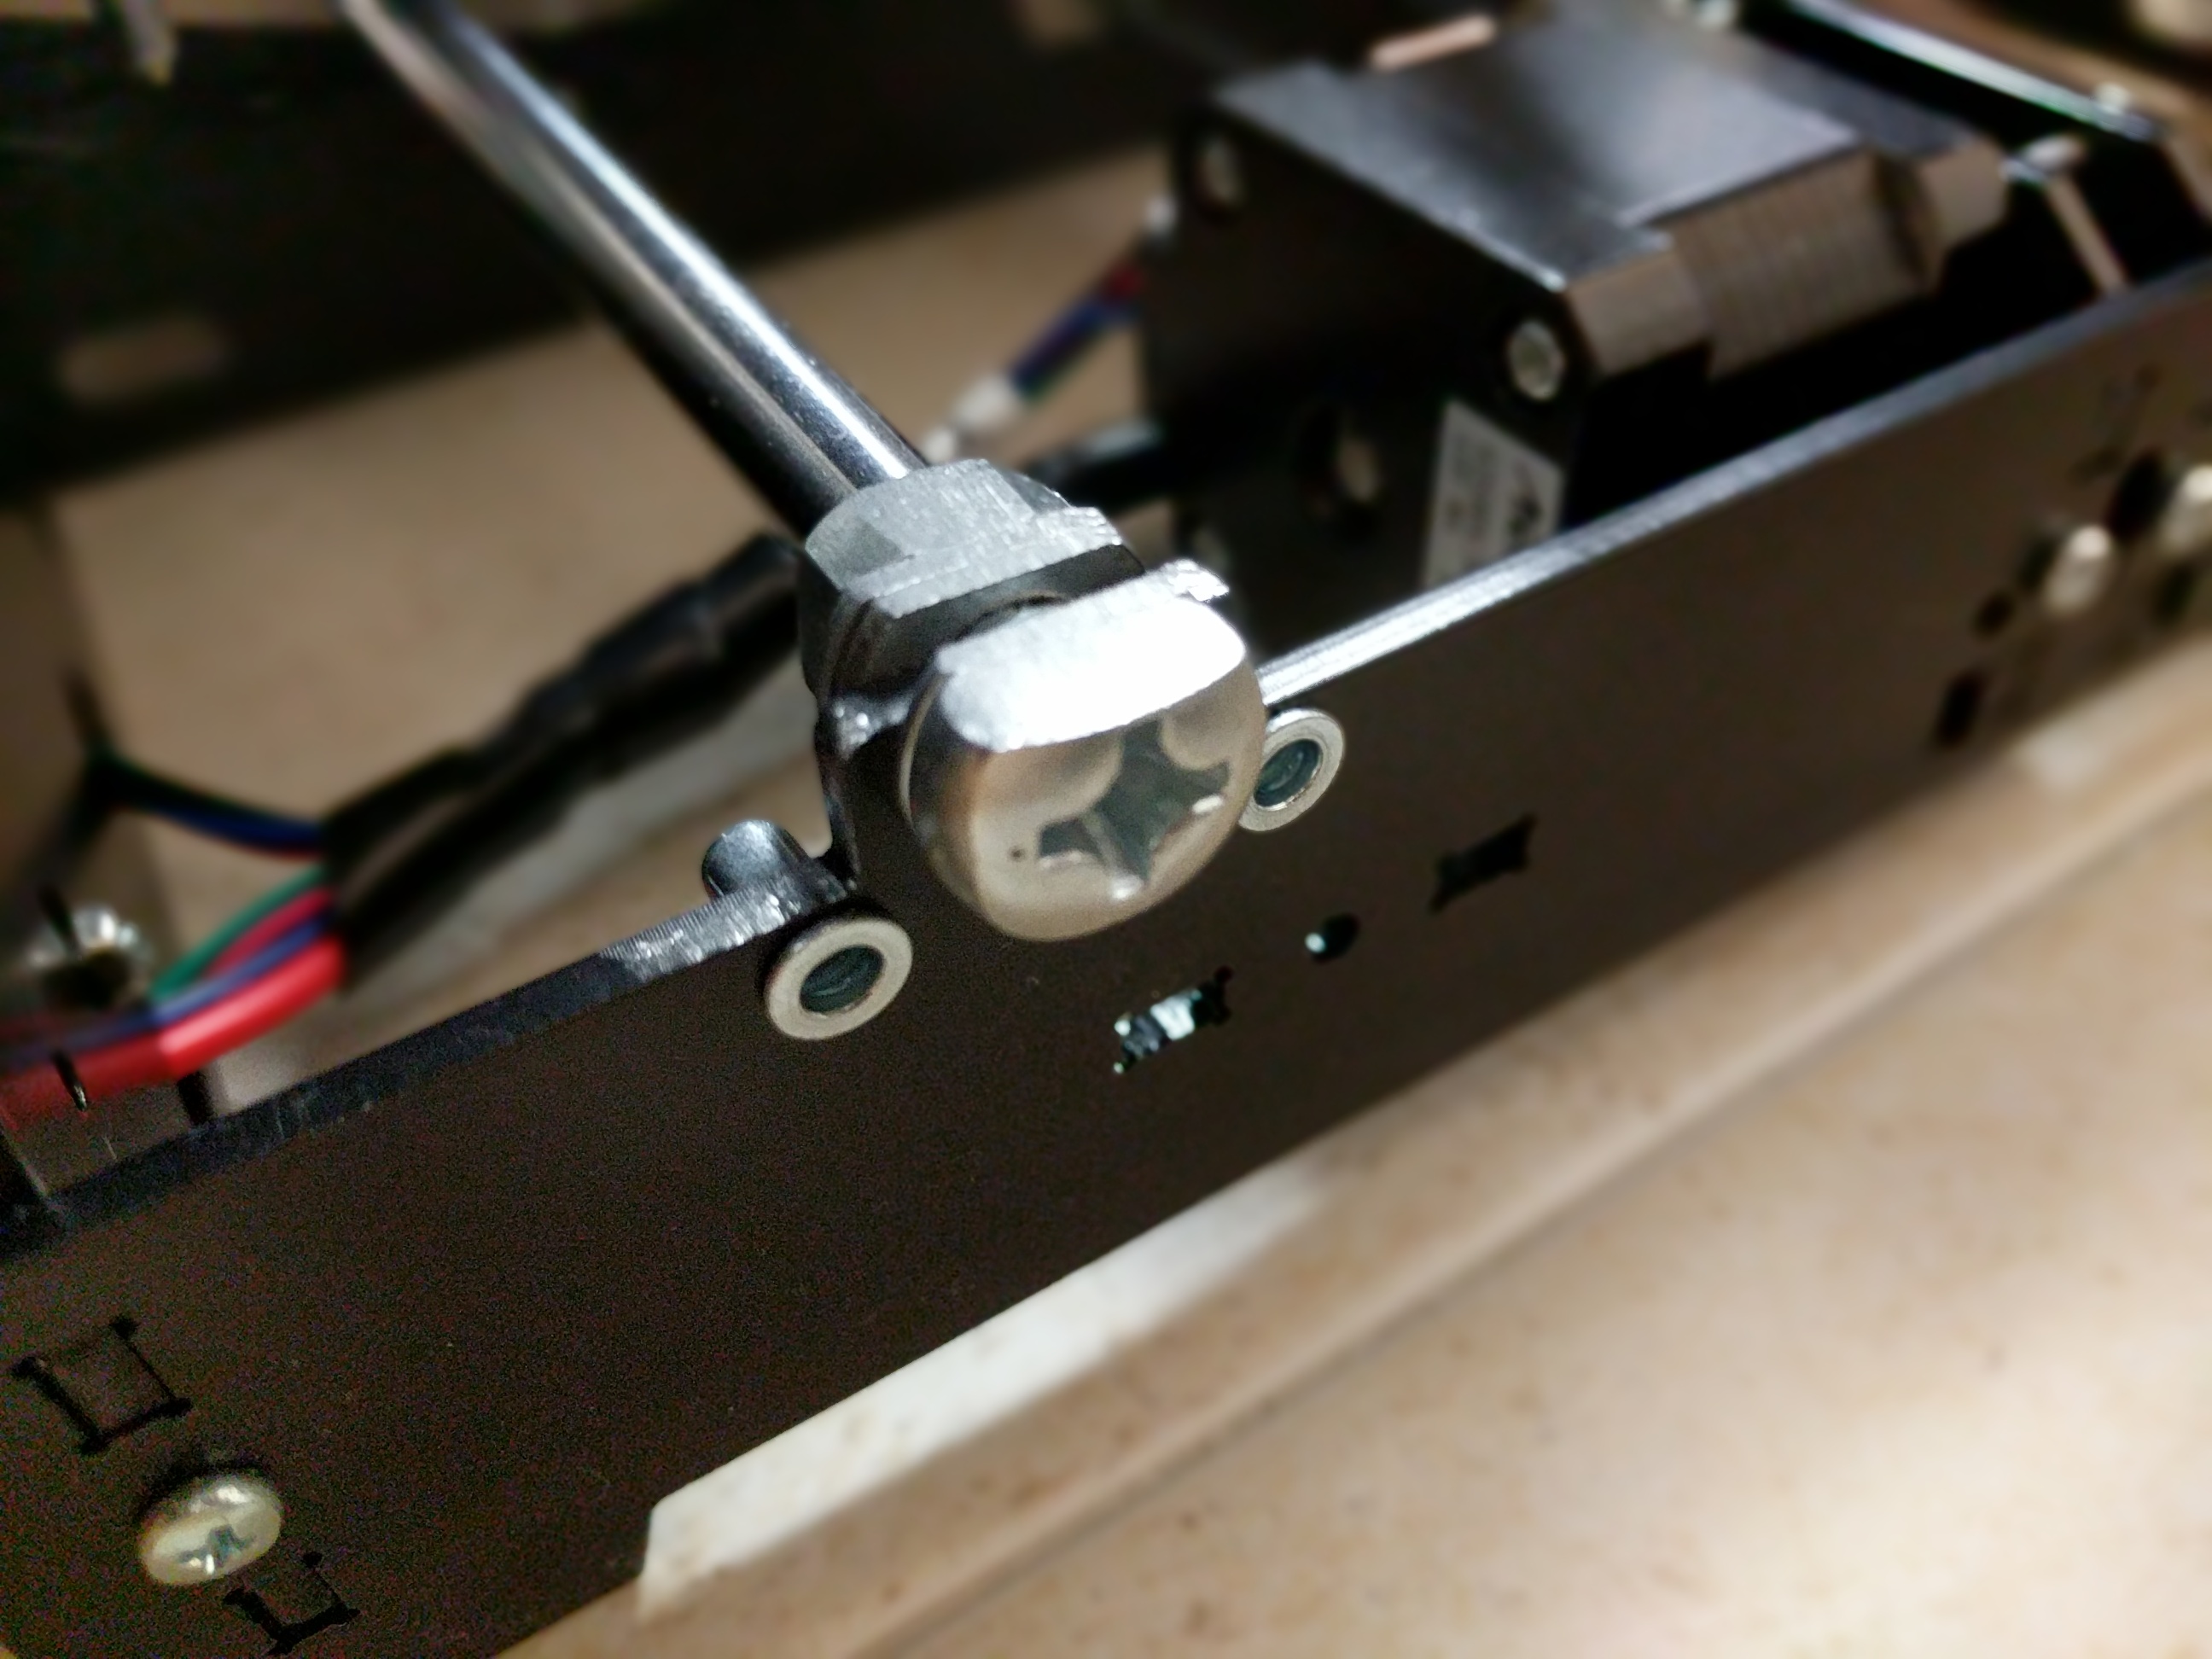
The holes for the nuts in the steel frame are larger than those in the acrylic, and self-locking nuts fit into them without problems. So the thread lock was not used. But nuts with Grover have an external size smaller than the original ones and for tightening I had to hold them
with a key with a cobra . I was very lucky that I had linear and conventional bearings, and also a belt. But the polished shaft for the Y axis (printer table) from the original kit was shorter by one centimeter. He built up the shaft with the help of M8 bolts, nuts and washers (the old shaft rests on the nut), and the protruding part that prevents the table from moving with a file.
The kit did not have a plastic motor mounting insert. Ideally, it should be printed in advance. I used a brass rack insert instead.

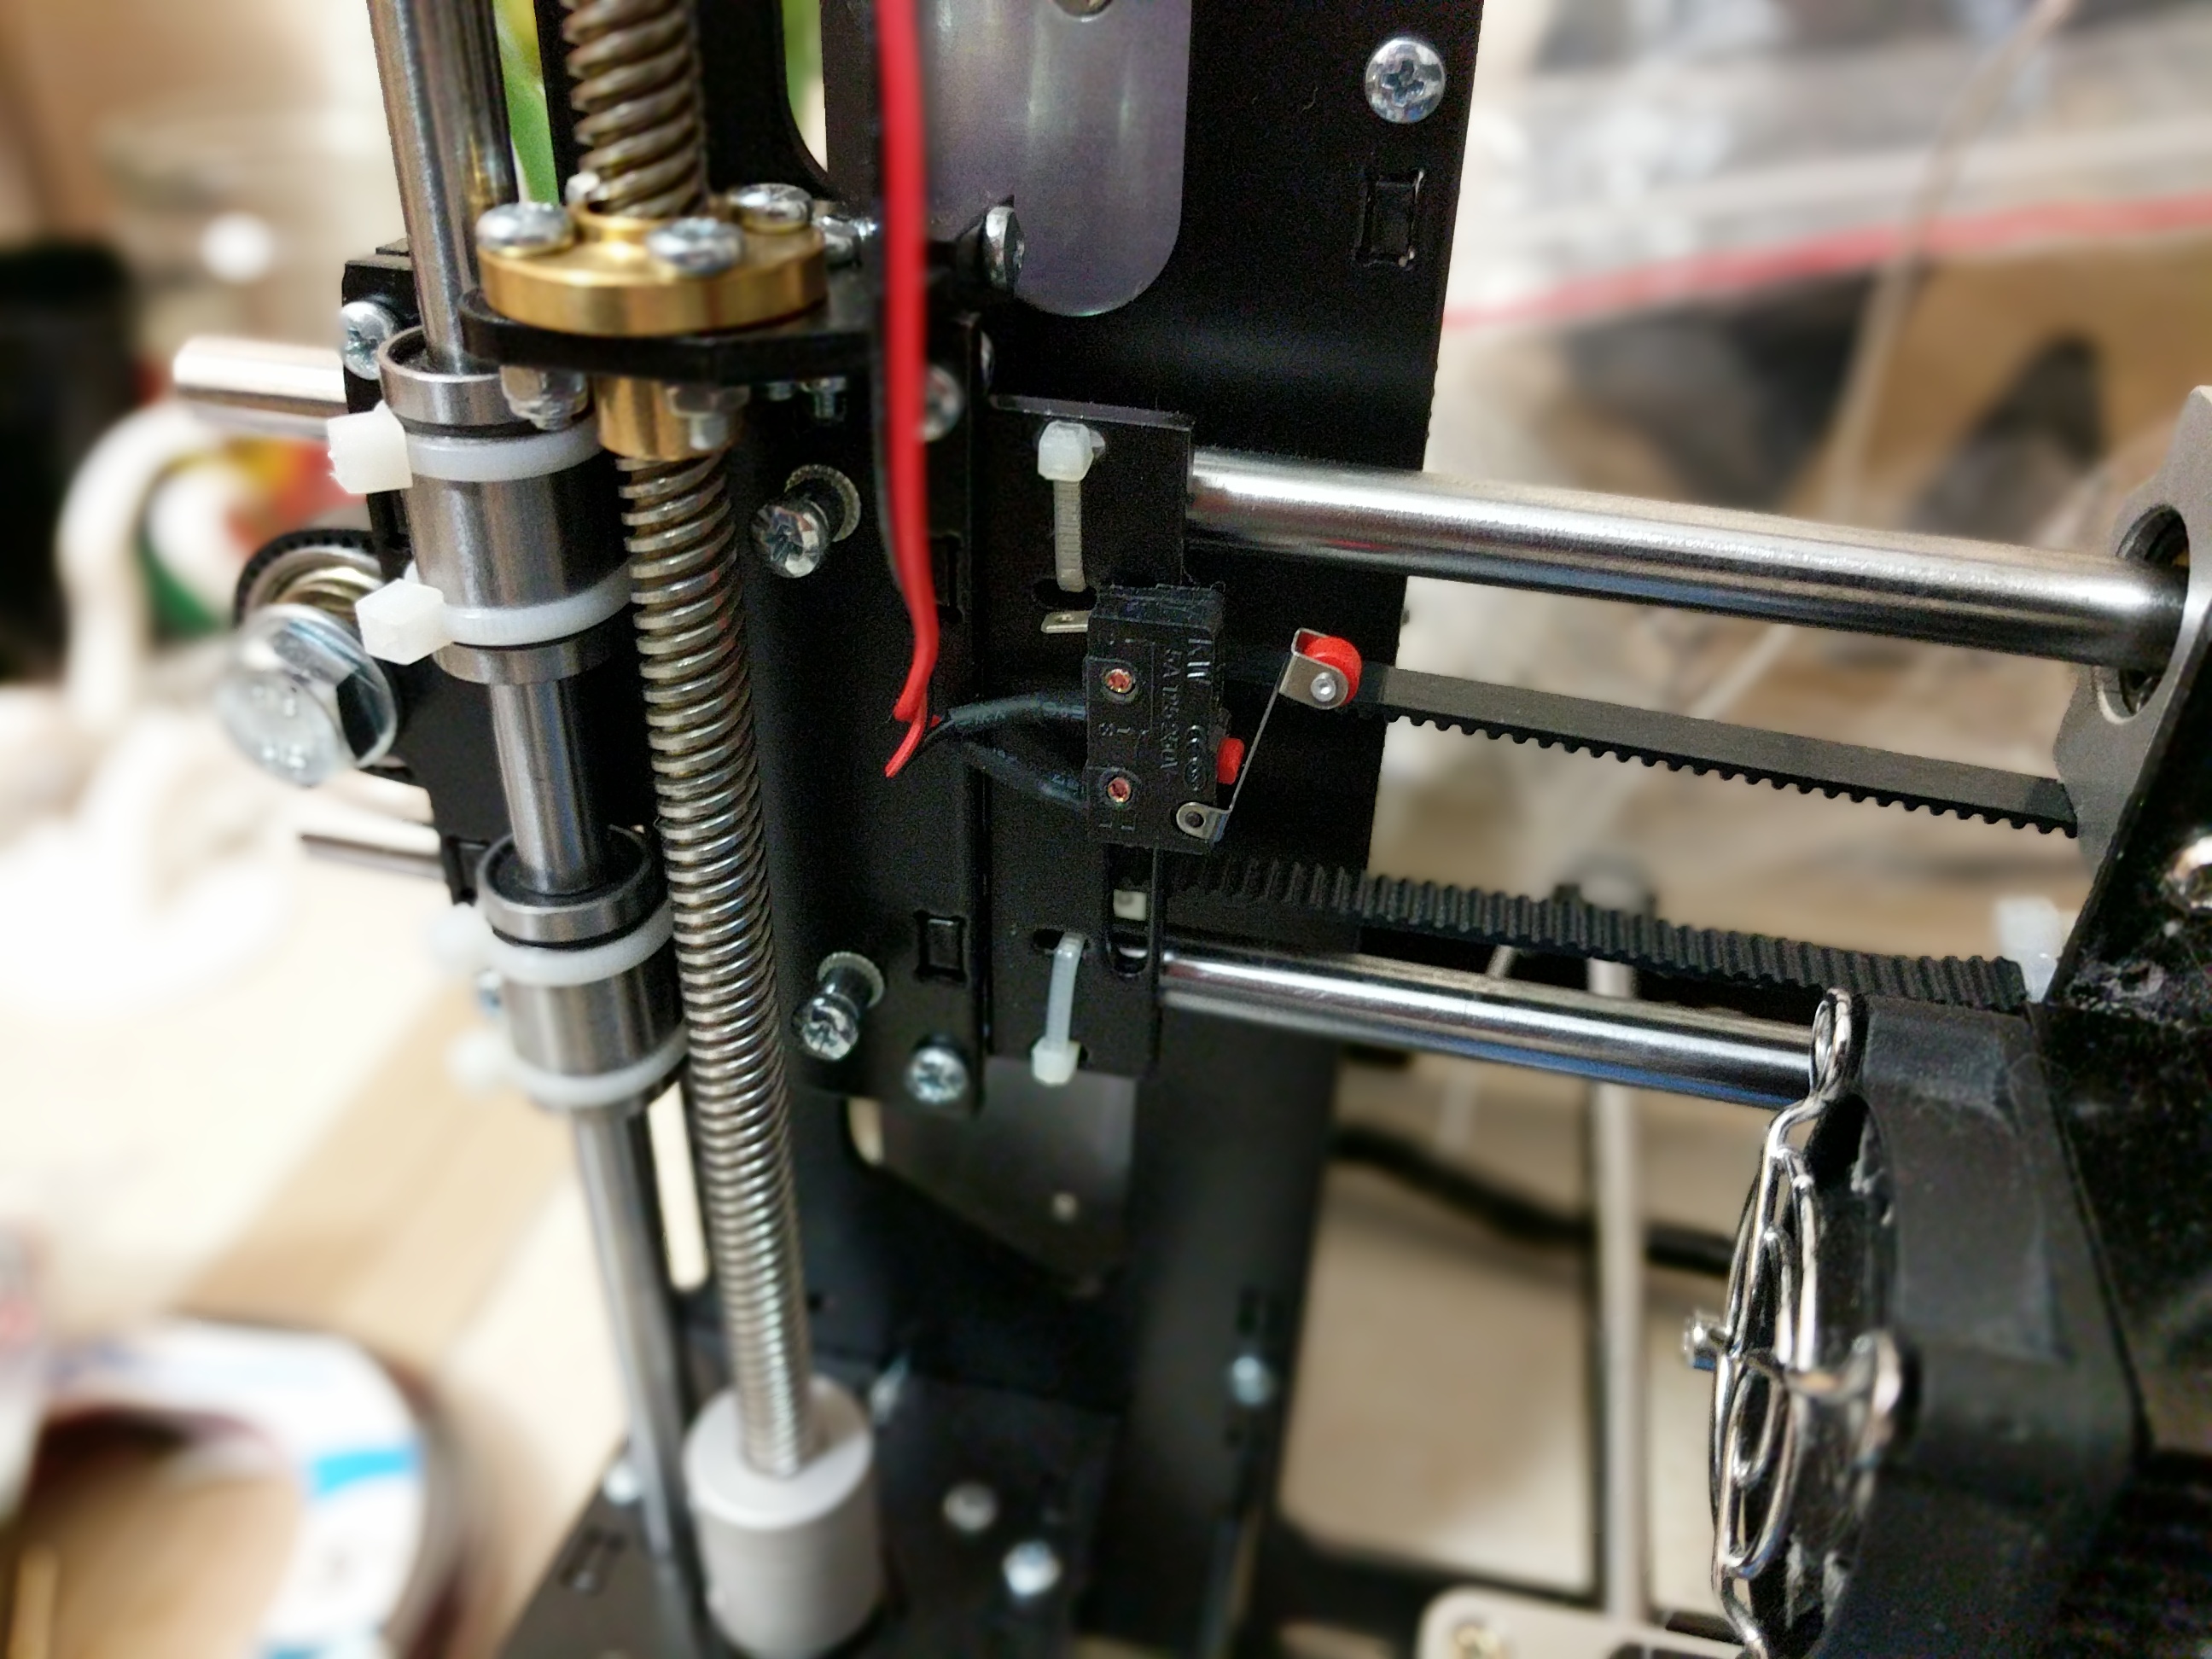
I also had to tinker with the limit switches, according to the instructions it is assumed that they are combined with a small board and the Y-axis limit switch should be placed on racks. In my case, the limit switches went without circuit boards; for the Y-axis, g had to be tricky. I cut off the old limit switch holder and fixed it on the M4 screw.

Also, the X-axis limit switch in the assembly instructions for the steel case is on the right, although it is on the left in the acrylic. Without changing the firmware, homing will not work. I built up the trailer wire and located it on the left.
Another couple of pictures of printer elements General impressions
The main goal is achieved, the frame is very durable. Stiffness is more than enough. Convenient "shelf" for plastic coils. The X axis is well balanced, the drive motor is shifted to the other side as opposed to the extruder. Linear bearings are offset as close as possible to the vertical guides. The maximum print height is increased by lowering the table (linear bearings can be fixed directly to the table without using bearing holders). The backlash of the extruder carriage is practically “gone.”
But not without a fly in the ointment.
For me, the number one problem is the need to purchase additional shafts and bearings (see the complete set section). Of the less significant, the X-axis belt slides from the tensioner to the right, I had to fence a washer structure to combat this effect.

No x belt tensioner.
If you do not have Anet A8, then instead of a bunch of Anet A8 + steel case, it is better to look at other models immediately in a metal case.
I consider the purchase of a steel chassis reasonable for those owners of Anet A8 who are not satisfied with:
* rigidity of the structure (including after modification)
* appearance / aesthetic component
* does not scare the price