The Wilson Camera (also known as the fog camera) is one of the first devices in the history for recording tracks (tracks) of charged particles. The principle of the camera uses the phenomenon of condensation of supersaturated steam: when any condensation centers appear in the environment of supersaturated steam, small liquid droplets form on them. These drops are of considerable size and can be photographed. The source of the studied particles can be located either inside the chamber or outside of it (in this case, the particles fly through a window that is transparent to them).It is very strange to think that tiny particles moving at the speed of light constantly bombard us. Want to see evidence of their existence? Watch the video. Do not believe the video, or just want to see traces in the fumes with your own eyes - keep reading this instruction.
Step 1: materials
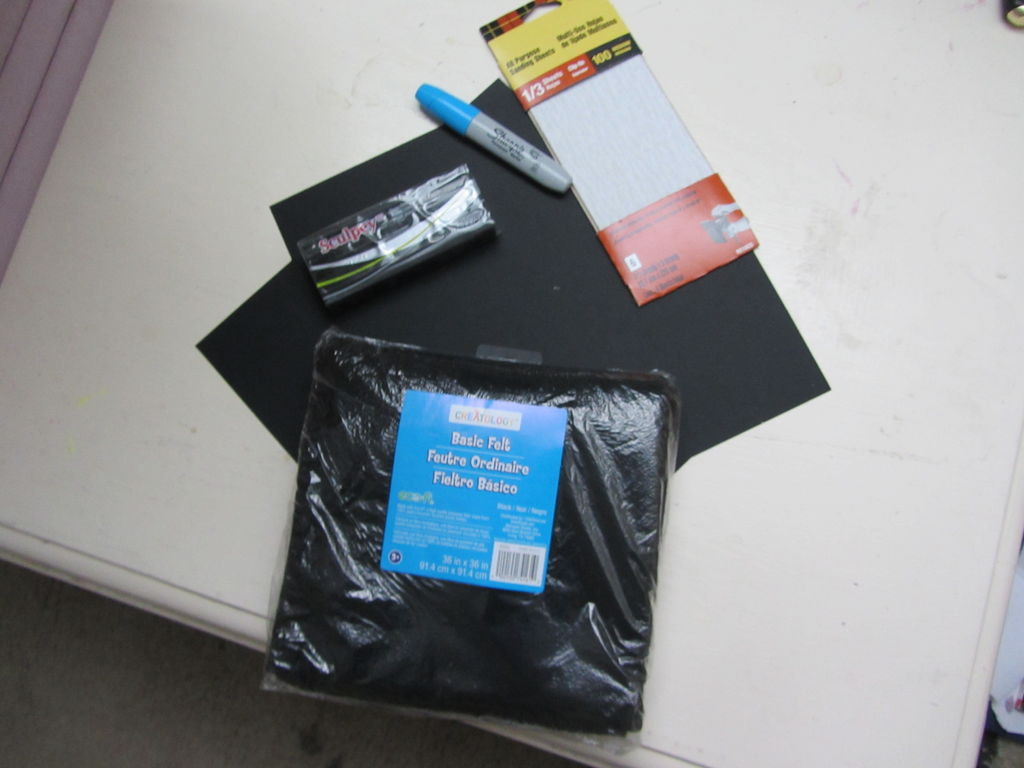
This is what I needed to build my own foggy camera:
- Polyfoam (bought already cut into pieces of the right size);
- Aquarium;
- Metal sheet;
- Black plasticine;
- Black thick paper;
- Black duct tape;
- Glue;
- Skin;
- Flashlight or projector for slides (you need a clear and bright beam of light);
- Dry ice (to cool the base of the chamber);
- Isopropyl alcohol concentration of 91% or more (70% will not work!);
- Water.
Instruments:
- Knife;
- Spatula (helped myself in cutting foam);
- Ruler;
- Marker;
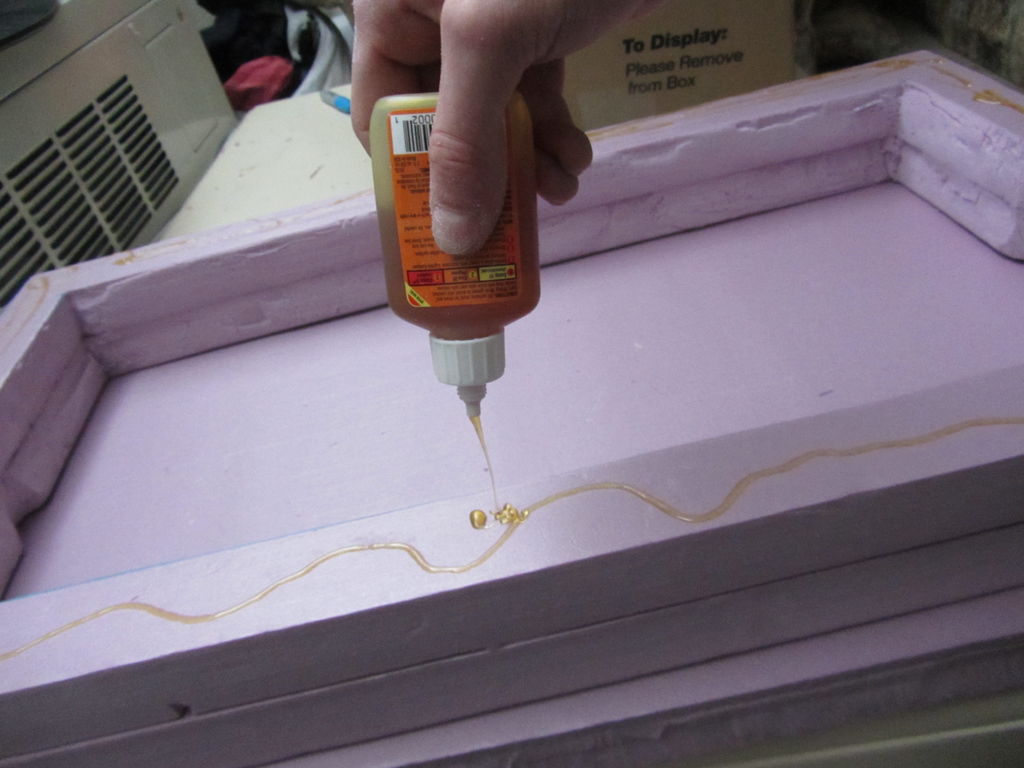
- Thermoplastic glue;
- Magnets.
Step 2: construct an insulated dry ice box

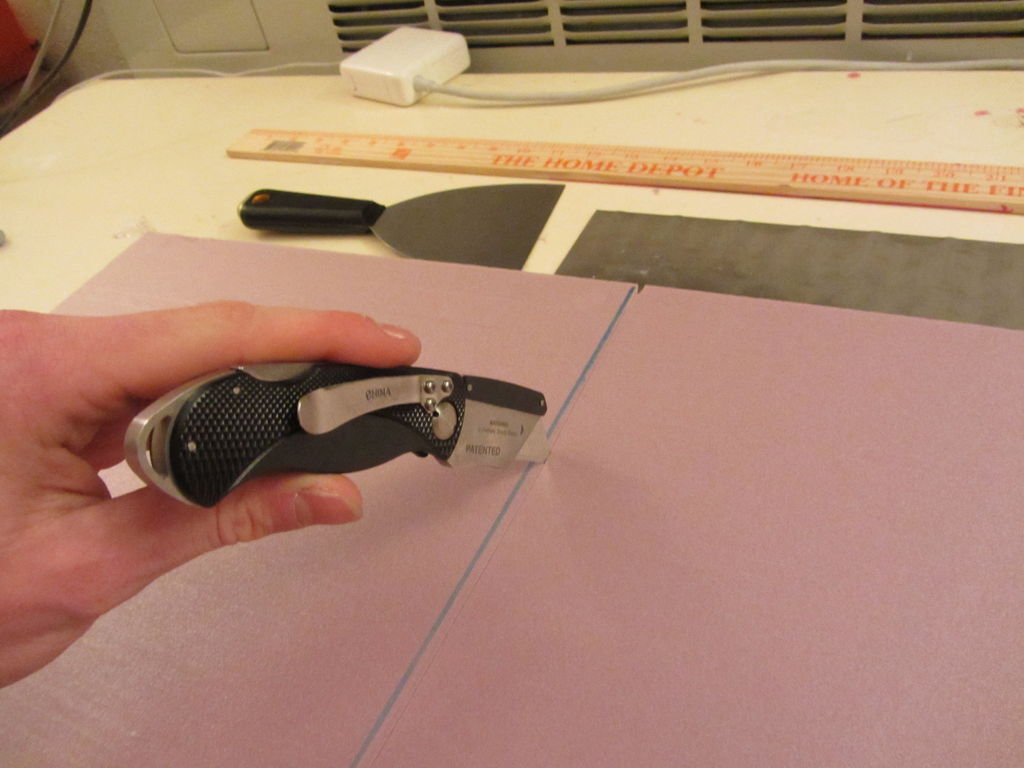


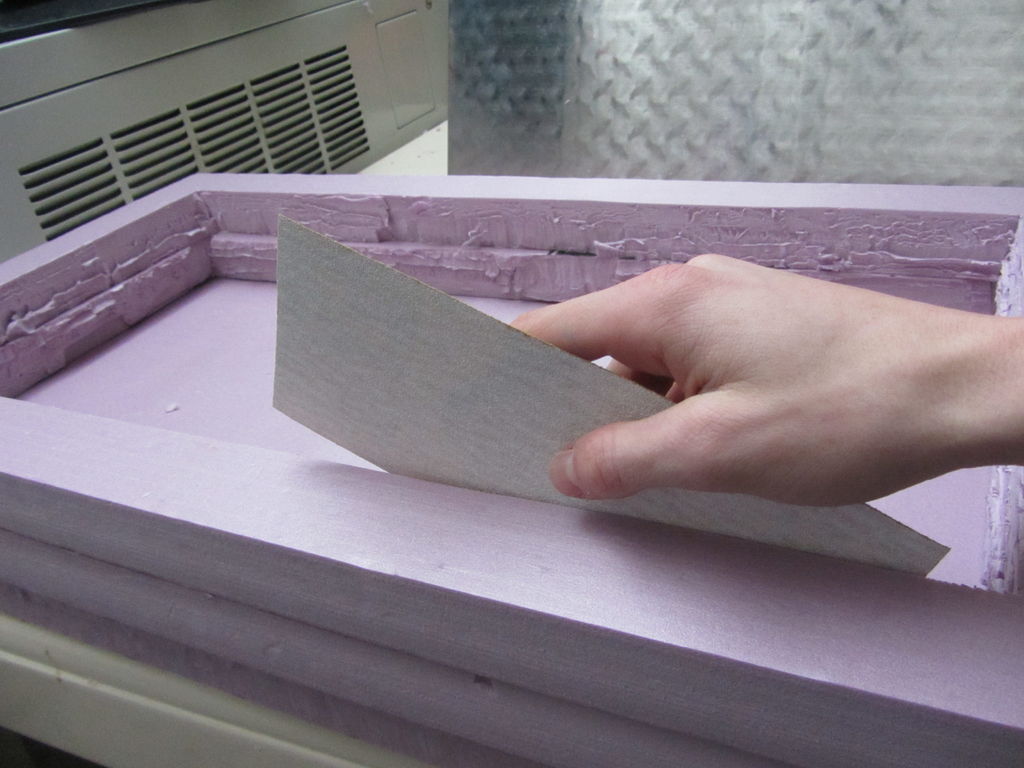

In short, it is necessary to make a heat insulating box, which we fill with dry ice. It should be large enough to hold a metal plate tightly in it. I used the plate as a stencil for cutting the foam box. Then I sand the foam and glued it all together. When cutting the foam, I first used a knife for cutting out the incision, and then the remaining thickness I went with a spatula. I am sure that there is a better way to cut foam plastic, but since I still sanding it then, the result of cutting didn’t really bother me.
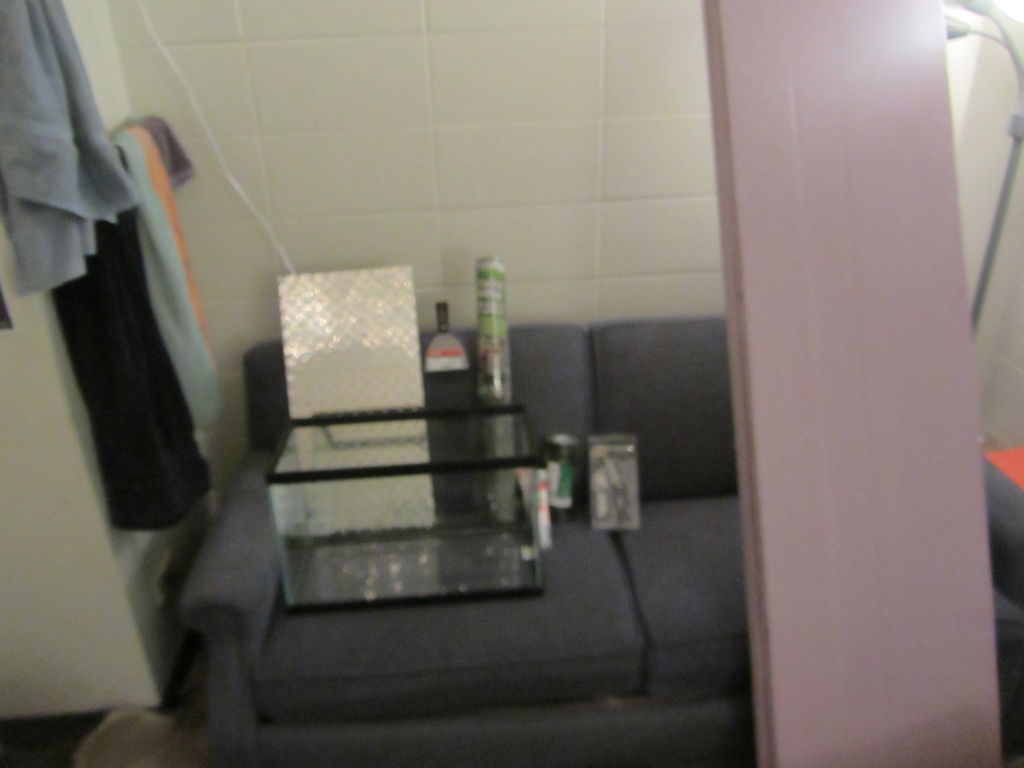
Step 3: Preparing the Metal Base
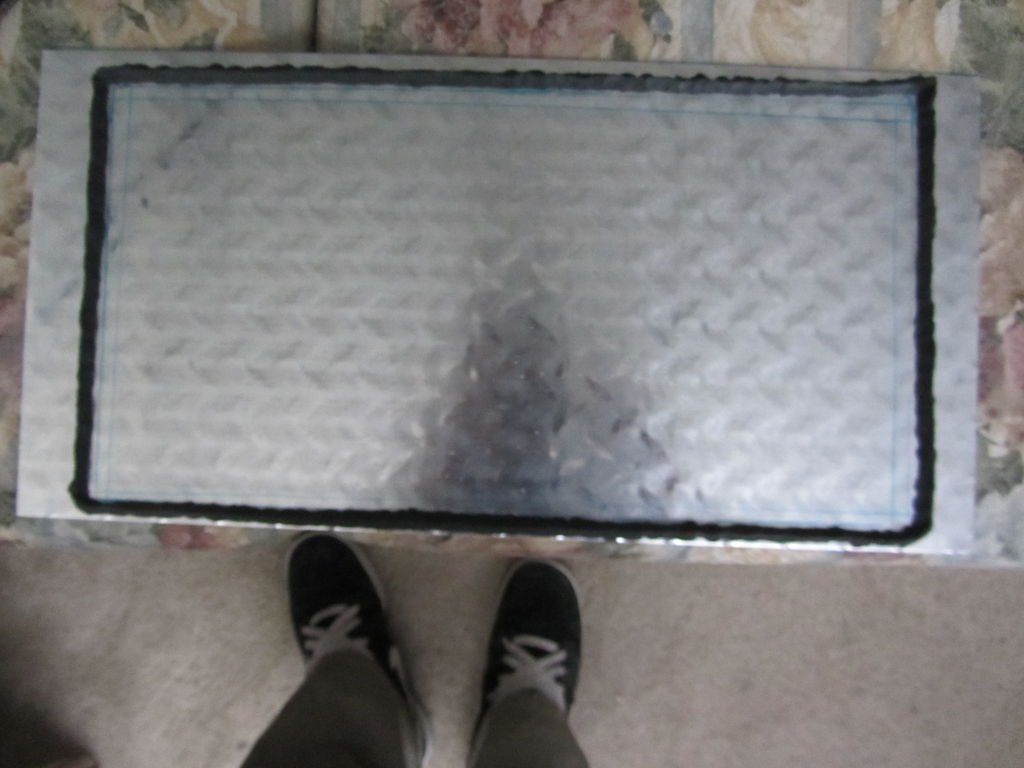

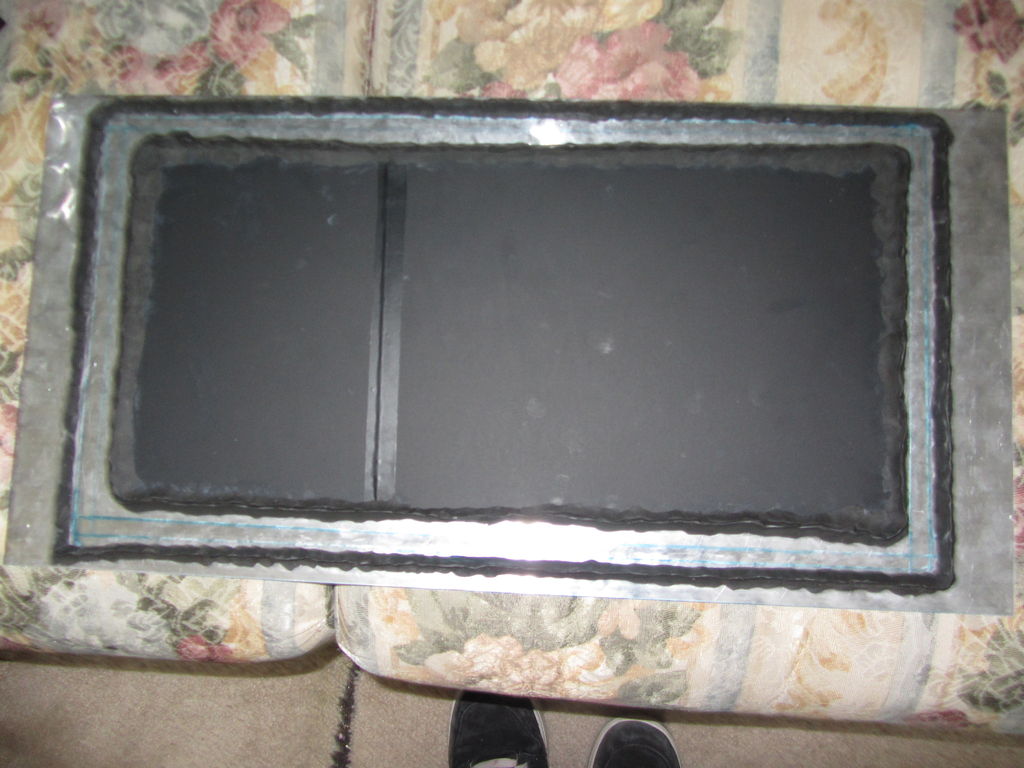
A metal plate is placed on top of dry ice for heat transfer between it and the camera. The most important thing - the plate with the aquarium must be connected tightly. This allows you to maintain a high concentration of alcohol in the chamber and get supersaturated steam. For this, I decided to fill the groove on the edge of the aquarium with water or excess alcohol. And to make a groove, I used clay and made two tracks on a metal plate from it. Then, so that the white tracks in pairs contrasted with the lower part of the camera, I pasted black paper on the plate. Thanks to her, footprints in pairs could be seen much better.
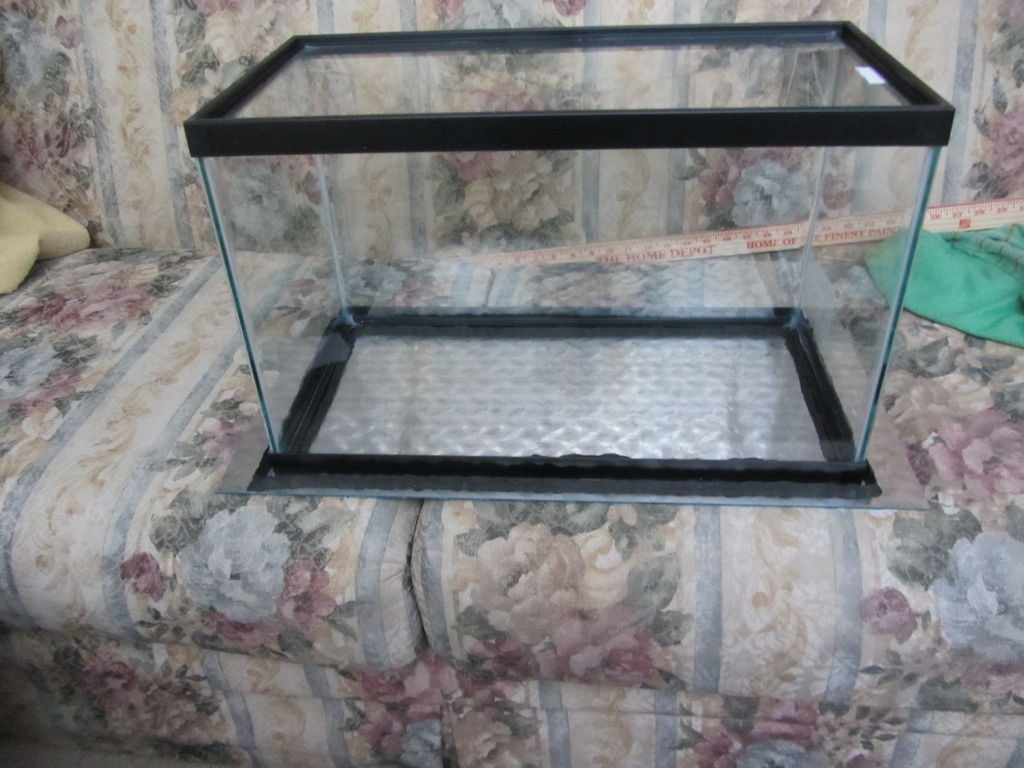
Step 4: prepare the aquarium
I glued a piece of felt to the bottom of the aquarium (which ended up at the top). At first I did this with the help of hot melt, however, as you can see in the photo, after absorbing alcohol, it sagged. To fix this, I used a set of magnets, which much better pressed the felt to the bottom of the aquarium. Felt is used to absorb alcohol and can be replaced with any other sponge or absorbent cloth.
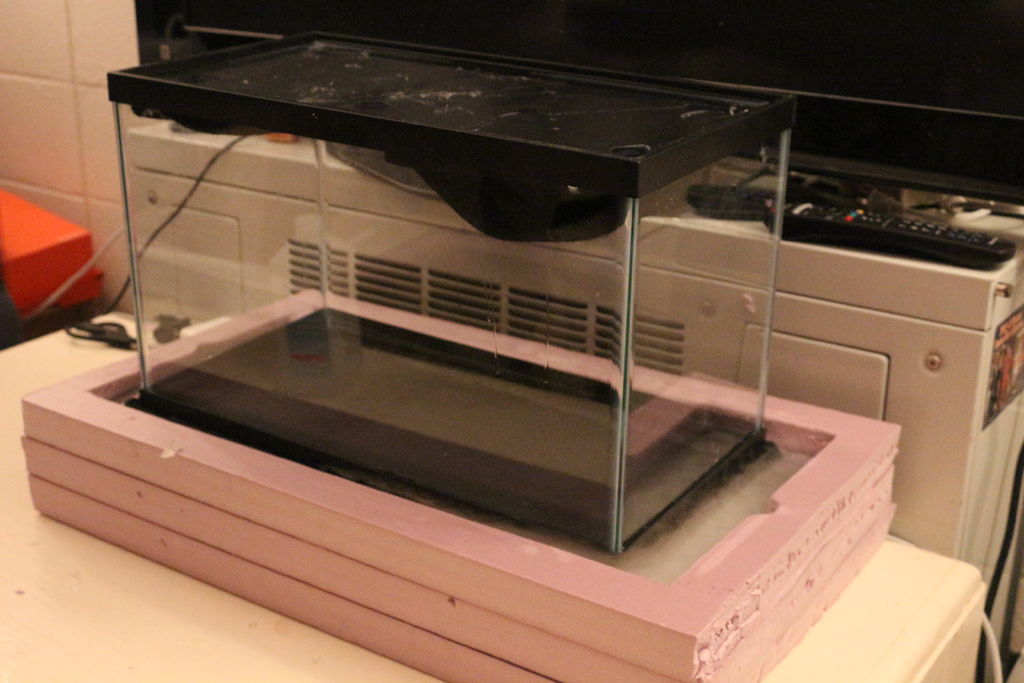
Step 5: Putting it all together!

And now the dry ice box, the metal base and the aquarium are ready to go!
First you need to fill the foam box with dry ice, and then place a metal base on it. It will probably creak terribly during rapid cooling, but this should soon cease.
Then pour alcohol onto the felt until it is wet, and place the aquarium upside down on a metal base. Pour water or alcohol into the plasticine channel to ensure the tightness of the chamber.
Now turn off the light in the room and highlight the camera light source. I closed all sides of the aquarium, except for one, thick black paper, so that the cosmic rays were easier to shoot. Almost immediately, you should see the alcohol condensate begin to fall down, and after about 10 minutes it will form oversaturated steam. After that, closer to the bottom of the camera you should see the traces left by the particles in pairs.
This is what happens: when a
cosmic ray passes through the chamber, it ionizes air molecules, and the alcohol vapor is so saturated that it condenses on these traces of ionized molecules. This is how the camera allows us to “see” particles moving at almost the speed of light.