I bought a smart lamp koogeek LB1 c Wi-Fi, designed to control through Apple HomeKit. The lamp looks about the same as a normal LED lamp
(close to scale incandescent):
The stated characteristics:
Cap: E27 (ordinary lamp)
Power: 8 W
Light stream: 500 lumen
Color temperature: 2700-6000 K
Color Depth: 16000000
Angle of Dispersion: 199.9 °
Resource: 25,000 hours
Wi-Fi: 802.11 b / g / n, 2.4 GHzI use an iPad Air tablet with iOS 11.3 to control. I screw the lamp into the chandelier, turn it on - the lamp turns on. As usual, without reading the manual, I start to connect the lamp.
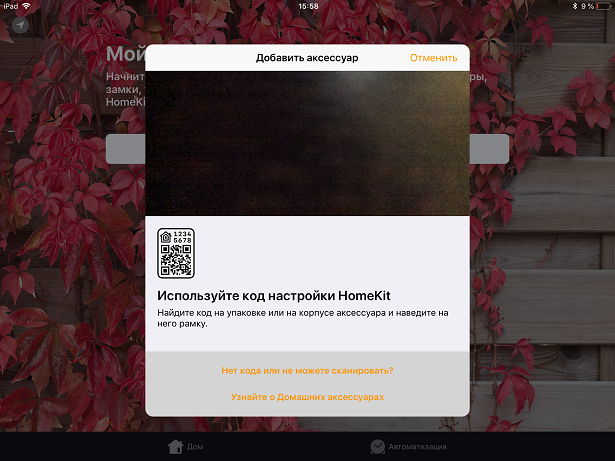
Launch the application "Home".

I click "Add accessory" (or a plus sign in the corner of the screen, if the system already has devices). A window appears where you can scan the code with the camera or enter it manually, the code is on the sticker on the lamp and on the sticker in the instructions.
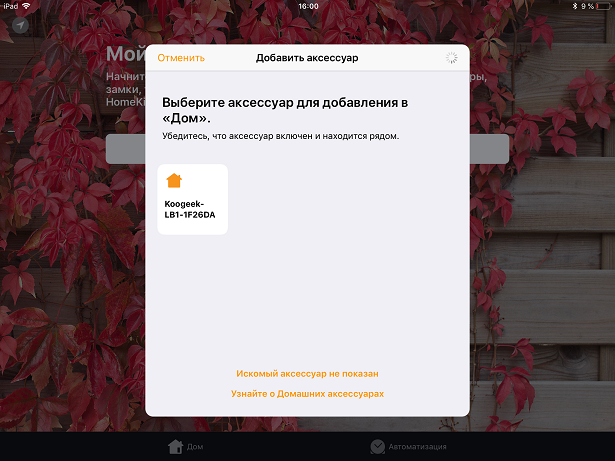
I click on the lamp icon.
And I get an error message.
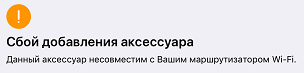
It was at this stage that it turned out that it was necessary to read the manuals. It also says English and white that the iPad must be connected to a 2.4 GHz Wi-Fi network, and I have a dual-band access point and the iPad is connected to a 5 GHz network. And, if you think a little, everything is logical - the lamp did not ask for the network name and password for Wi-Fi. How could she know that? Obviously, this data should be transmitted to her by Ipad. But it is also connected to the 5 GHz network and, of course, transmits the settings for its network. A lamp in this network does not work. Everything is clear - we switch Aypad to the 2.4 GHz network and repeat the procedure. Earned! Of course, after completing all the settings, I again returned Aypad to the 5 GHz network, the entire 2.4 GHz band is tightly packed with neighbors, except that there is enough control for the light bulb.
Now everything is fine. I am changing the name to “Lamp” (it will be possible to control the lamp with this name using Siri).

I click Finish and start checking. I click on the icon or give the command “Hi Siri, turn on the lamp” - everything works.

If you press and hold the lamp icon, the brightness setting window opens.

With optional color settings menu.


For convenience, there are scenarios of the lamp. For each scenario, you can adjust the on / off state, color and brightness. For the “Good Morning” scenario, I adjusted the full brightness of white, for “Good night” - the minimum brightness of blue (sort of like a night light), “yellow” - just yellow with full brightness, “green” - similarly. Now to control the lamp, all you have to do is say “Hi Siri” and “Good night”. Of course, this is all for an example; you can create any scripts with any names. Of course, other HomeKit components can be added to these scenarios.

For scenarios, it is possible to configure automation by timer, by geolocation, etc. I described these settings in the last article about the Elgato smart socket.
Also to control the lamp is an application Koogeek Home. But I did not understand him, at first glance there are the same functions as HomeKit.
In case something goes wrong, or to reassign the lamp to another system, you can completely reset the lamp settings, this is described in the instructions. The lamp was purchased on Aliexpress, the price is ~ 2000 rubles.